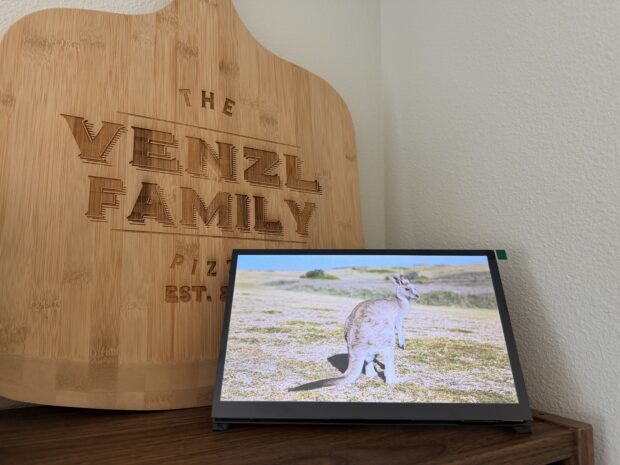
For the longest time, my wife and I wanted to get a picture frame for the living room to display pictures and videos of our trips that we had taken. There are a lot of picture frames available that you can get off of Amazon, some of them decently priced, some of them more expensive, and mixed reviews on their quality and longevity. But almost all of them require an account and mobile app to send pictures to the frame. This is great if you have family abroad and you want to share some pictures with them. However, I’m sort of a bit of a security freak these days and I really don’t like the idea of sending pictures over an app over the internet, especially pictures with my family, even if the company behind the frame assures me that it’s safe and that the pictures will never be stored away or used for anything else. I suppose I just don’t trust such statements anymore these days. And I also really don’t care of having yet another account somewhere just to have my pictures displayed in my living room.
What I want is to have a picture frame that I can easily upload pictures to, but fully local in my own private network at home. I don’t need nor want to send pictures via the phone over 1000s of kilometers away. I would have even been happy with a frame that takes a USB stick and just circles through the pictures and videos on it but these are almost impossible to find these days and what I found was not quite what I was looking for.
So this is the story of how I turned a Raspberry Pi (4B) into a picture and video frame; and it combined two things: it gave me a nice picture and video frame and made my wife happy, and it gave me a fun project to tinker with. It’s not really hard to do so either, here is the documentation of my efforts.
The hardware
For the hardware, you can make this work with a Raspberry Pi 3B+, 4B and 5. Technically speaking, the frame I have chosen allows other hardware options too but because I had Raspberry Pis already, I chose that route.
Bill of Materials
- Raspberry Pi Screen, 10.1 Inch Touchscreen Monitor, IPS 1024×600, Dual Built-in Speakers
- Raspberry Pi 4B
- SD card
- USB-C power cable for the Pi
- USB stick
The frame
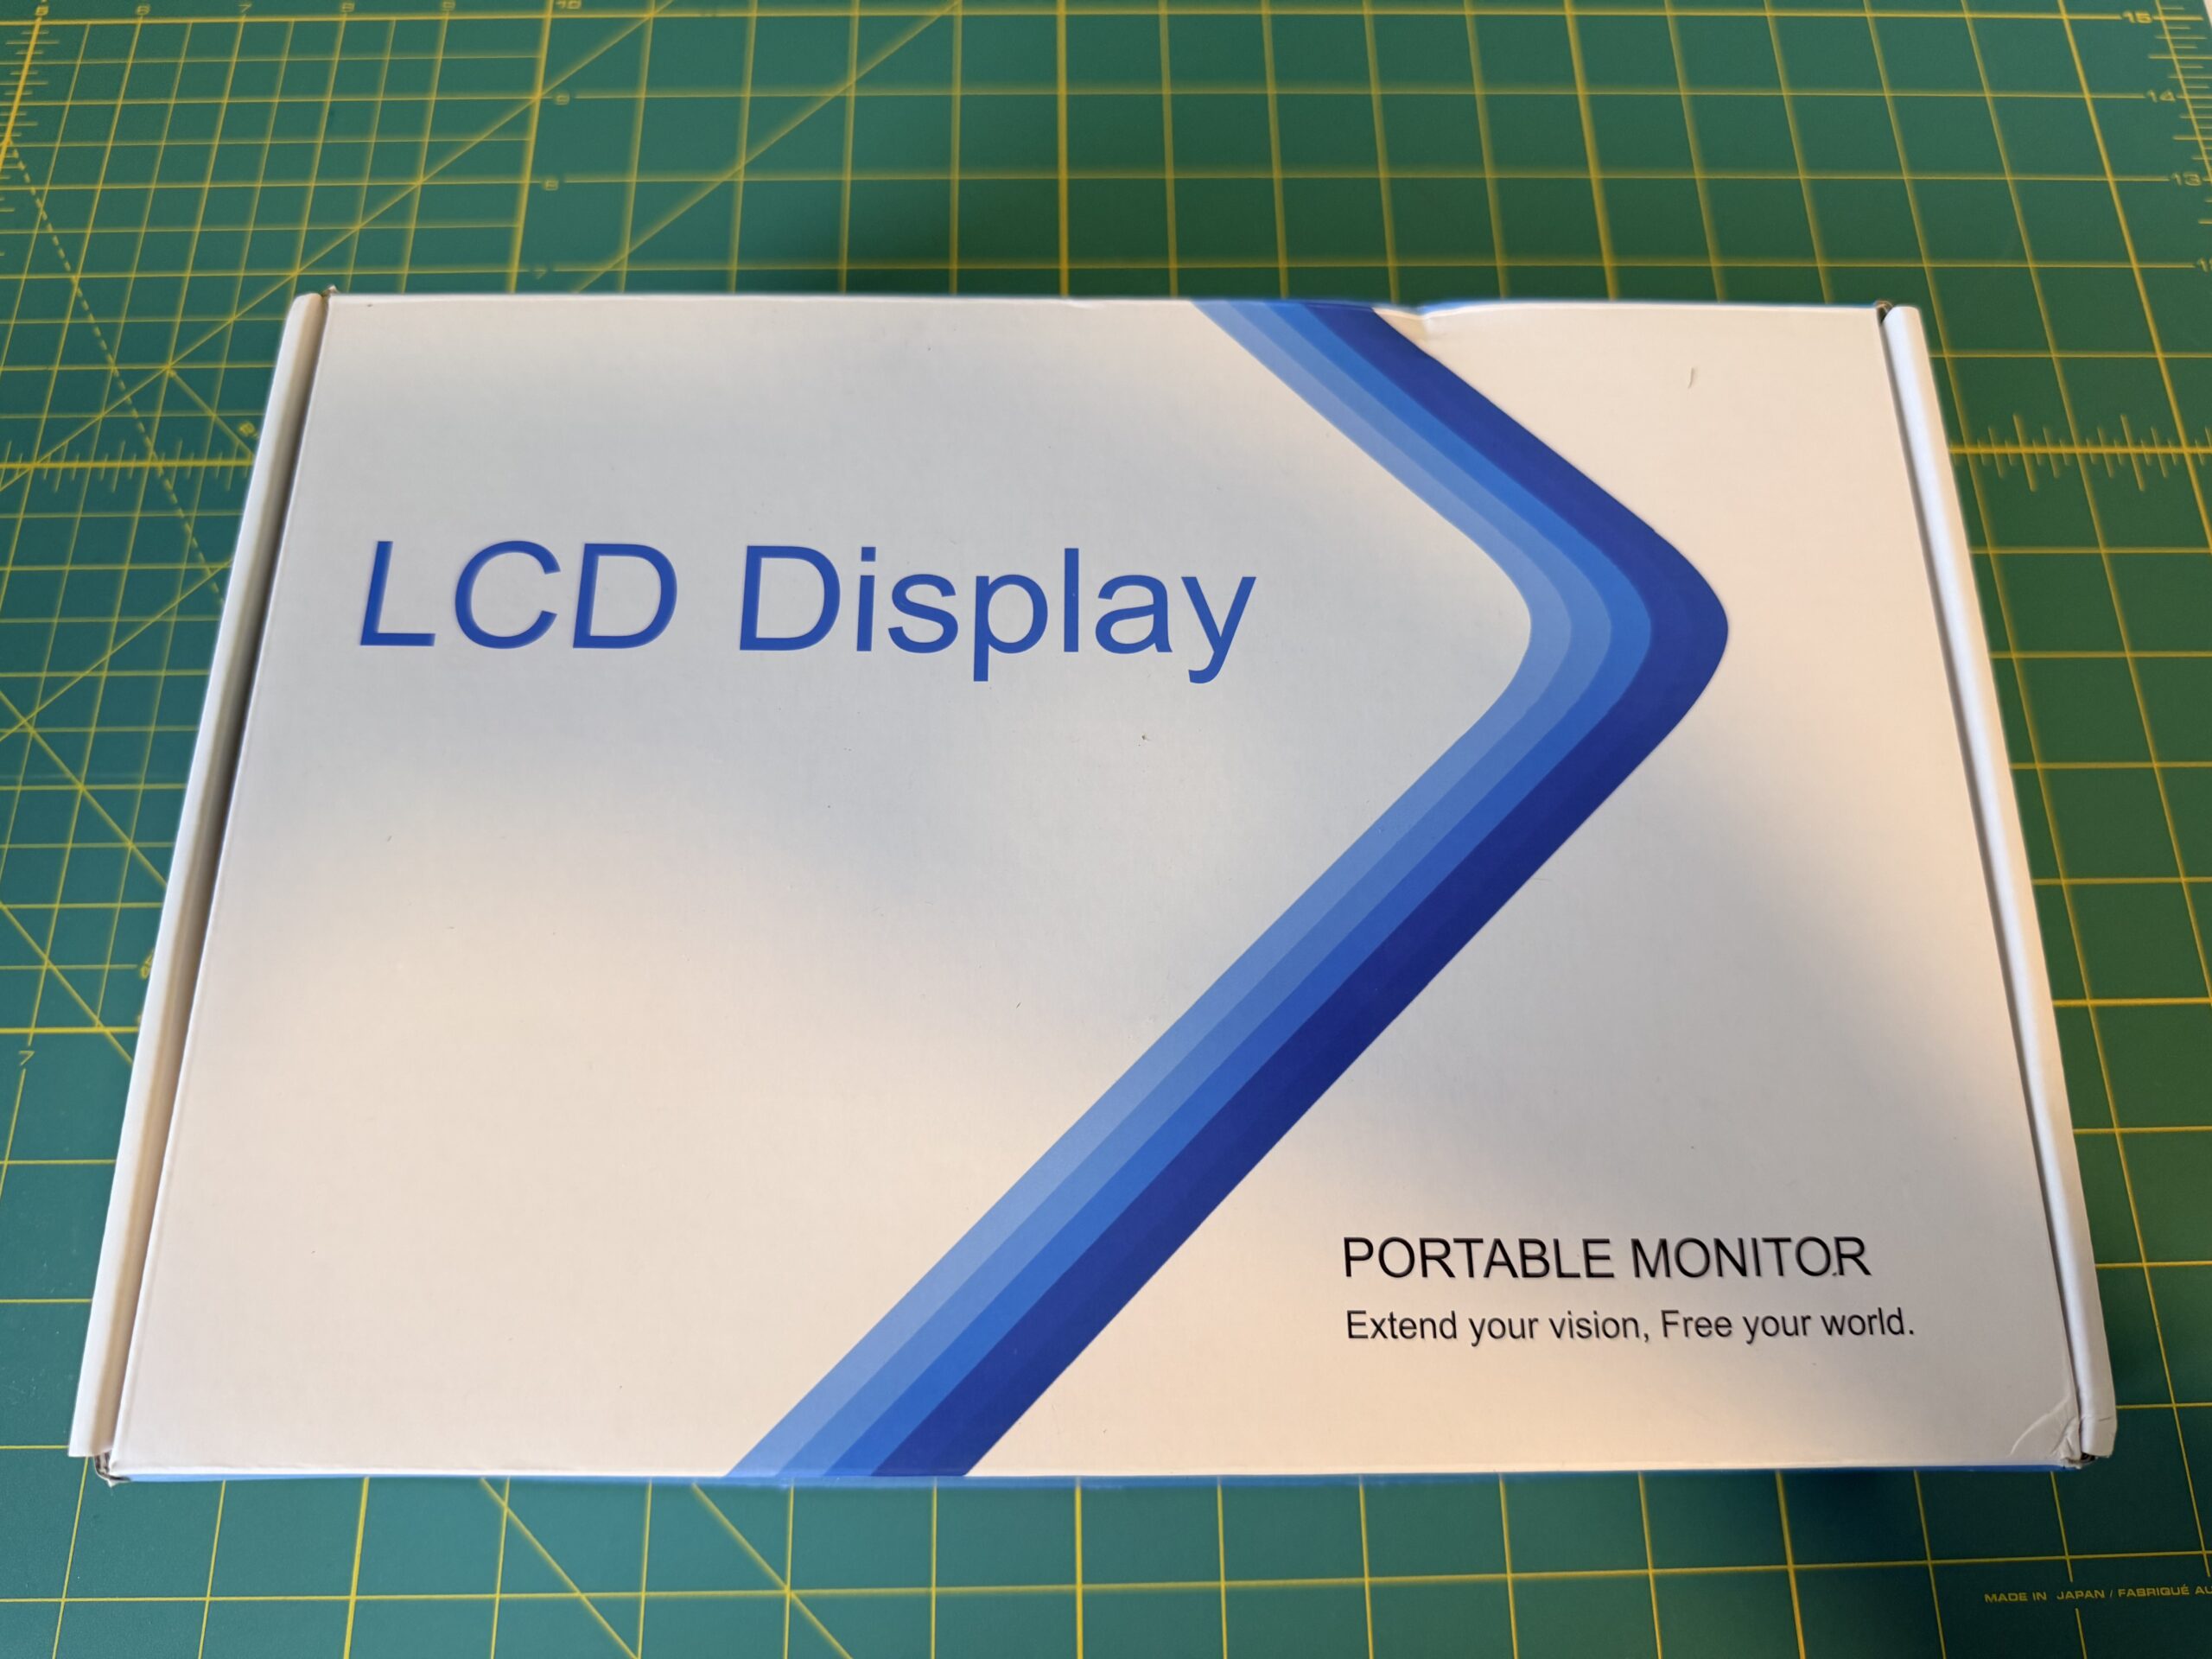
I decided on the iPistBit Raspberry Pi Screen, 10.1 Inch Touchscreen Monitor, IPS 1024×600, Dual Built-in Speakers for multiple reasons:
- My wife wanted a big enough display, more than the 7-inch or 5-inch screens.
- We both wanted the screen to have a wide view angle so that we can see the pictures wherever we are, this one offers a 178 degrees viewing angle
- We wanted a high resolution, this one has 1024×600 aka standard Wide Super VGA resolution and basically the best resolution for that price range
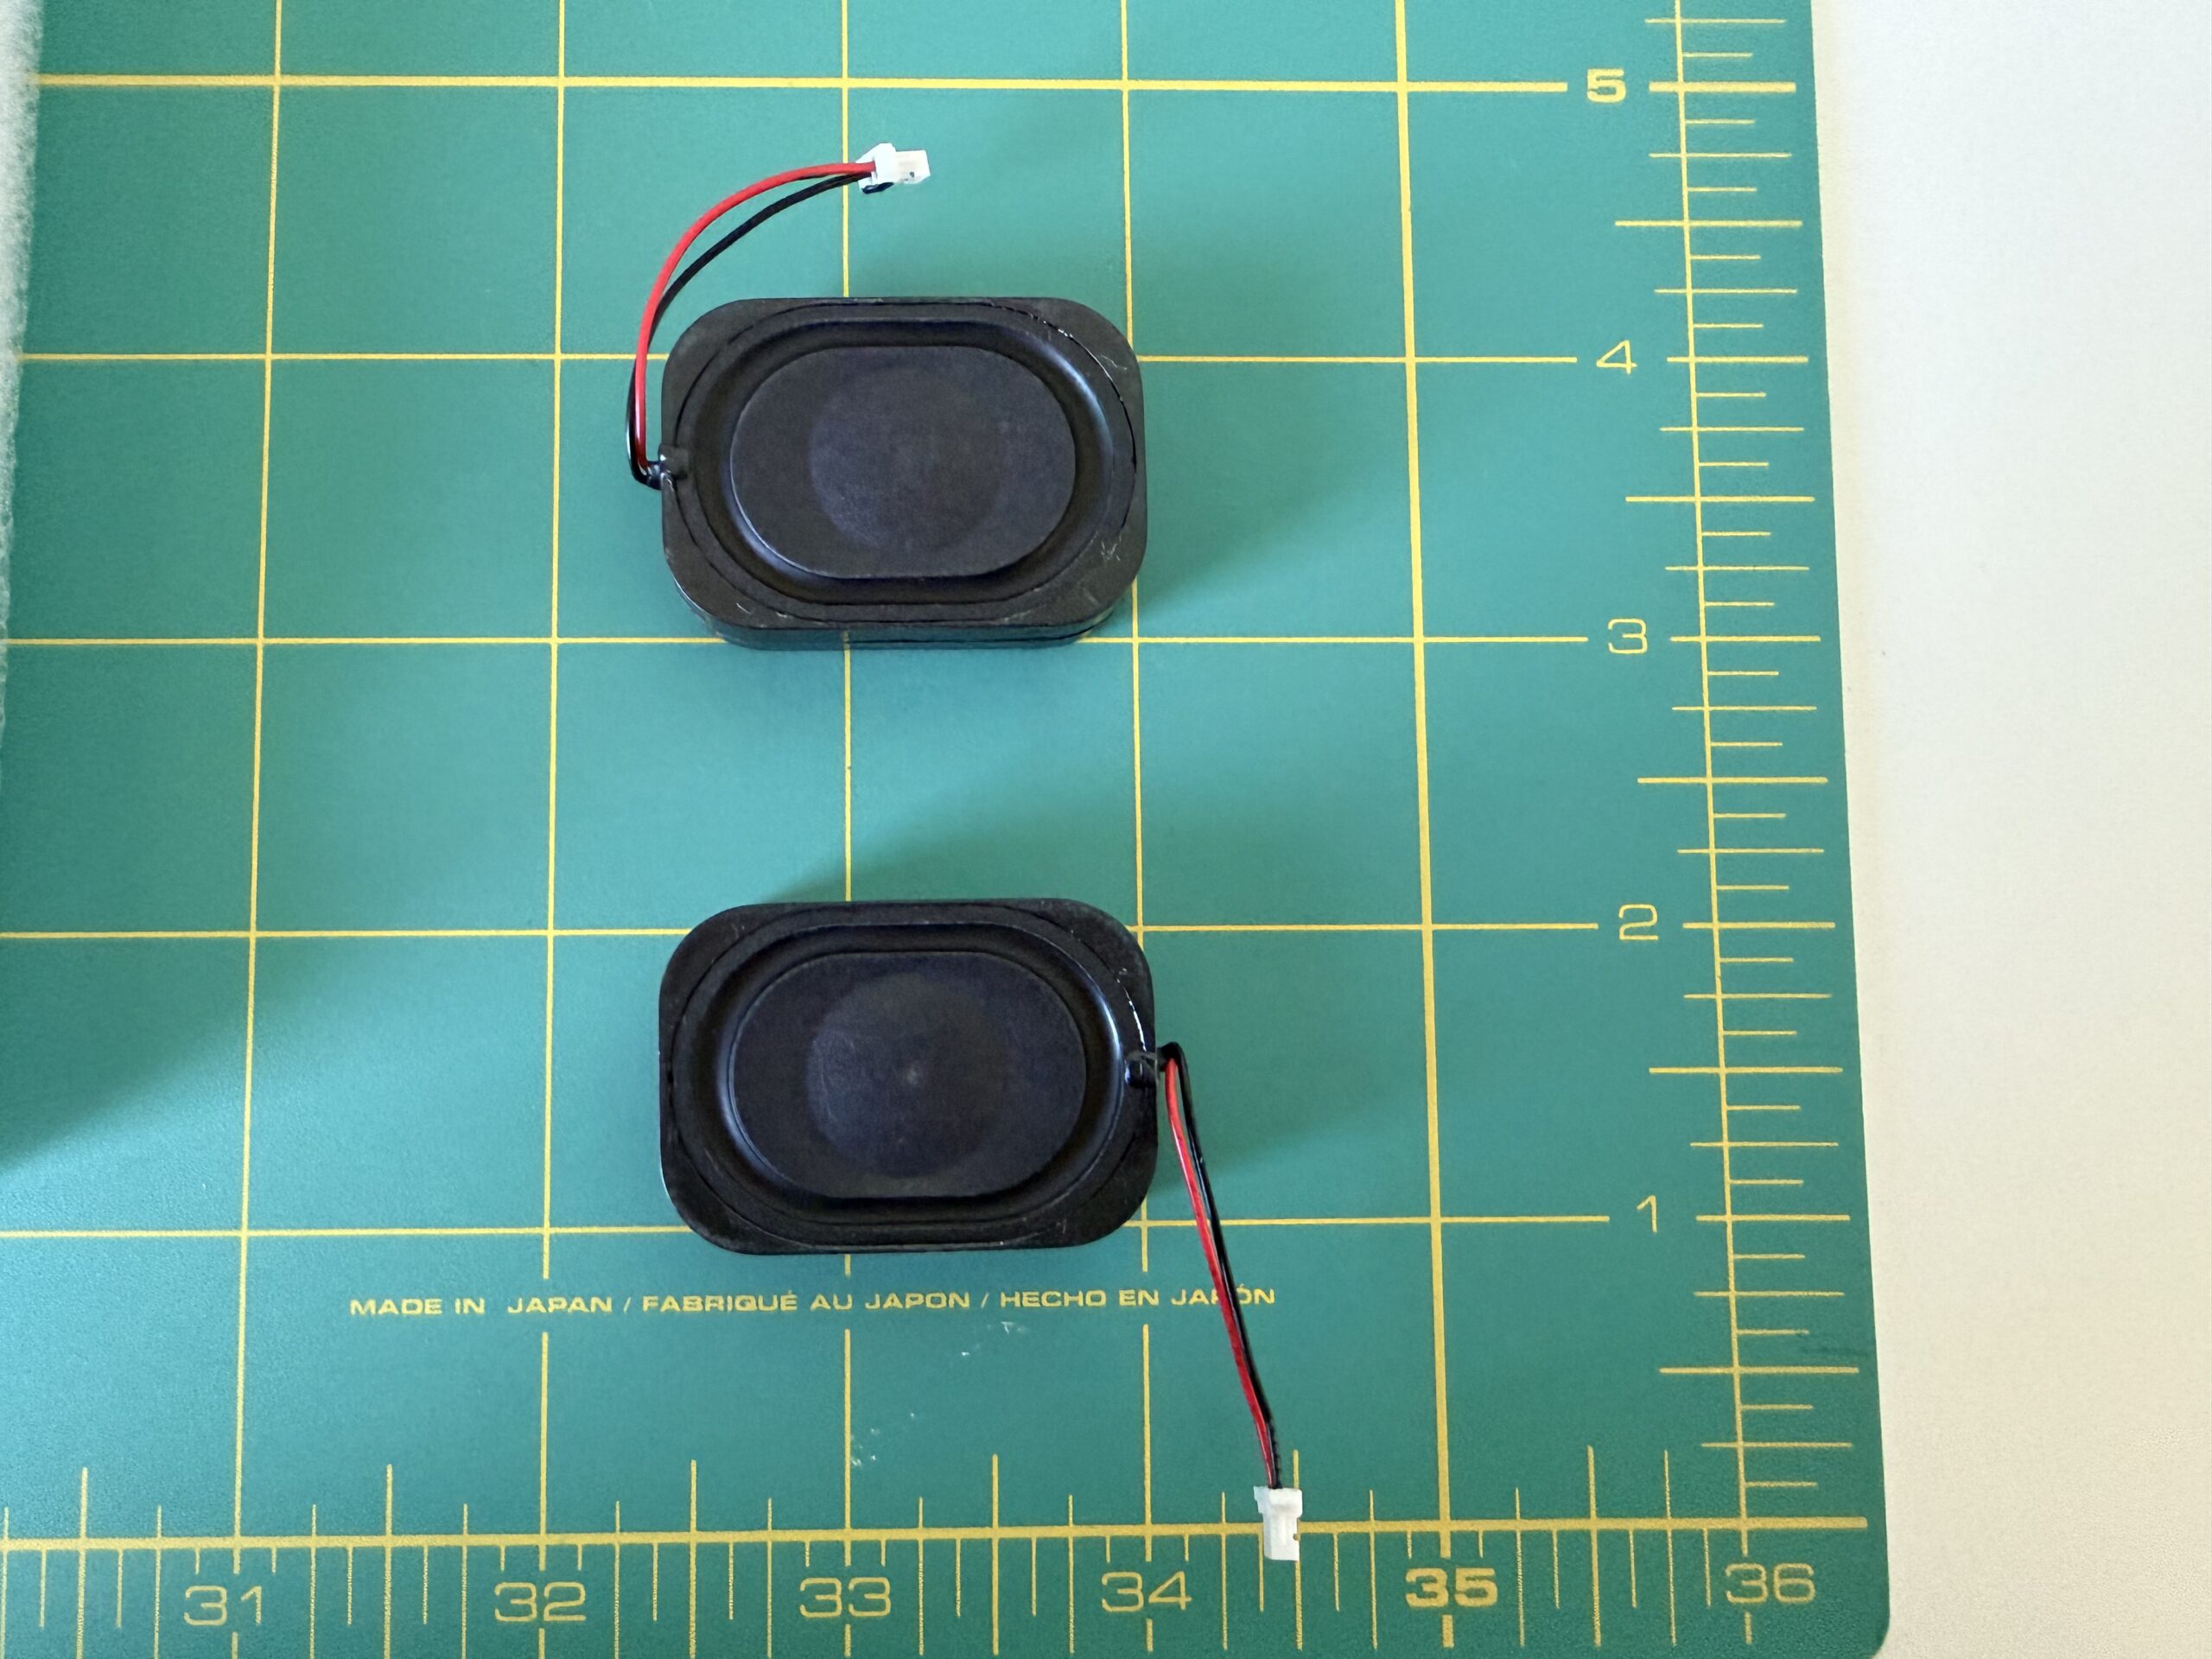
- The frame has built-in speakers for videos to play back audio
- The frame is touchscreen making it easy to interact with Raspberry Pi OS without SSH or VNC
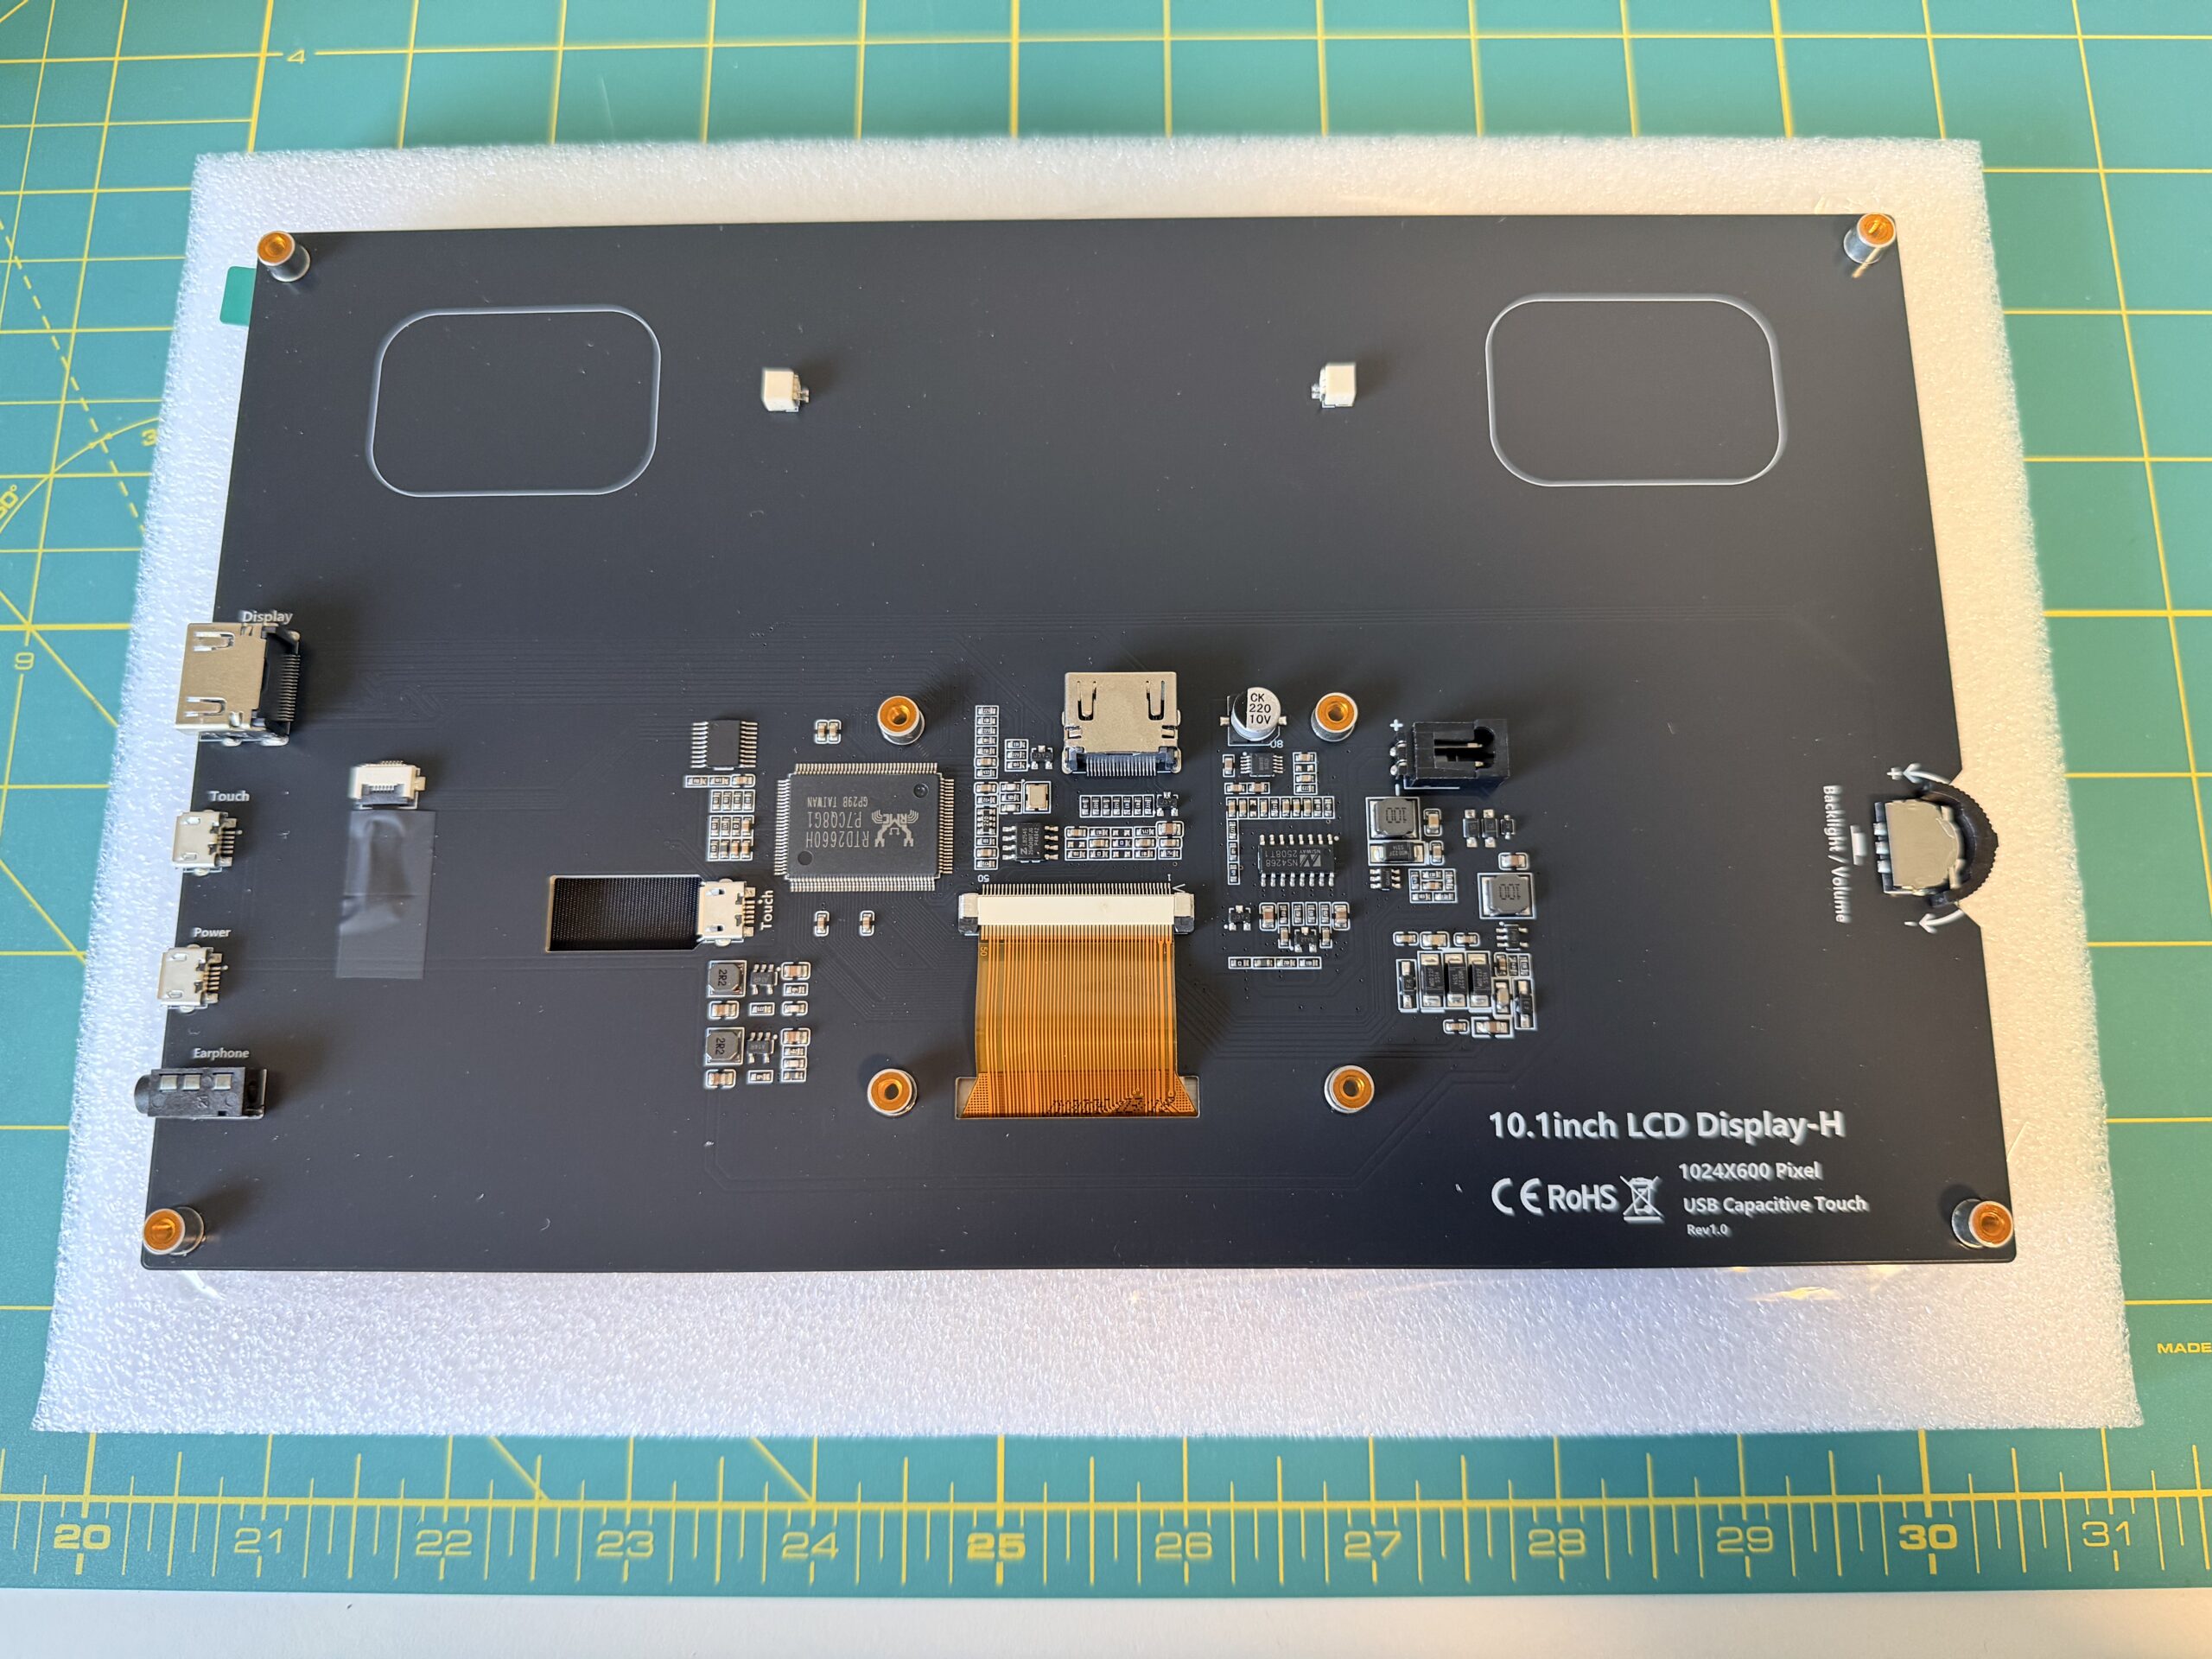
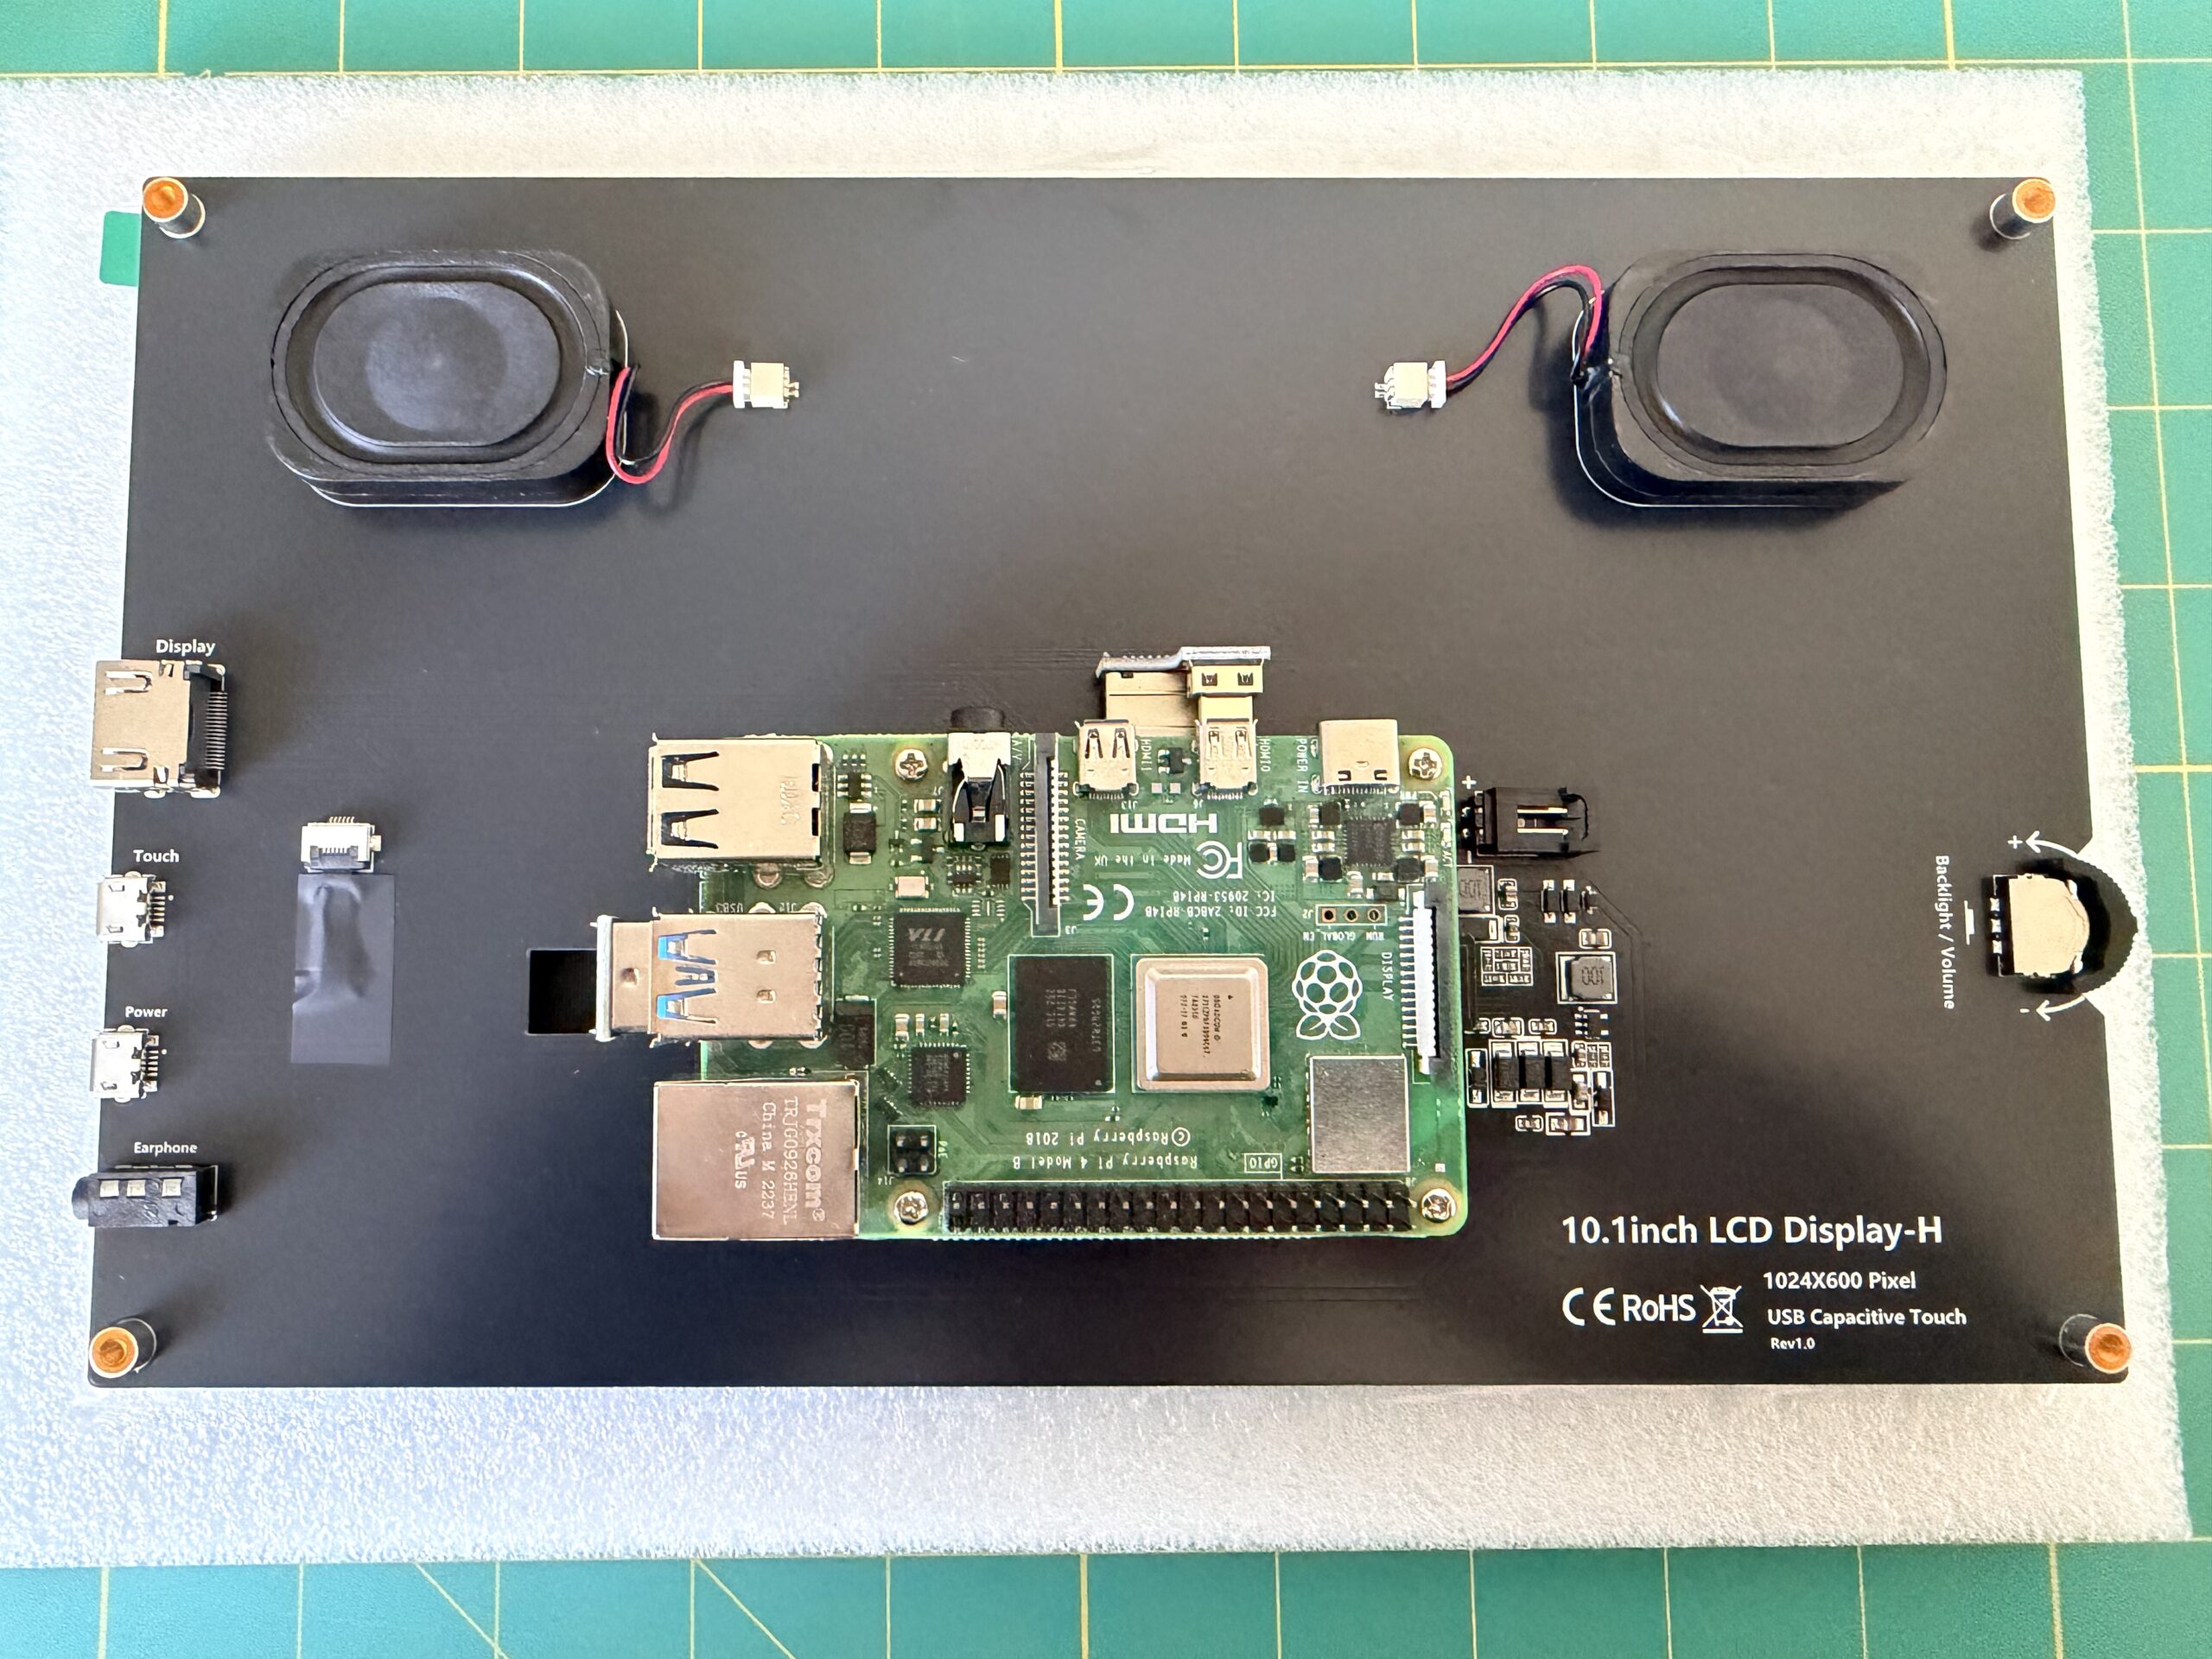
- The Pi mounts on the back and remains hidden
- The frame is plug’n’play with the Pi
- The frame can be powered via the Pi, meaning only one power cable is required
- The frame has a very low reaction time of 3 milliseconds
The Pi
For the Raspberry Pi, I used the 4B model with Raspberry Pi OS. Choosing the 4B model was deliberate, here is why.
The Raspberry Pi 5 requires quite a bit more power than the 4B. For the 4B, a 5V/3A (~15W) power supply is recommended which most modern USB-C plugs and batteries provide. For a 5, the recommended power supply is 27W, almost twice as much as the 4B. If you power the Pi 5 with only 5V/3A, it will limit the peripheral power to just 600mA, which will not be sufficient for the screen.
The screen requires 3.8W for 100% brightness and 0% volume and 4.8W for 100% brightness, 100% volume. Given the 5V voltage, that means that the screen requires either ~760mA or ~960mA.
Either way, the Pi 5 cannot power the screen reliably when using a common USB-C charger, which means that using a Raspberry Pi 5 also means that one has to use the 27W Raspberry Pi 5 power supply. I didn’t want to lock myself down to a wall plug. Using a 3B+ or a 4B means that you can power the frame even via an external battery, if that is what you fancy, and put it in places where no power cable can reach or just easily grab it and show it to people. Also the processing power of a Pi 5 is not needed as this is just a picture and video frame and will most of the time not do much CPU processing. Frankly, even an older 3B+ Pi could do, although it may struggle with video playback more than the 4B. I settled on the 4B because I had it, it has more than 1GB RAM (it has 4GB RAM), and is a nice sweet spot between the old 3B+ and the new 5 on multiple fronts.
Assembling and mounting the Pi
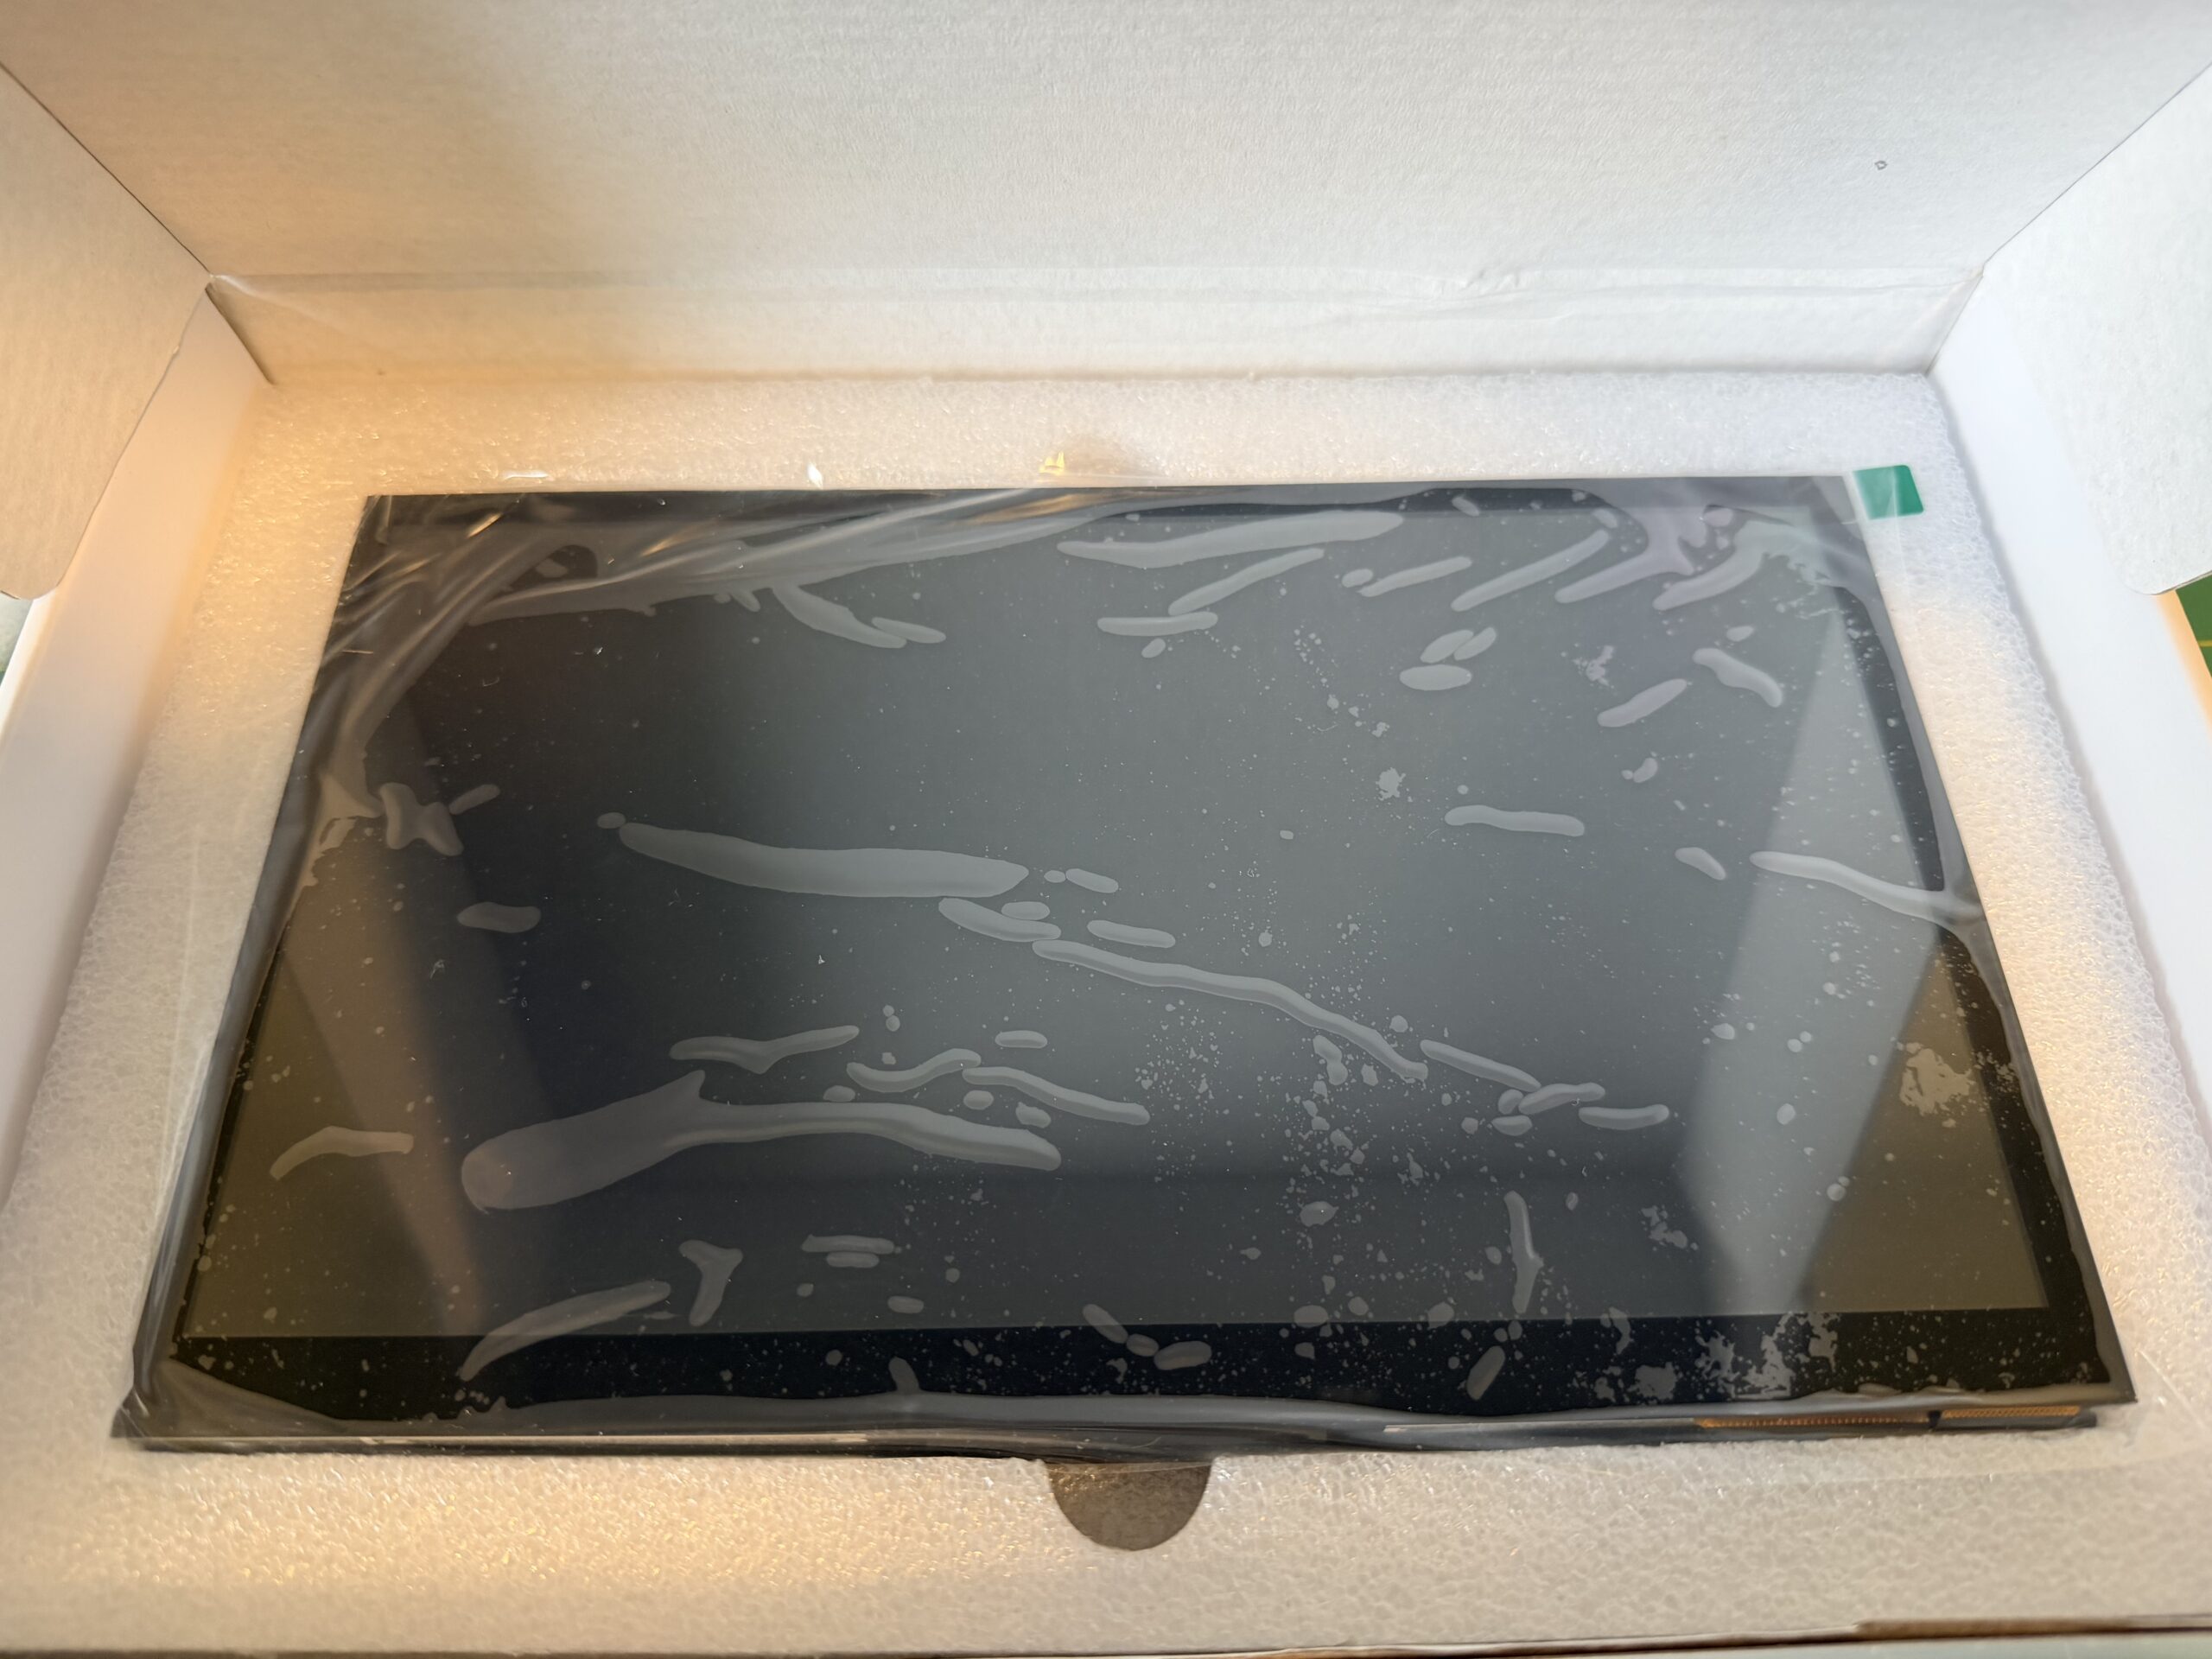
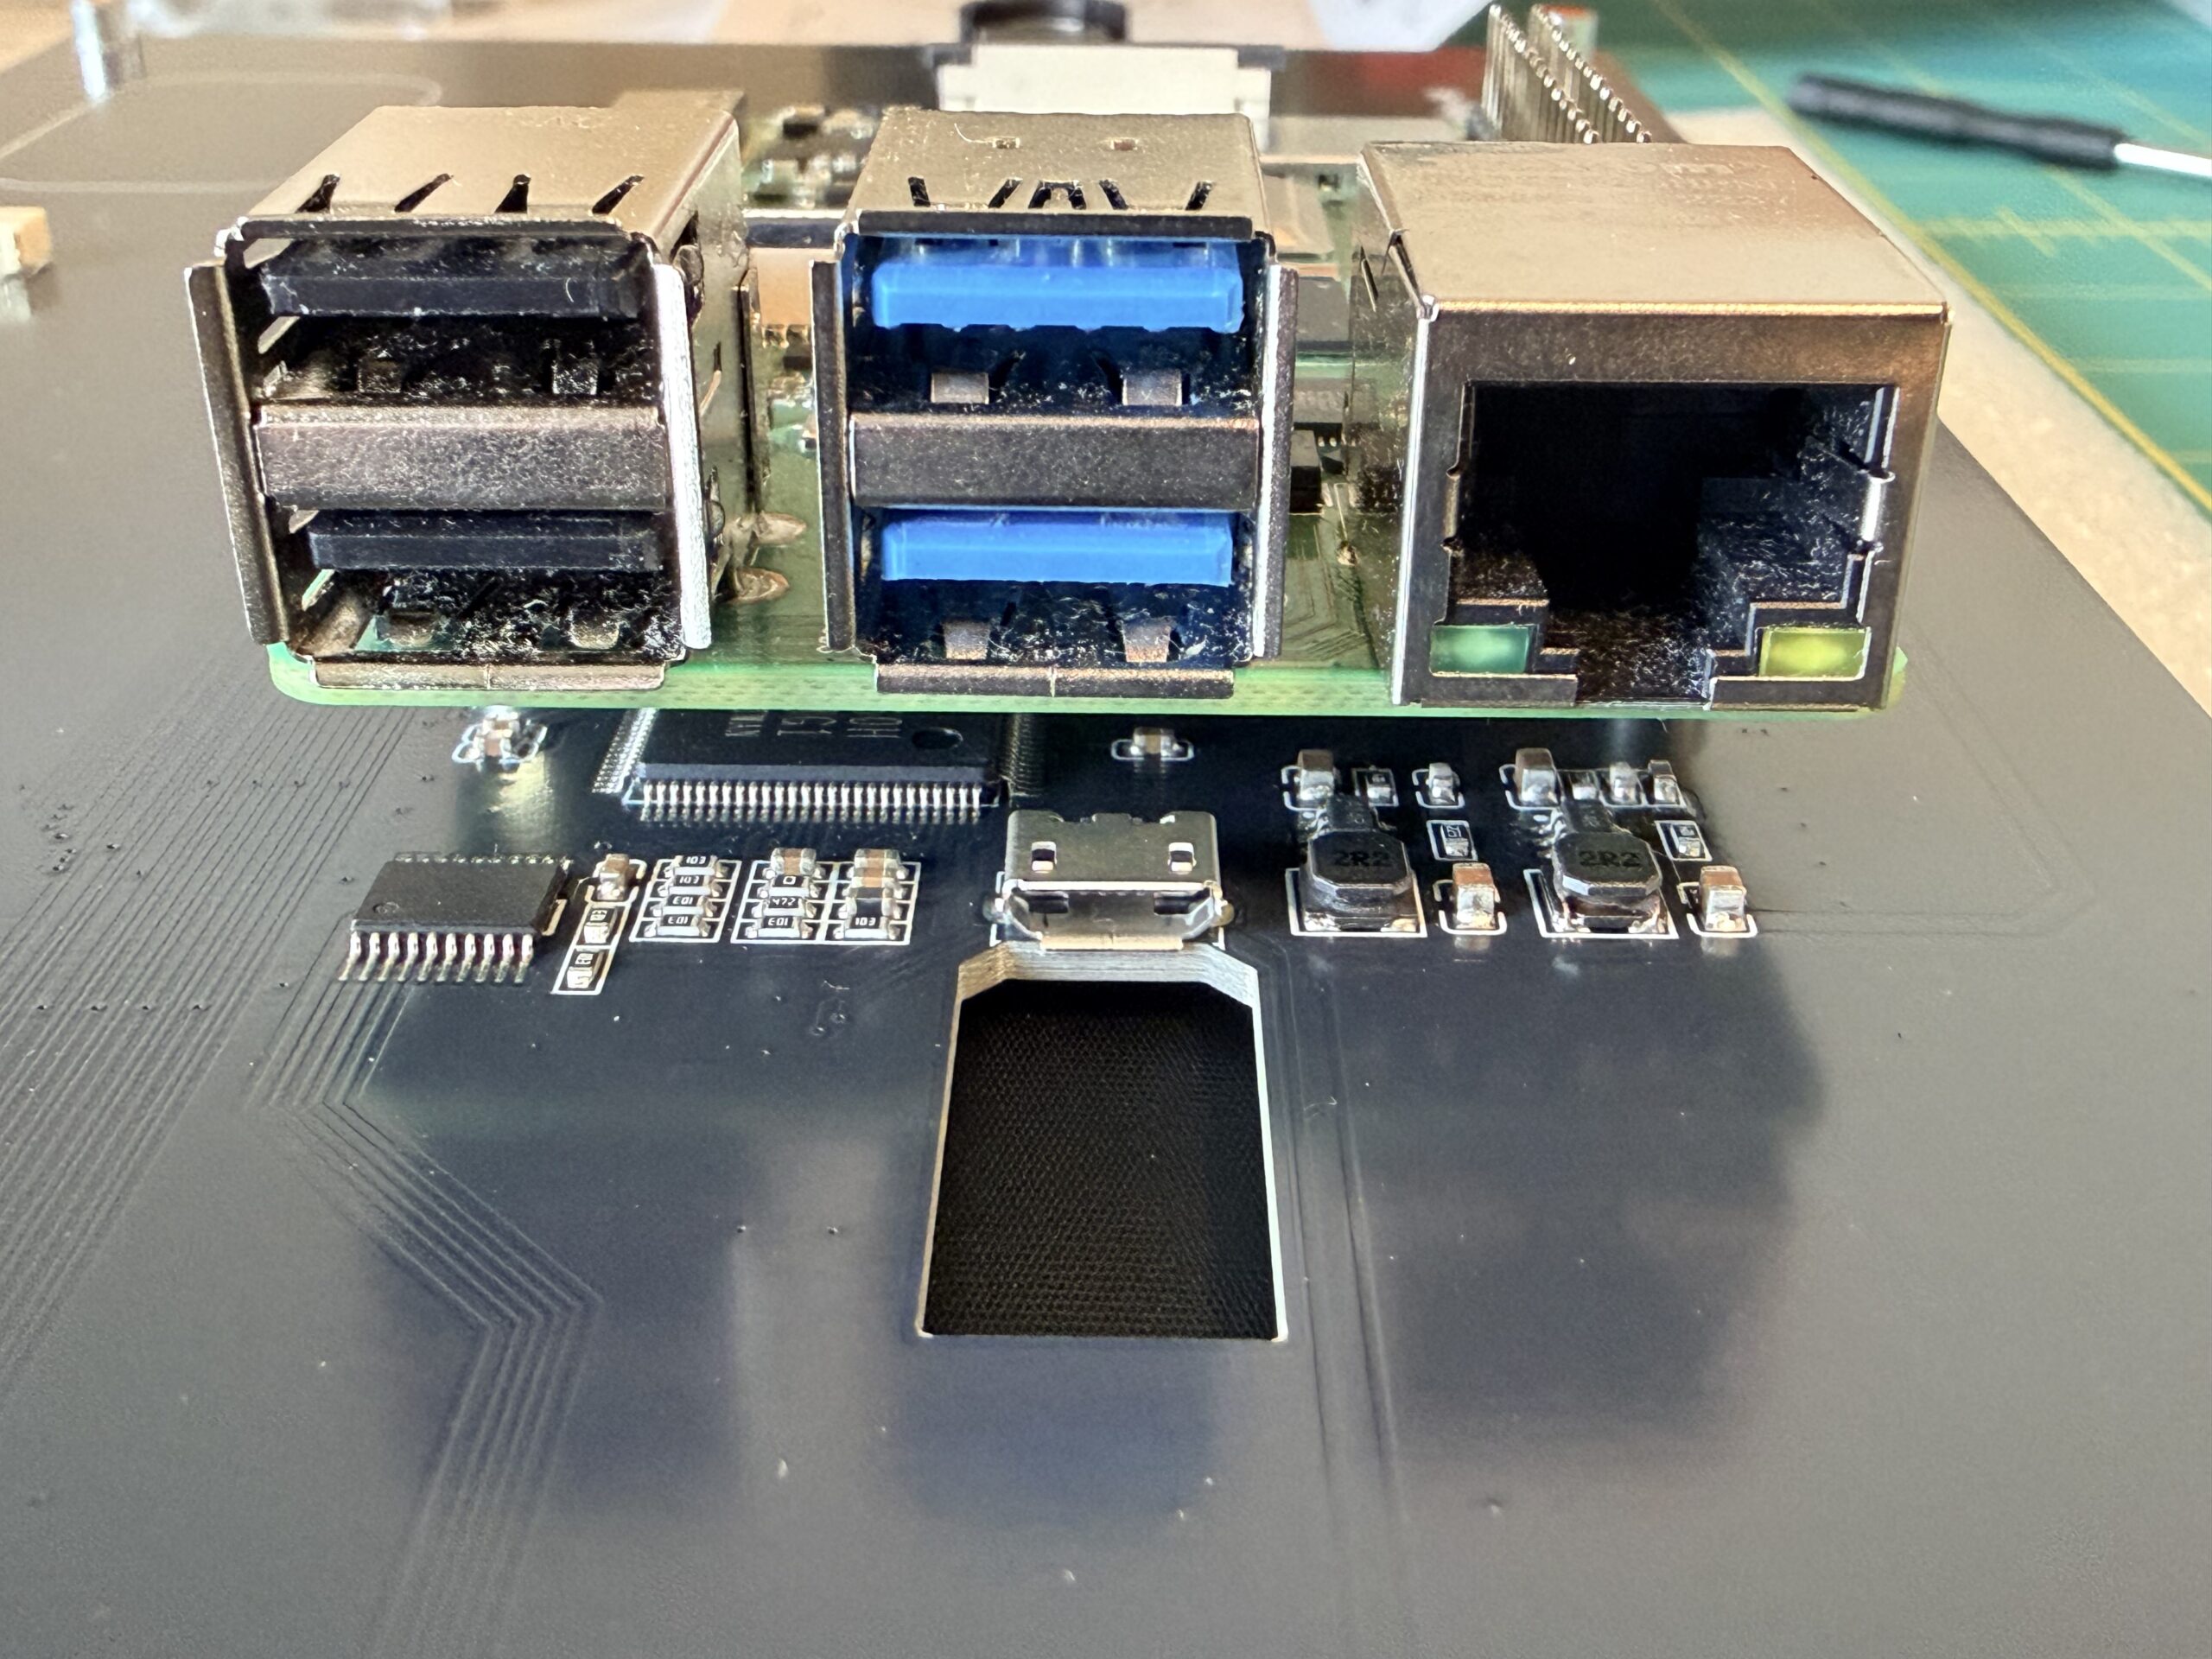
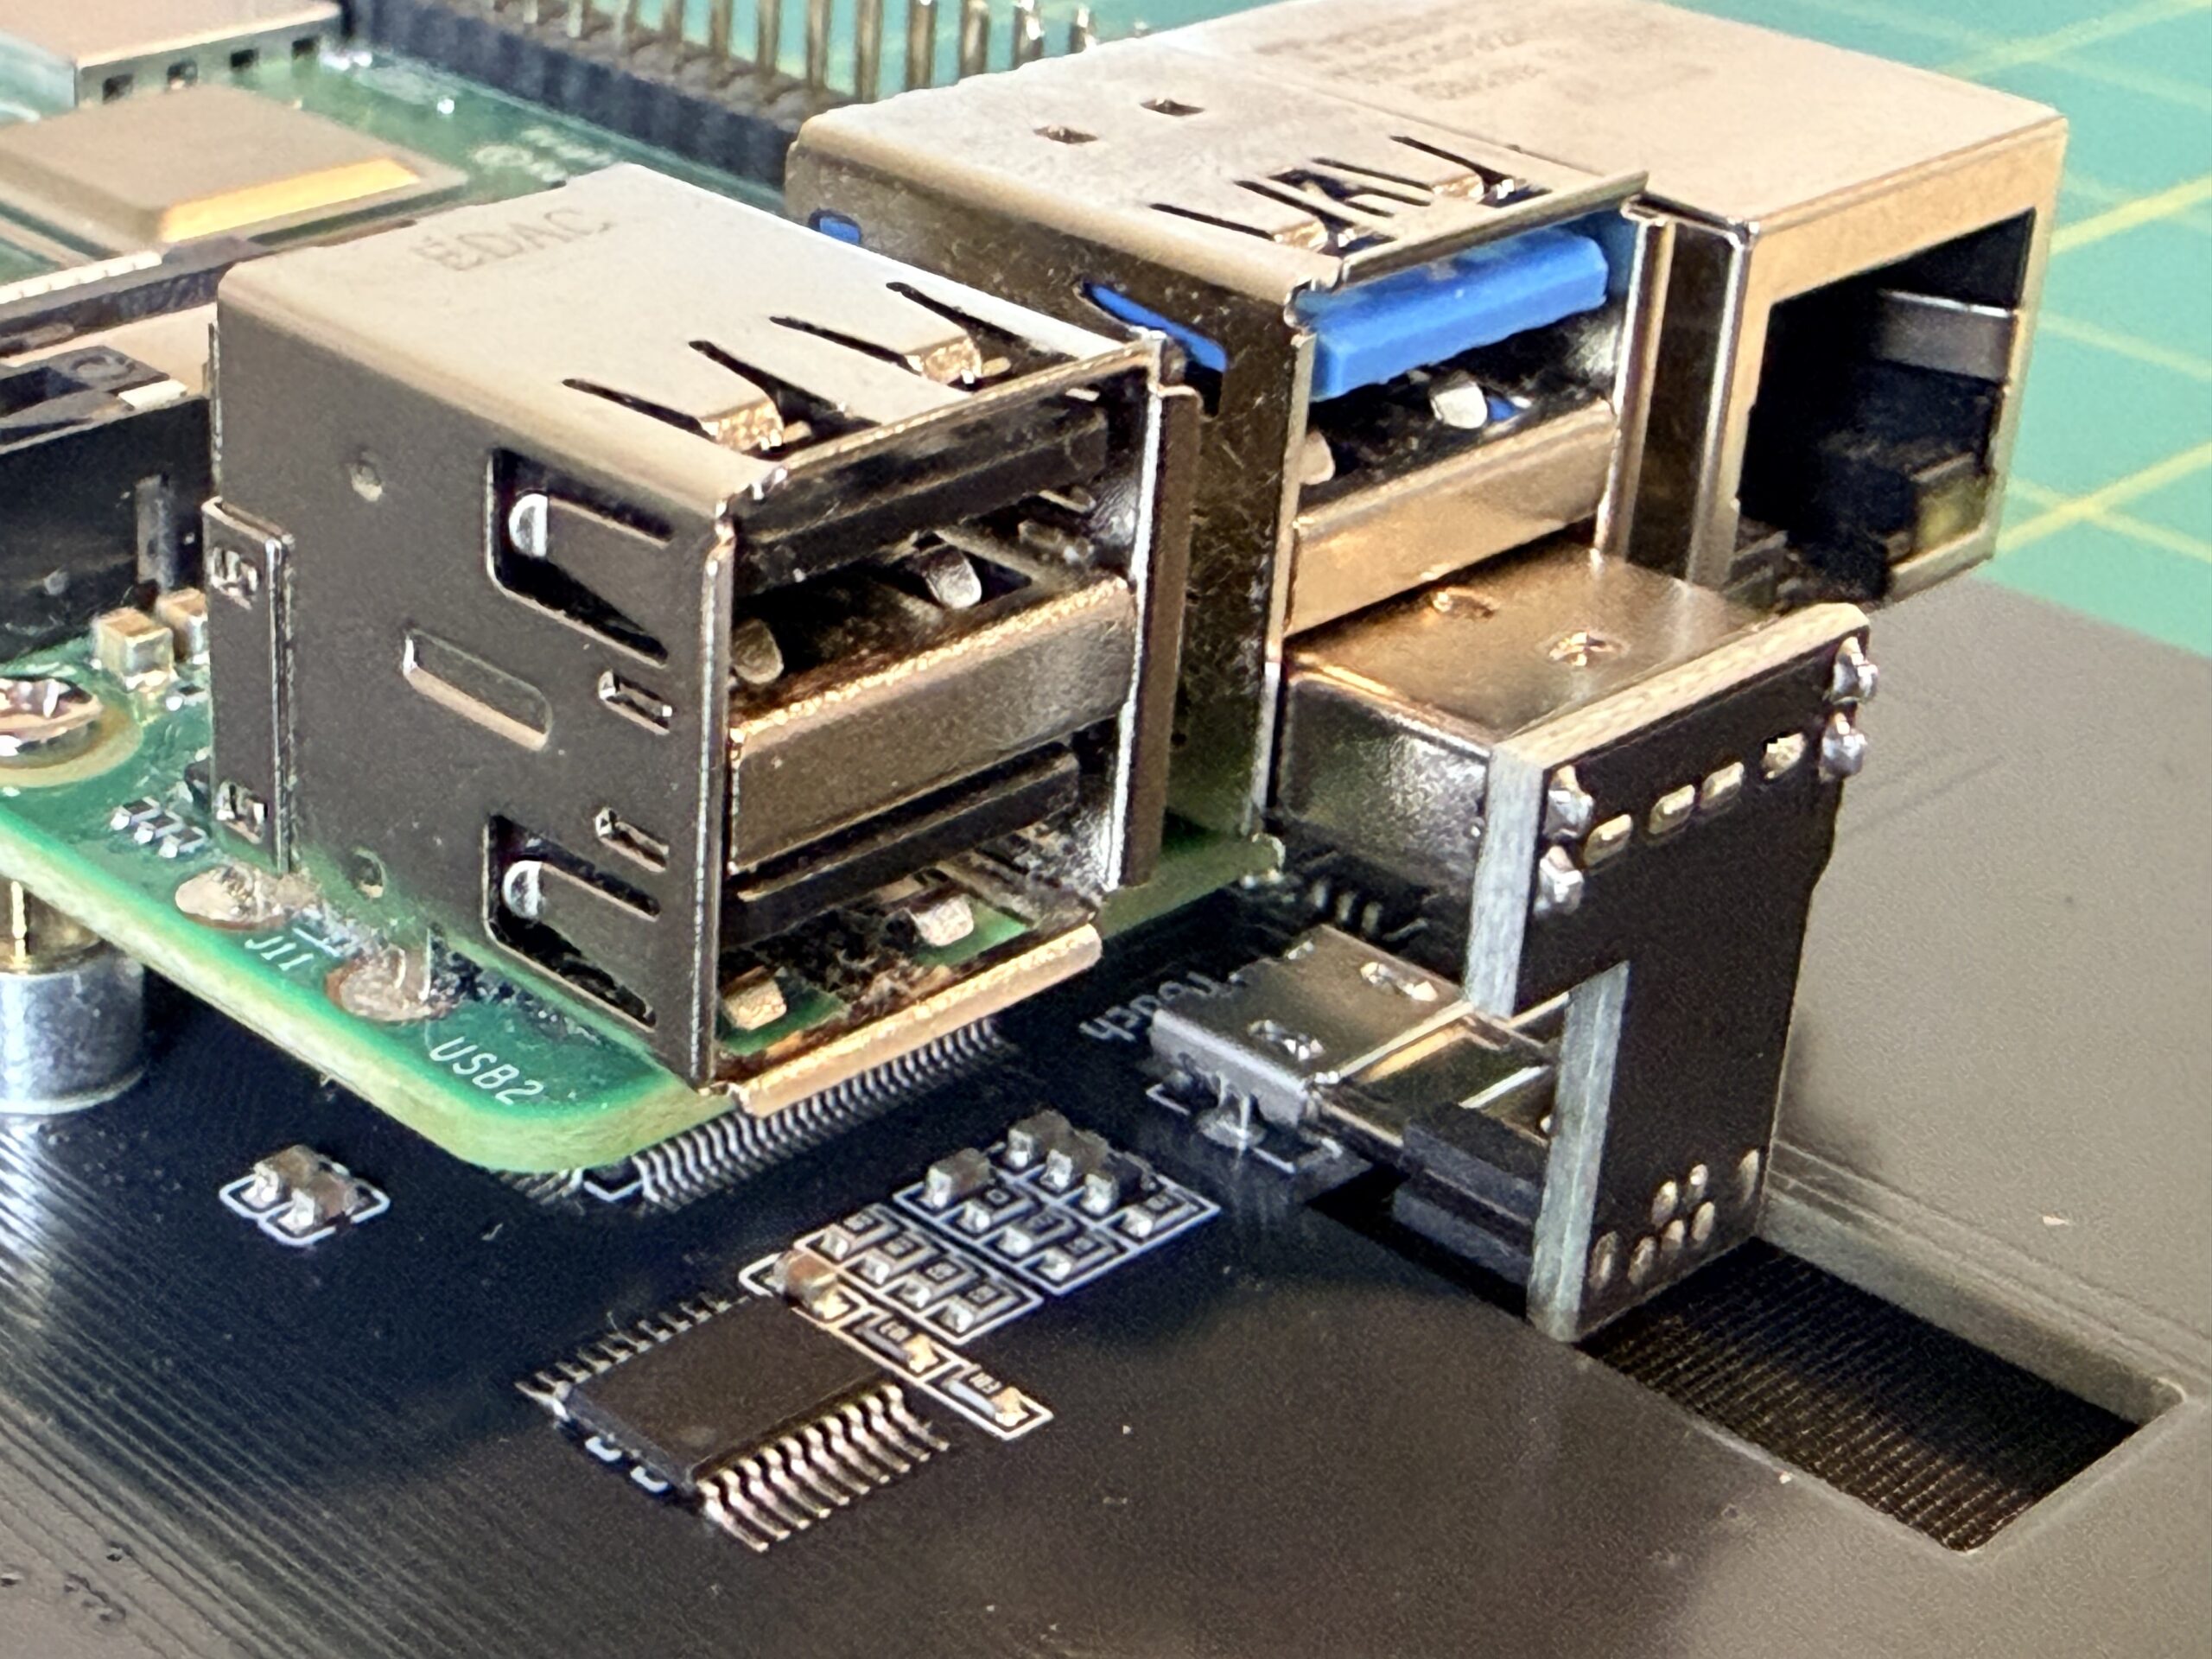
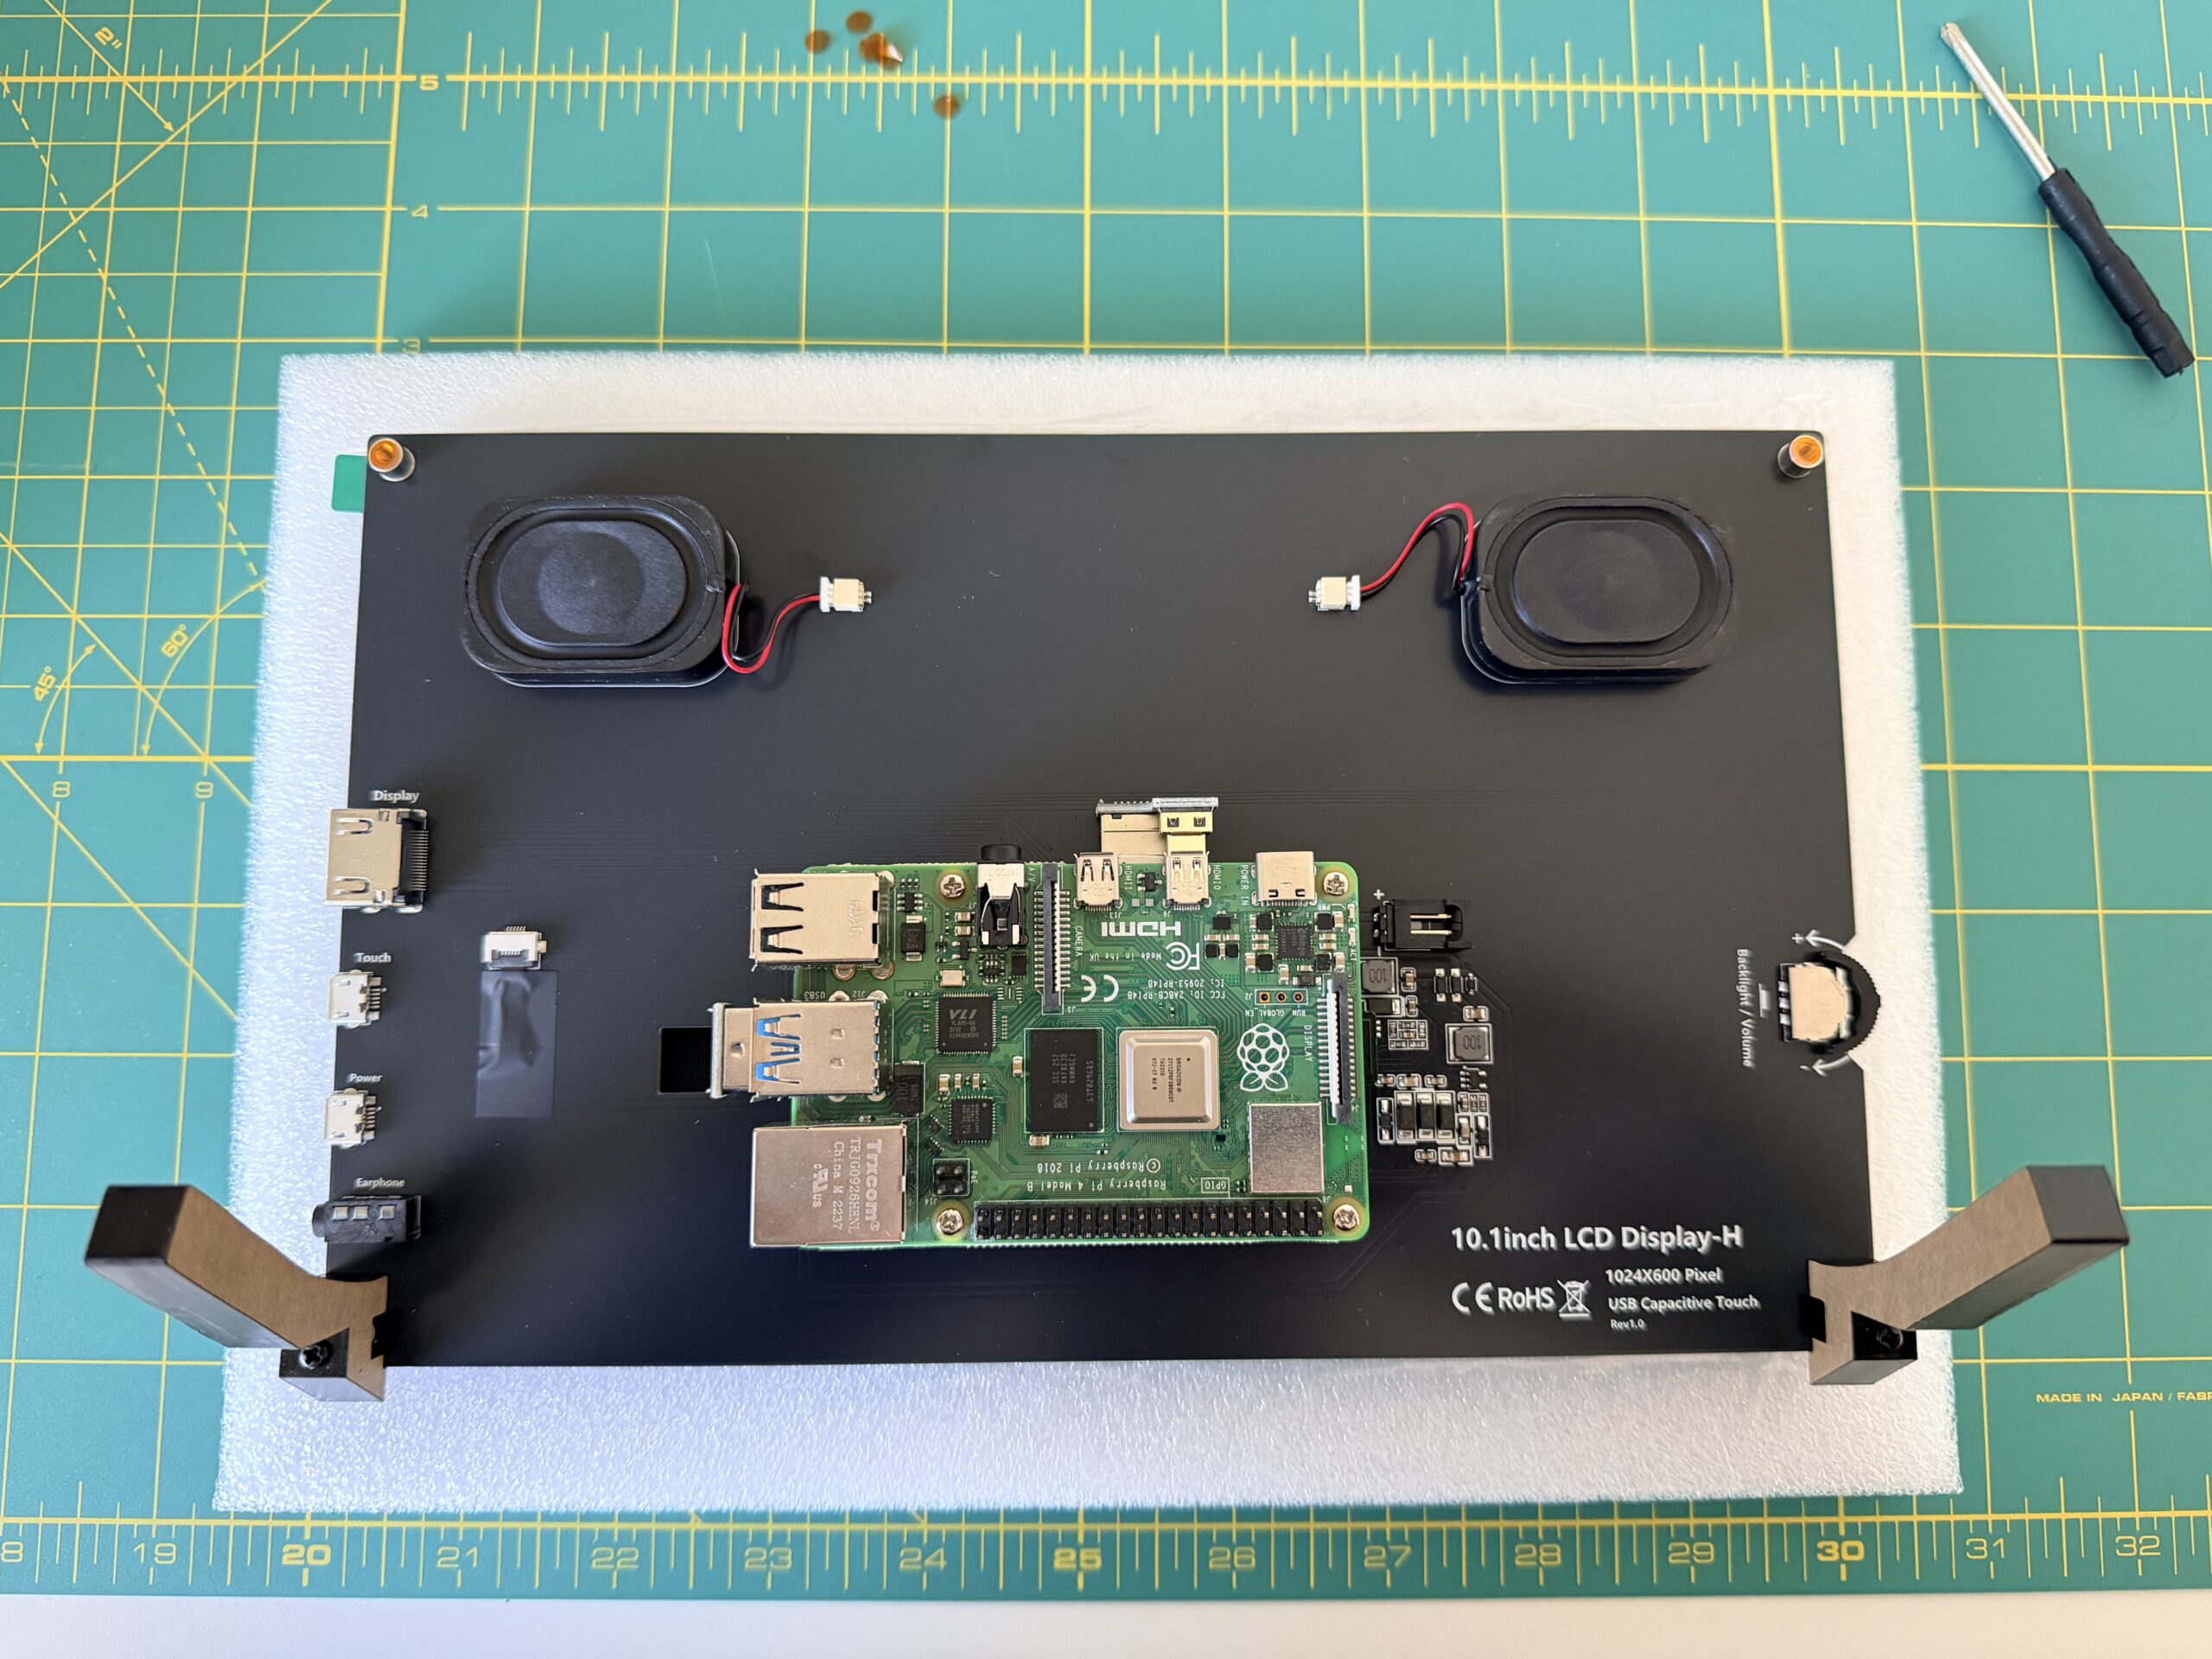
Assembling the screen and mounting the Pi really only takes 10 minutes, 4 screws and 2 connectors and 2 cables.
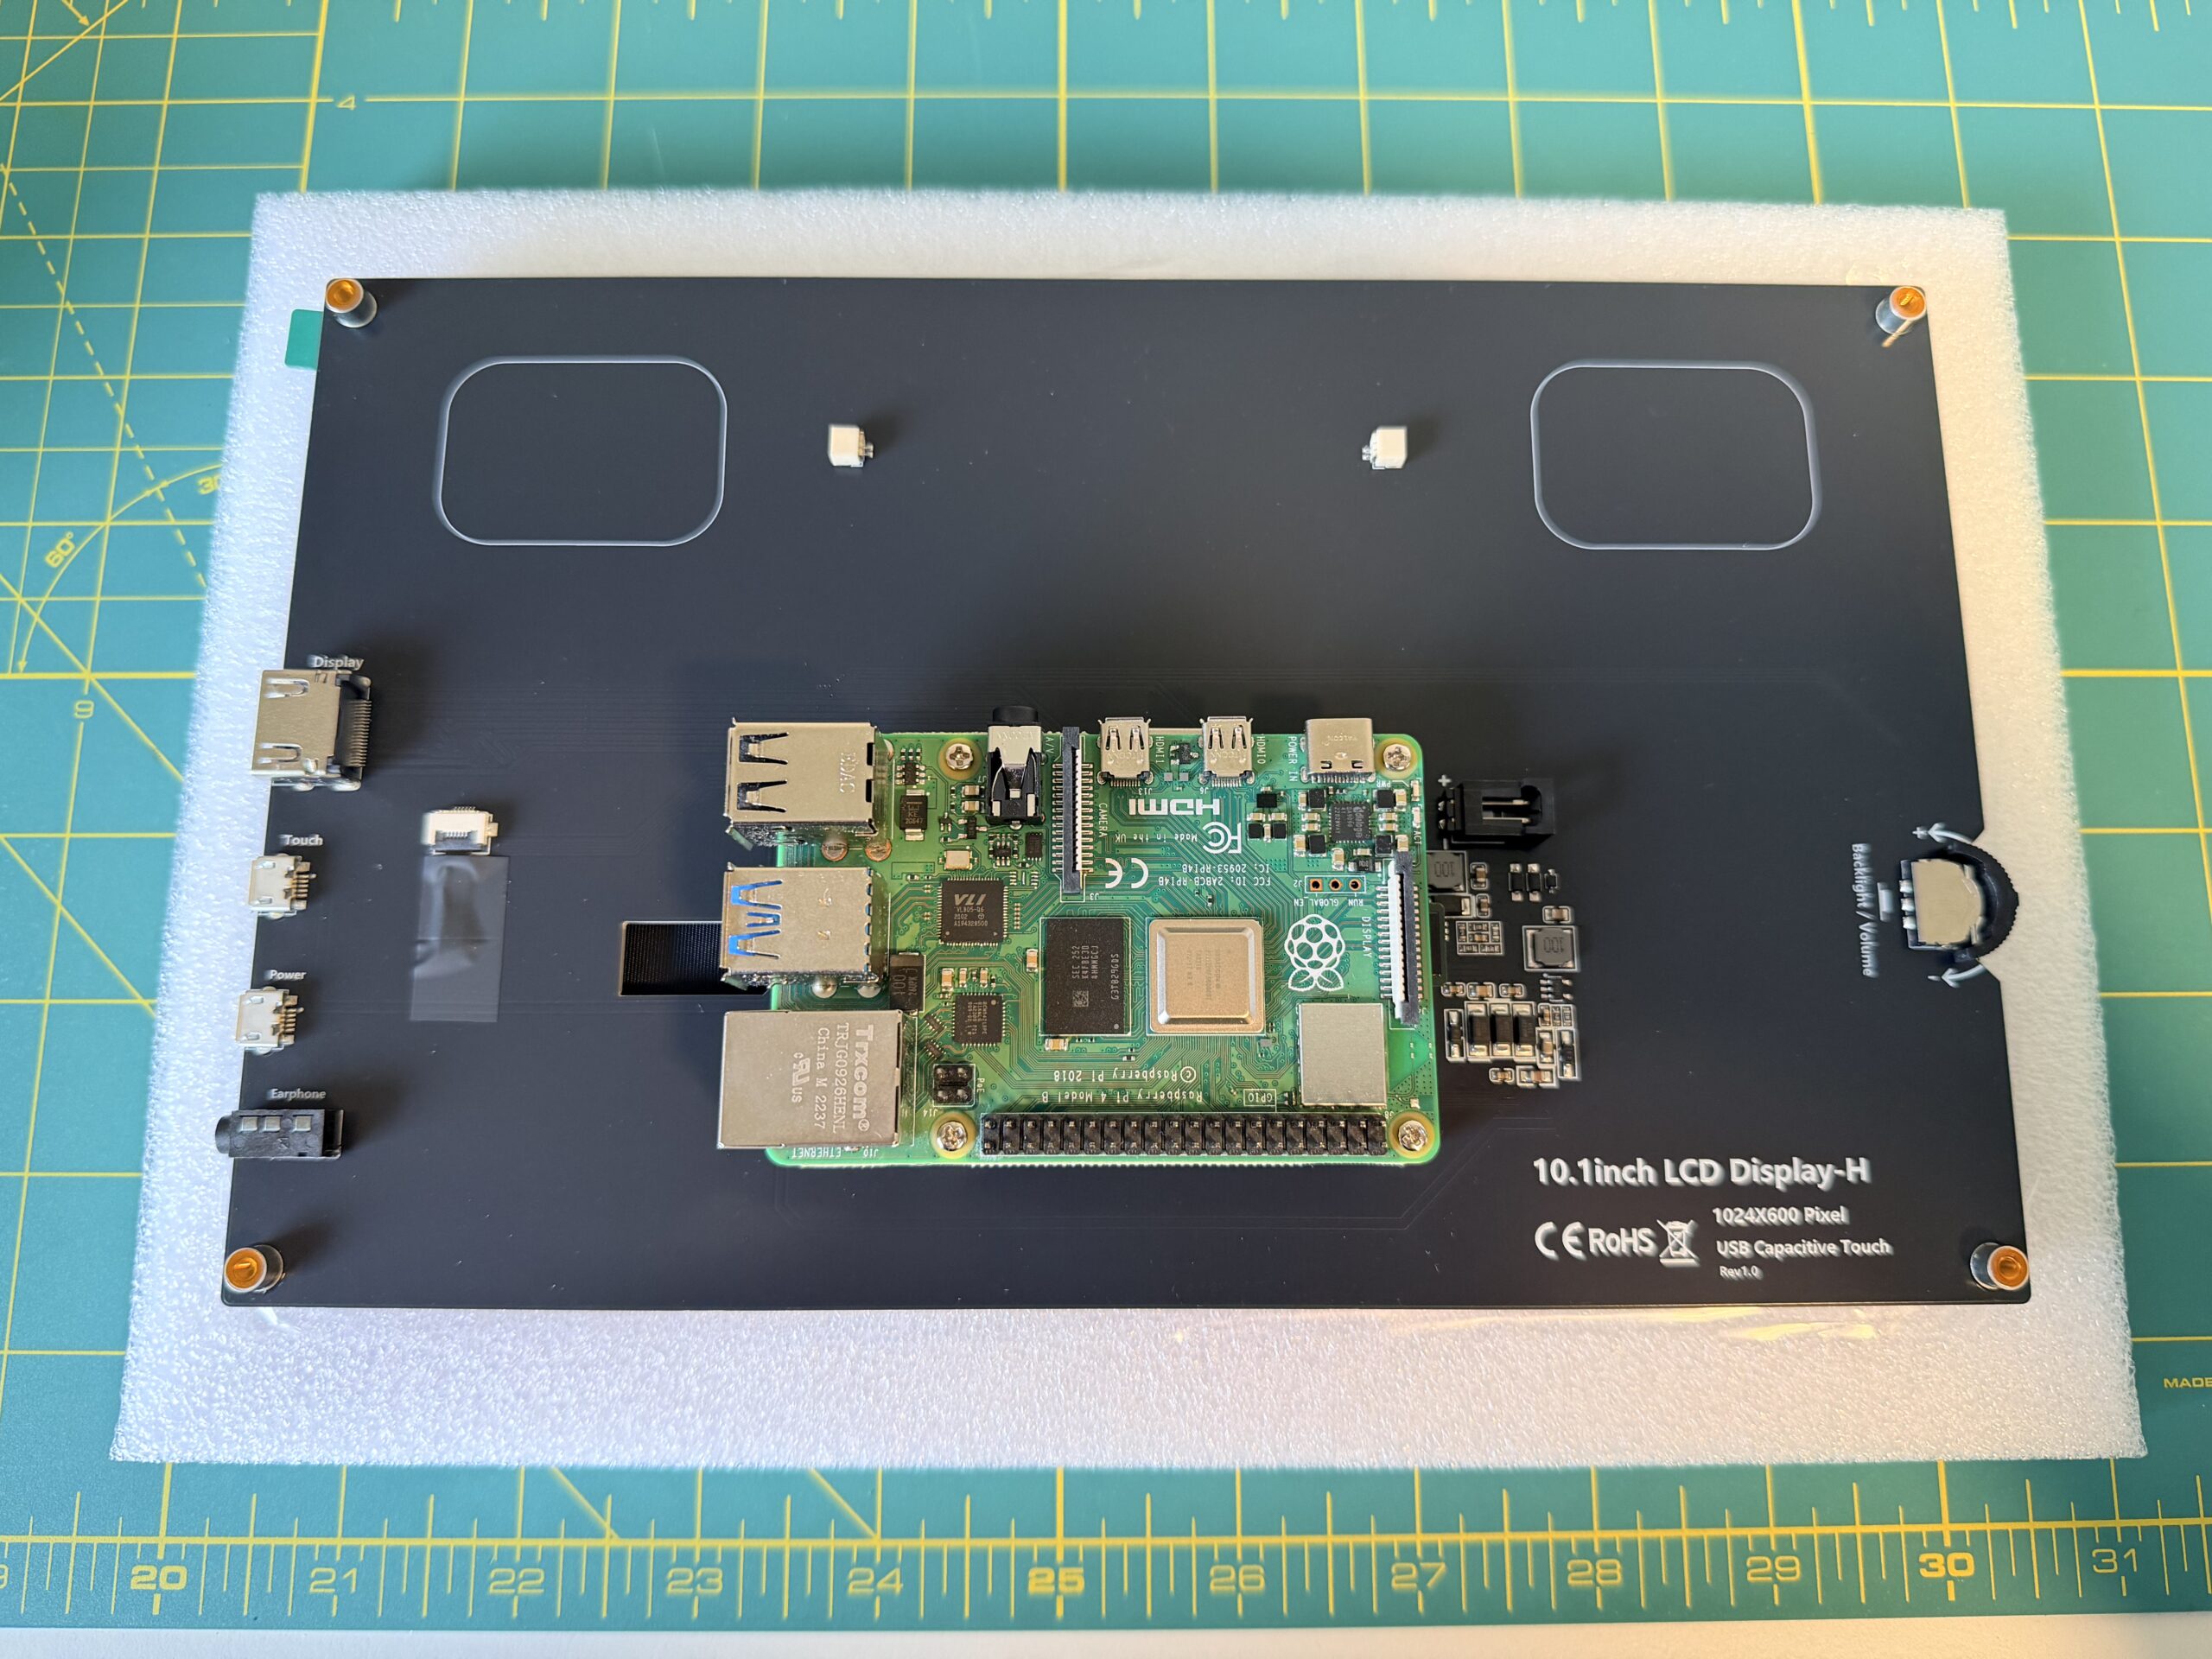
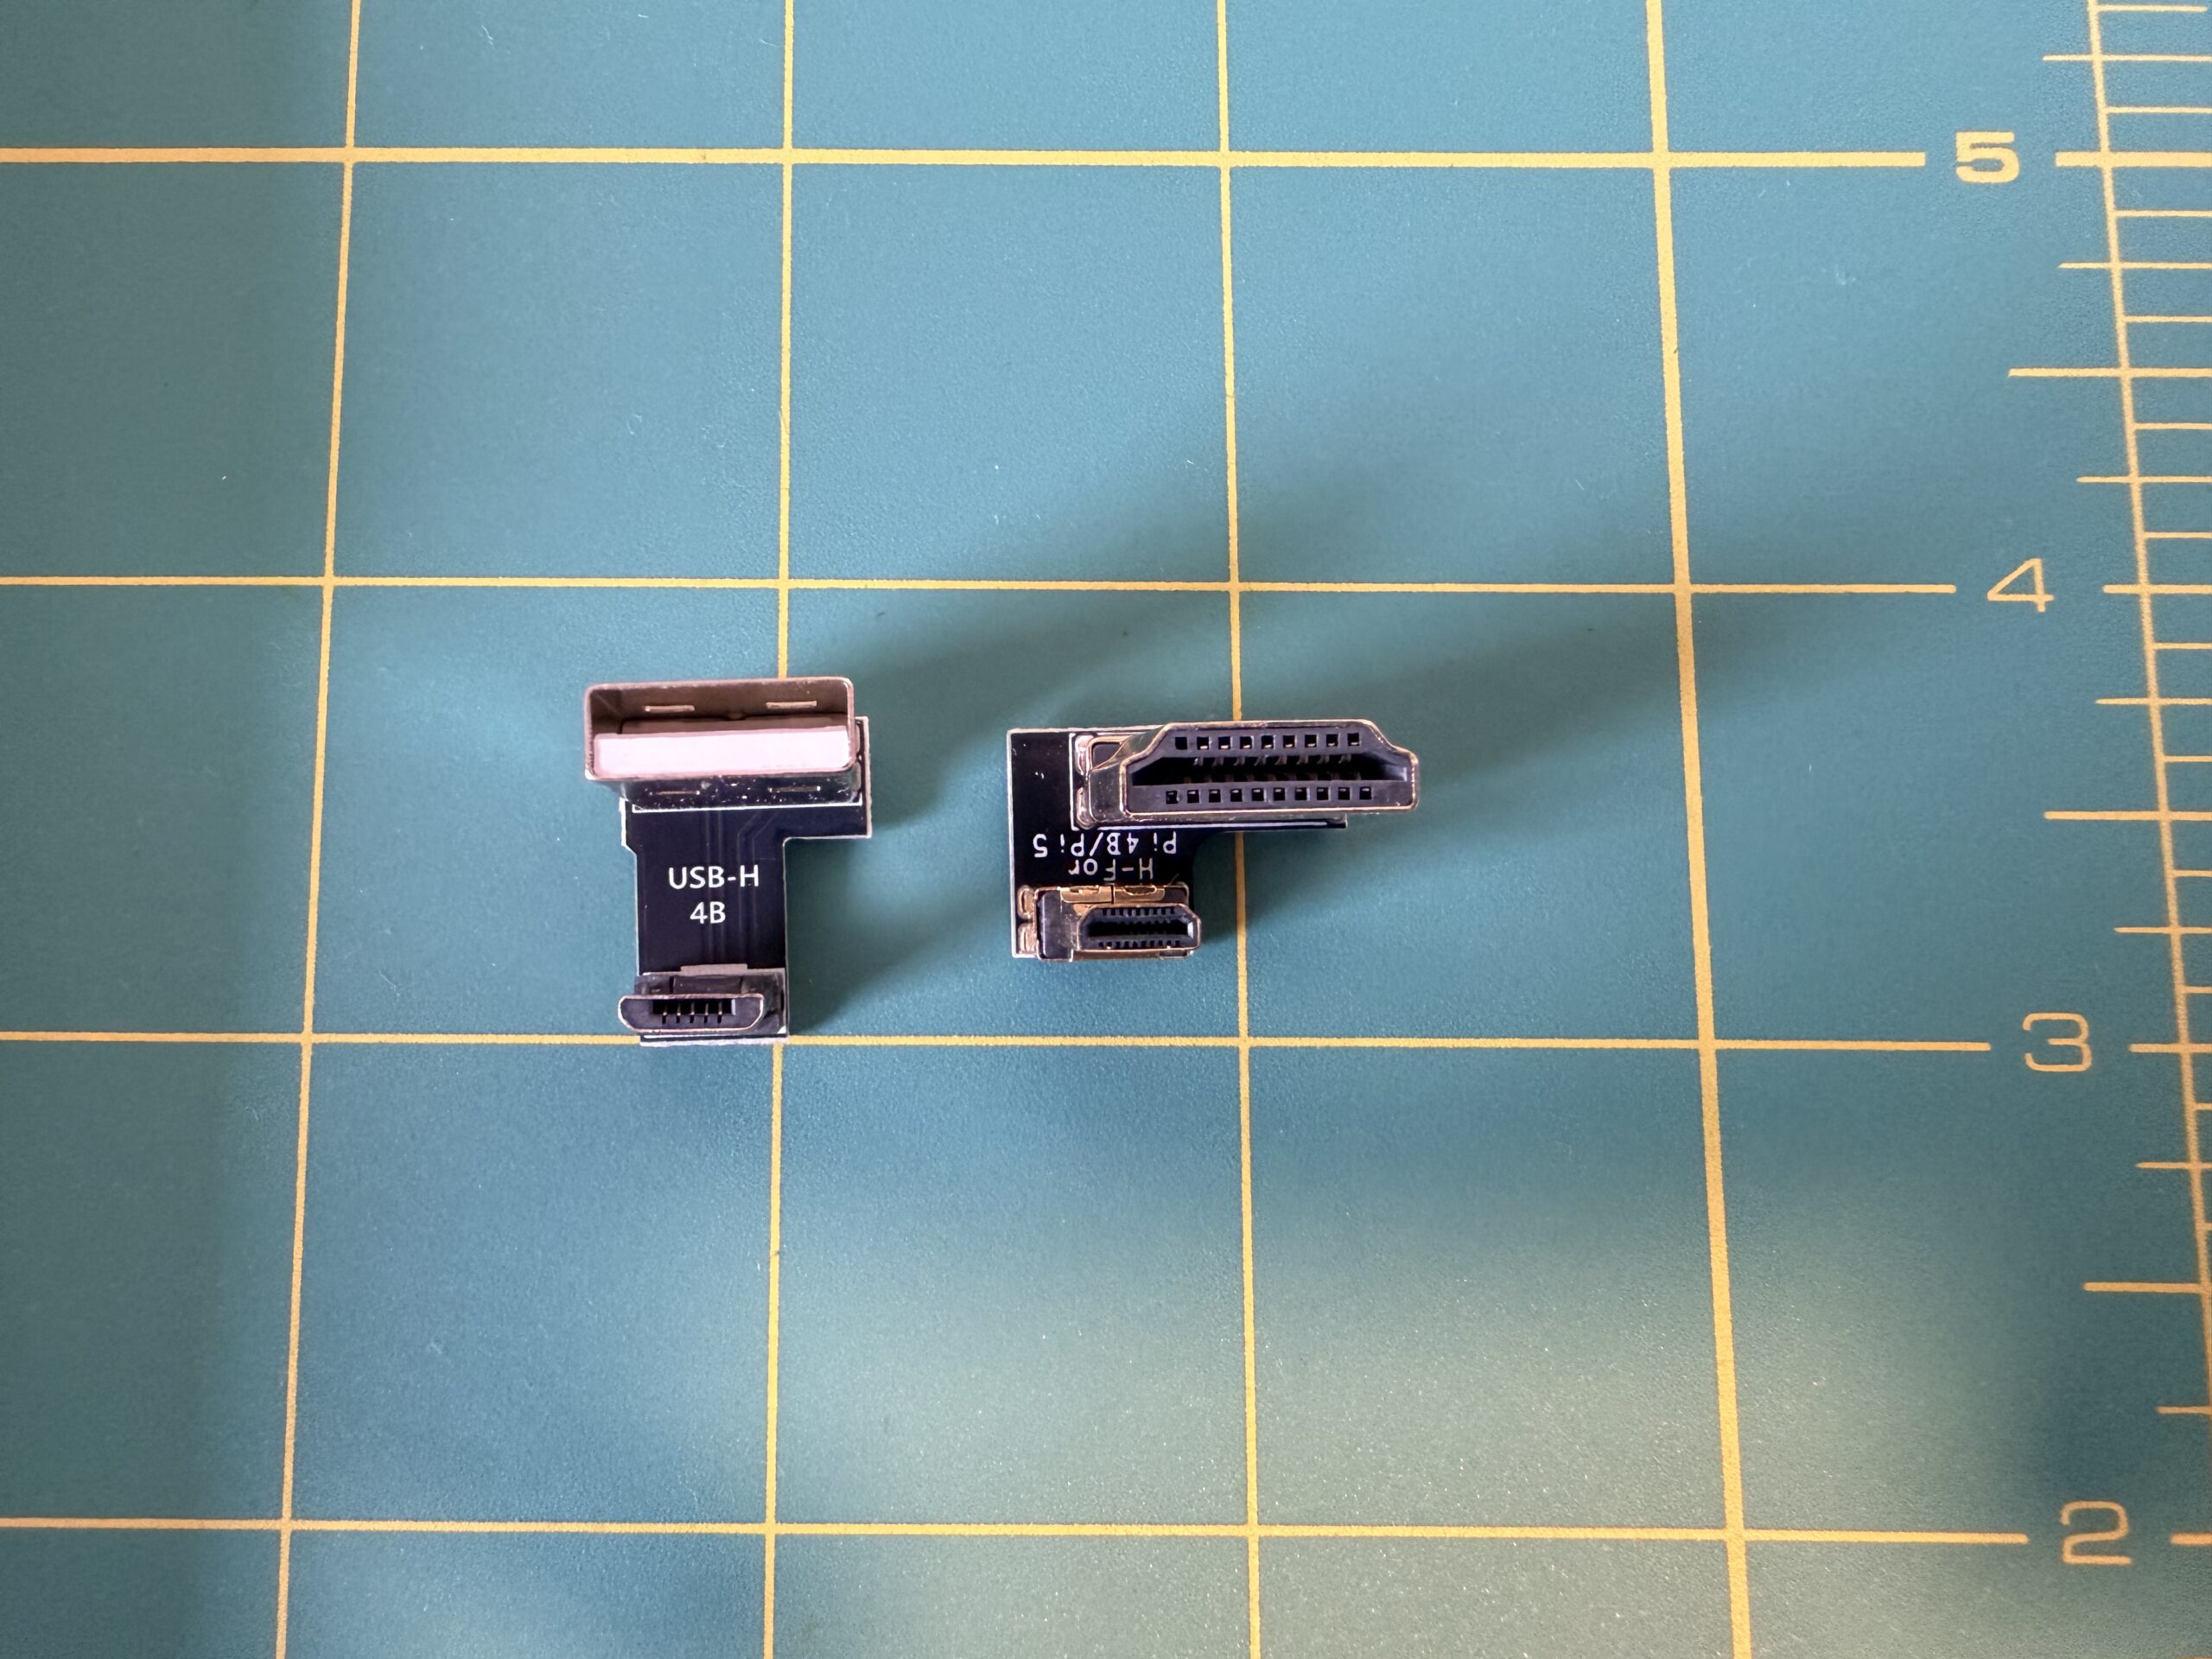
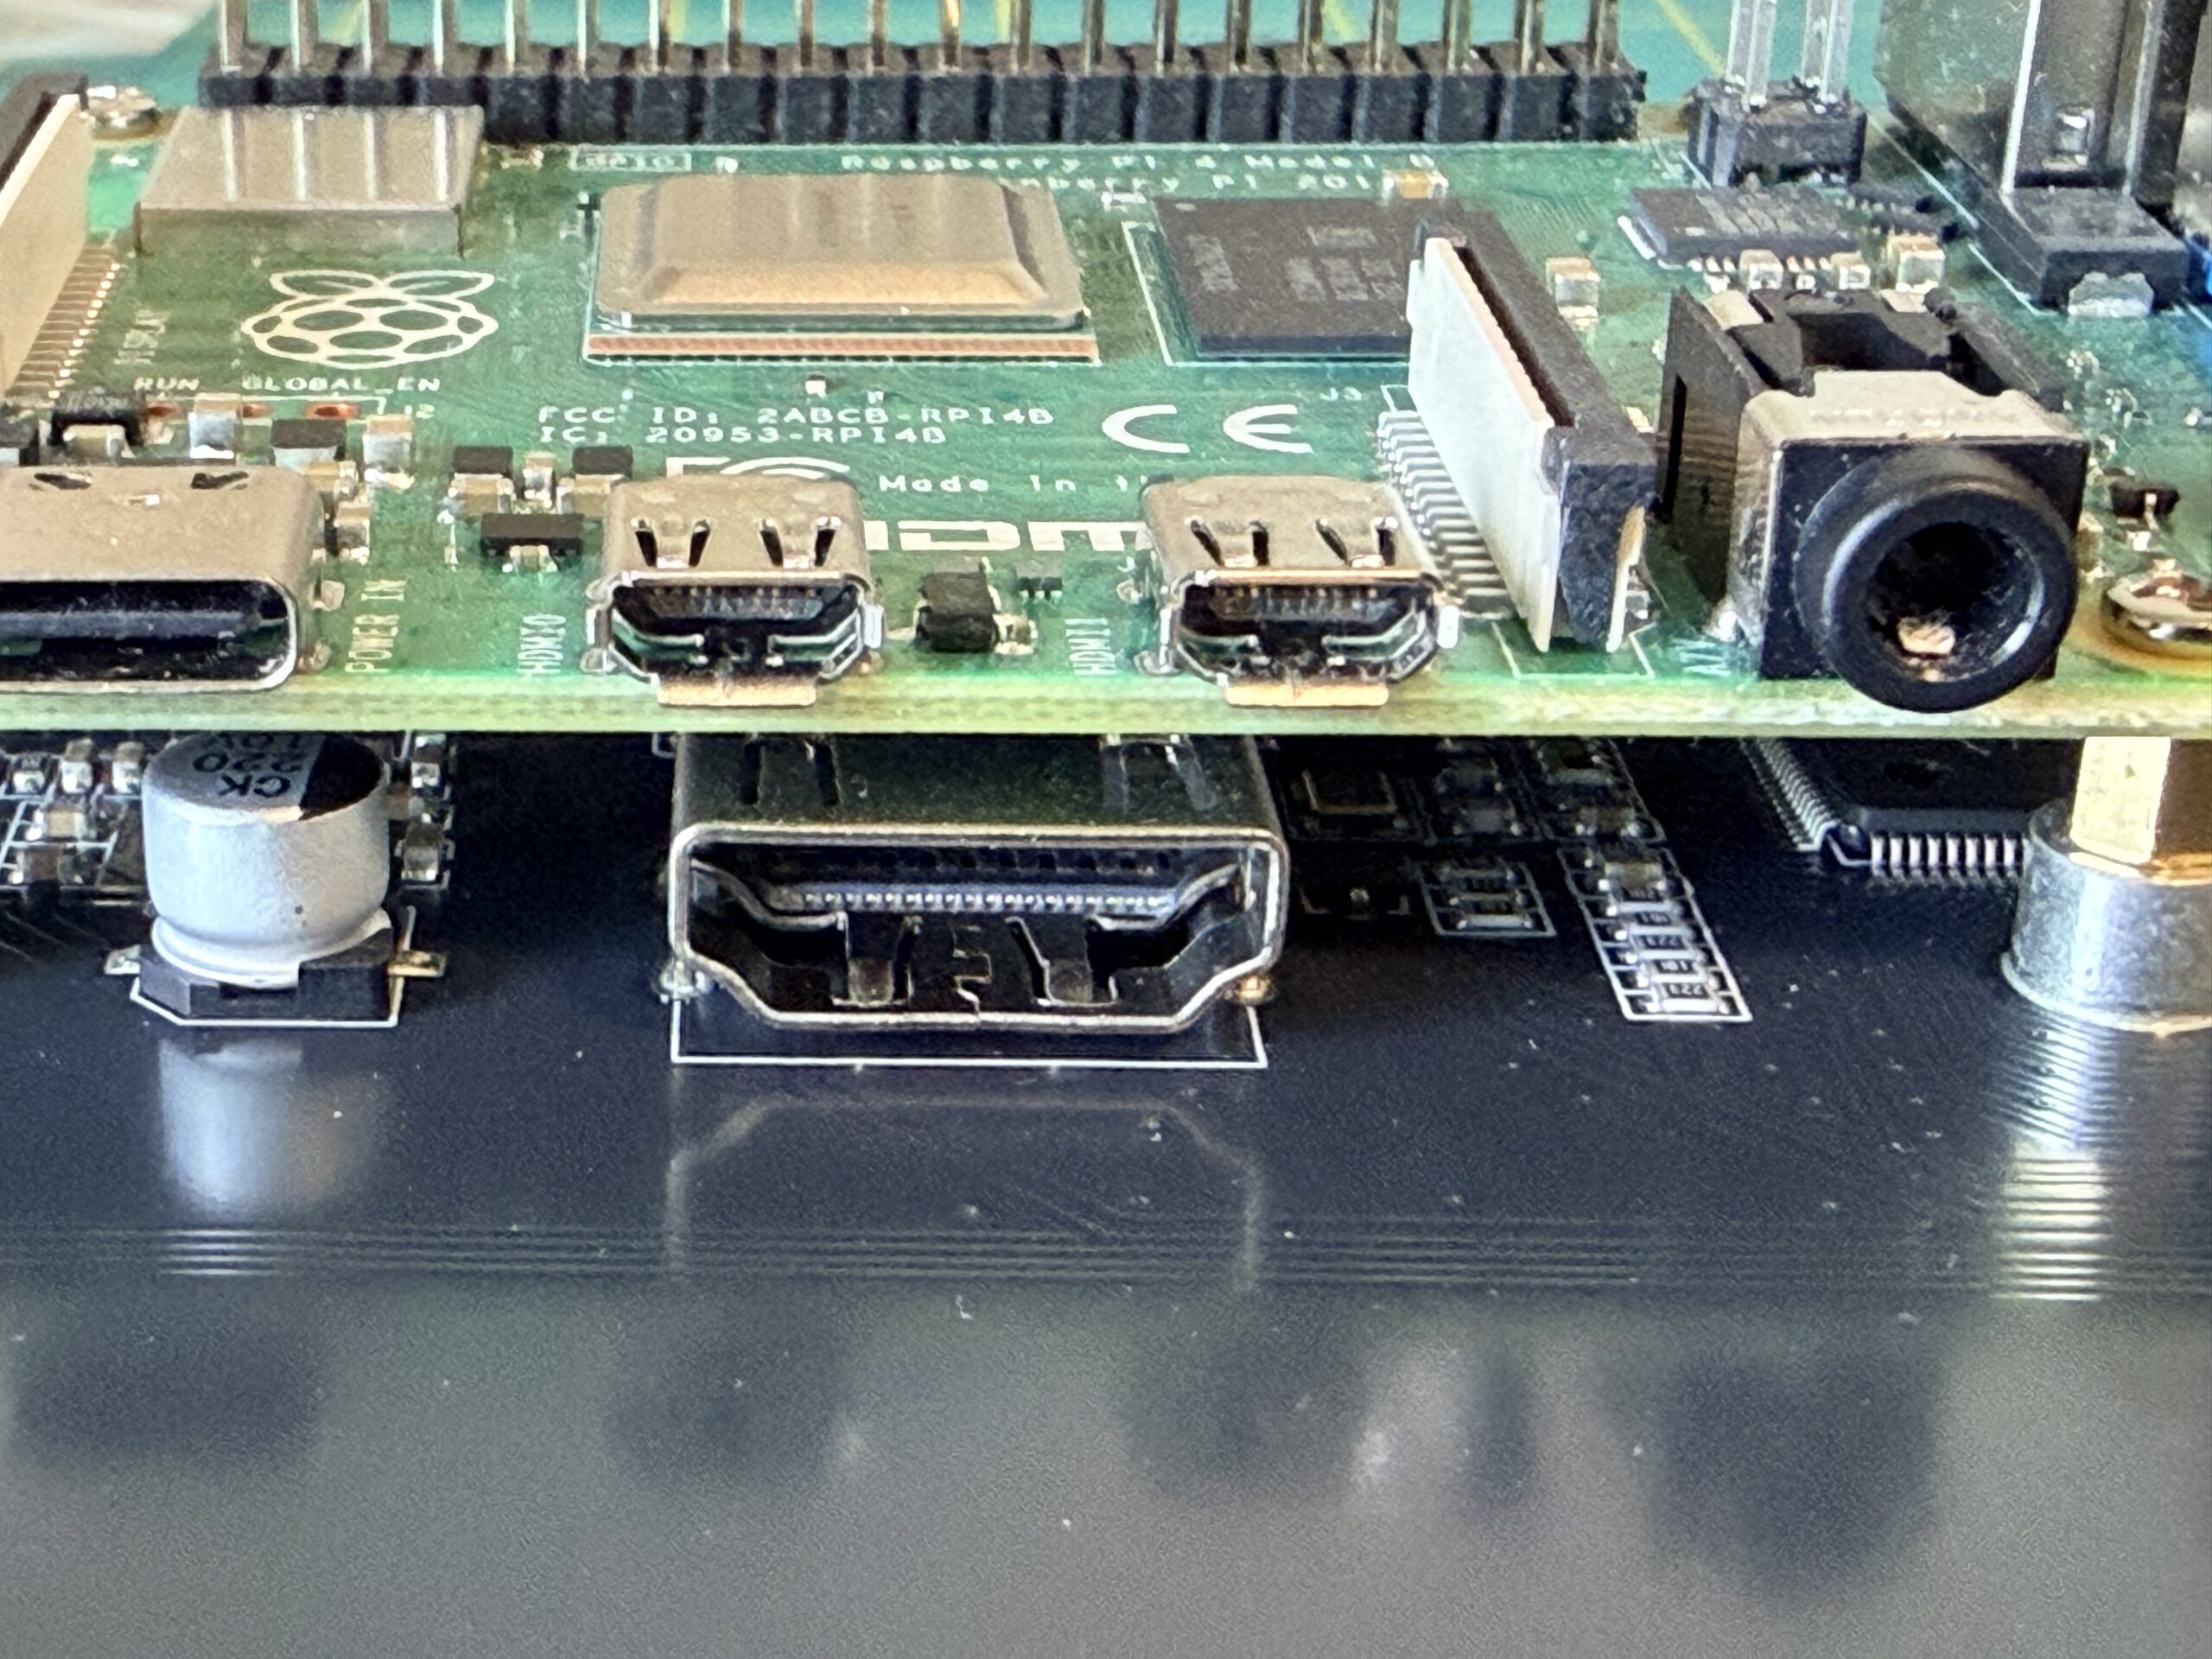
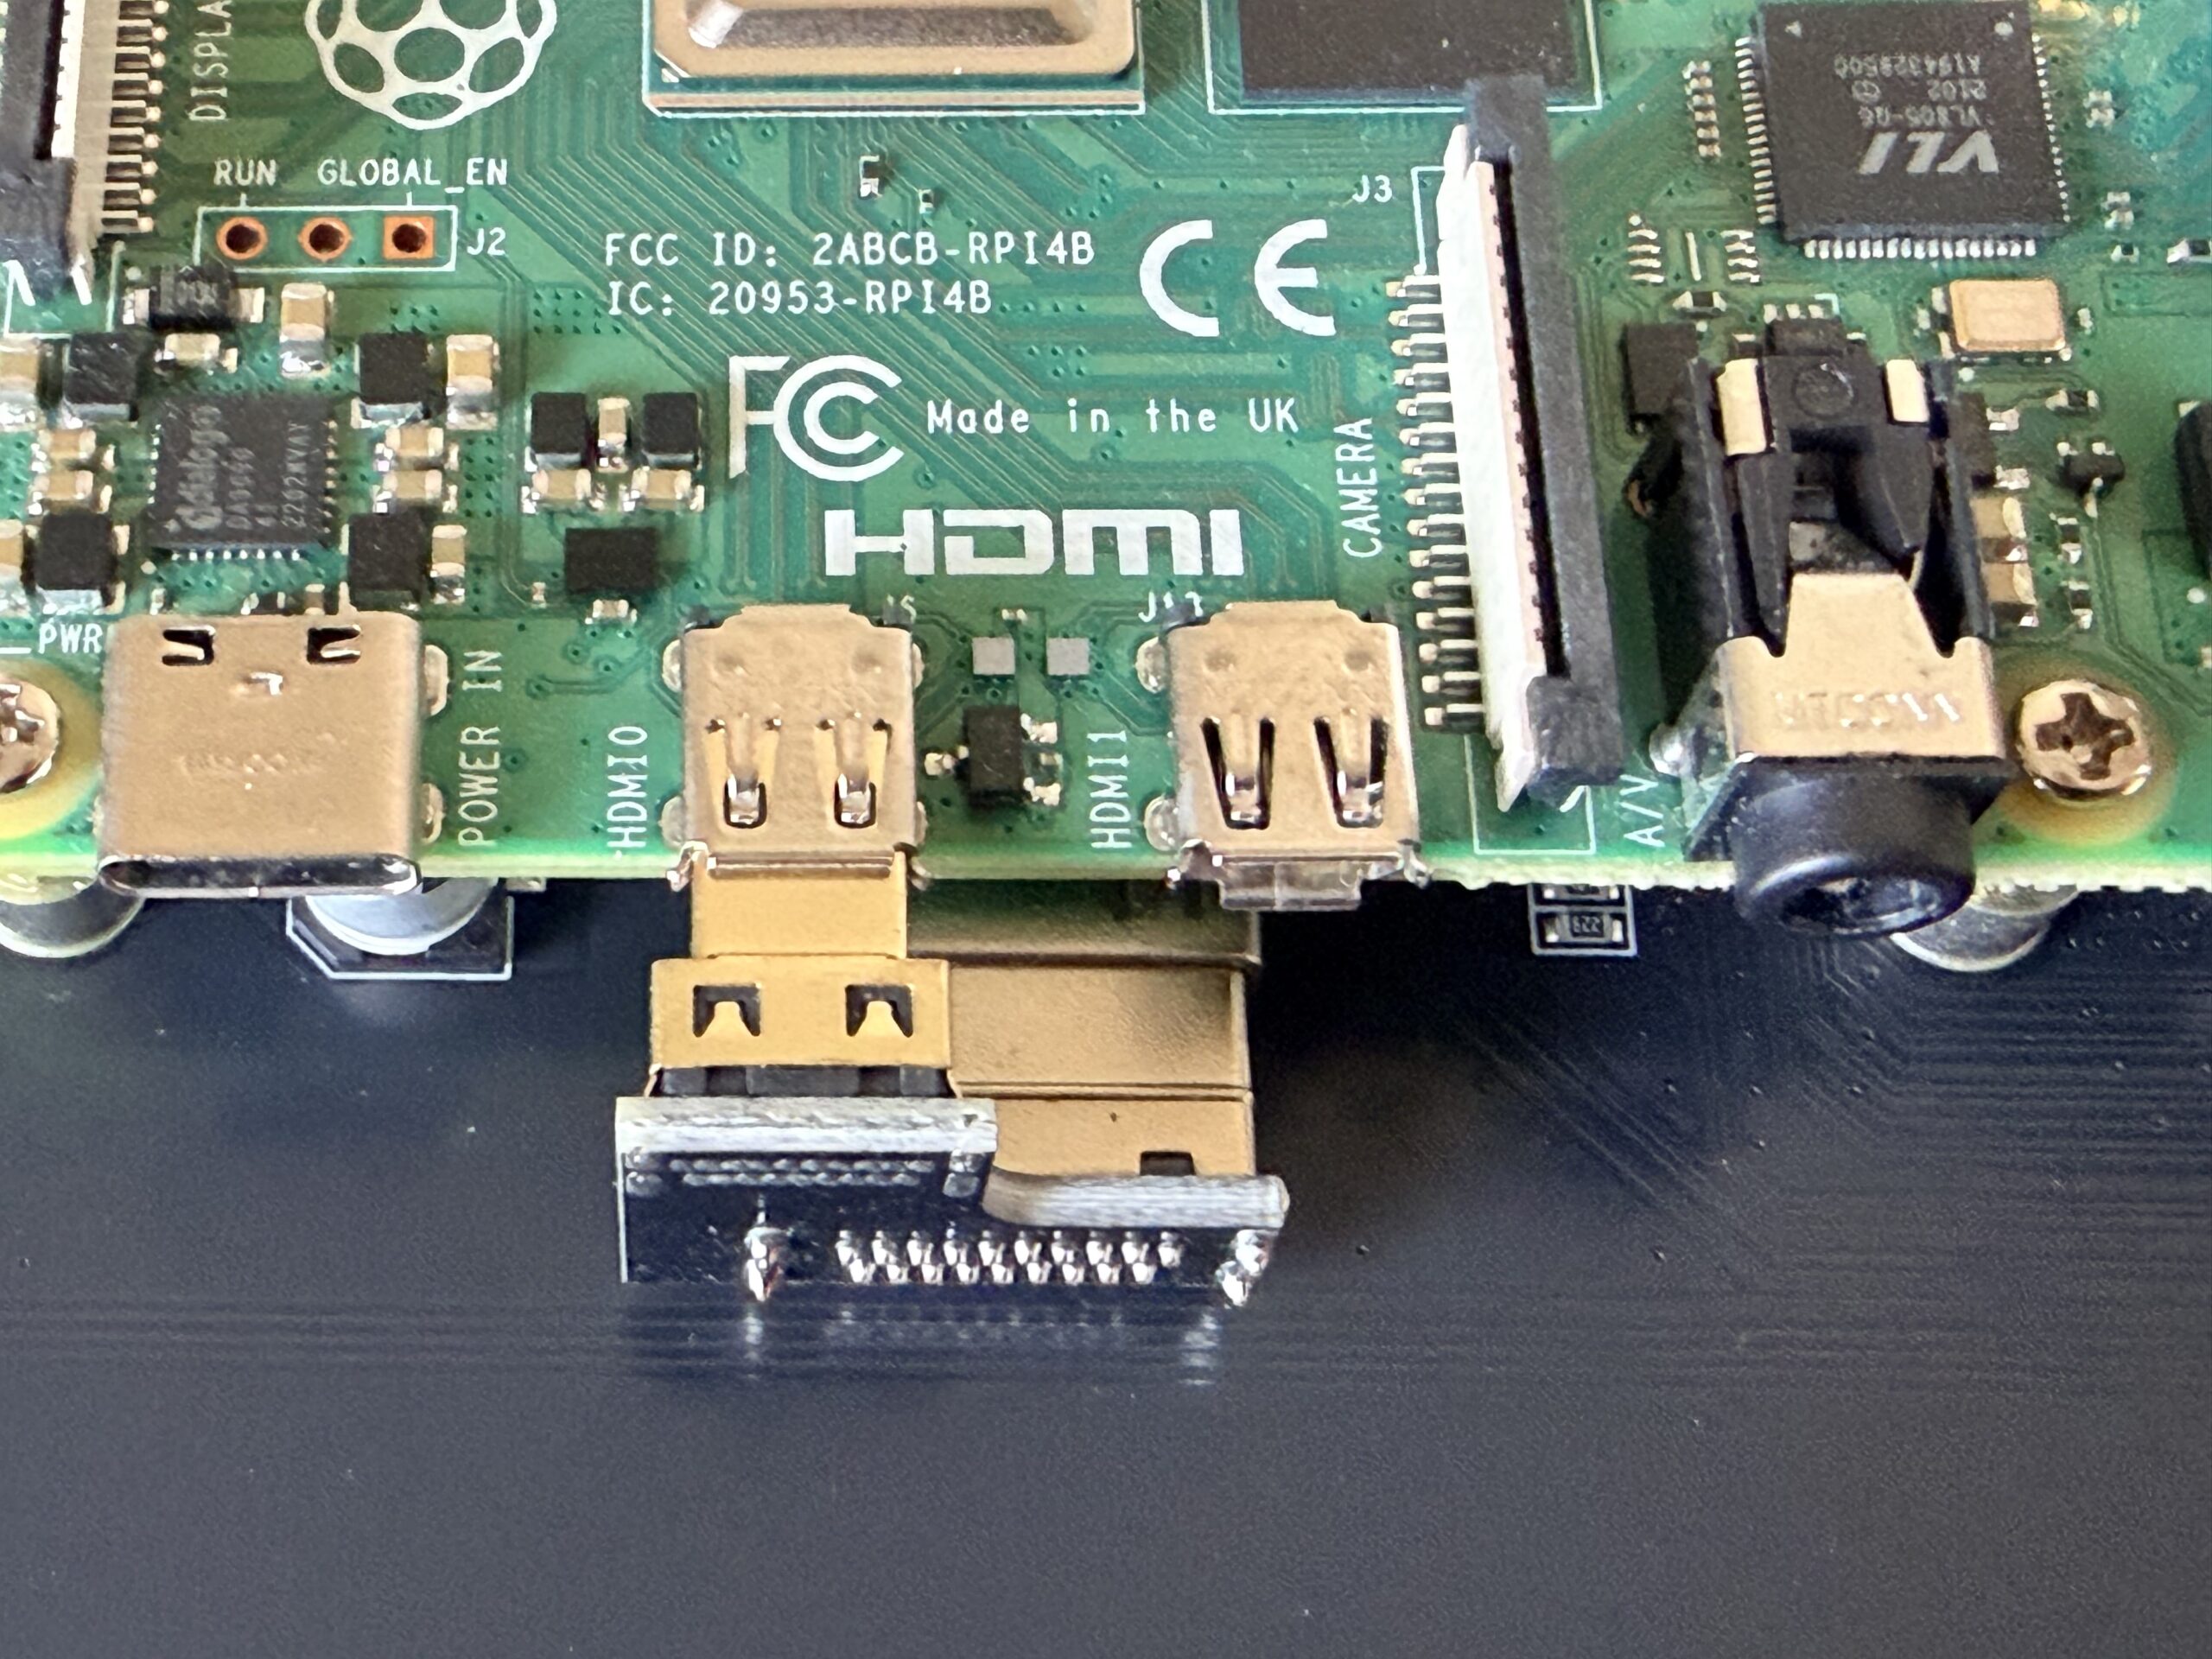
Adjusting the resolution for the screen
Once the screen is mounted, you can plug a USB-C power supply into the Raspberry Pi. The screen will get its power from the USB adapter that is plugged into the Pi. Once your raspberry Pi is booted, open the /boot/firmware/config.txt file to adjust the resolution for the screen.
You want to add these settings to the end of your config.txt. Some of these are dated and not/no longer required for a 4B but they do not do any harm either and are what the official instructions say.:
hdmi_force_edid_audio=1
max_usb_current=1
hdmi_force_hotplug=1
config_hdmi_boost=7
hdmi_group=2
hdmi_mode=87
hdmi_drive=2
display_rotate=0
hdmi_timings=1024 1 50 18 50 600 1 15 3 15 0 0 0 60 0 40000000 3
For reference, this is what my config.txt looks like:
Original /boot/firmware/config.txt
# For more options and information see
# http://rptl.io/configtxt
# Some settings may impact device functionality. See link above for details

# Uncomment some or all of these to enable the optional hardware interfaces
#dtparam=i2c_arm=on
#dtparam=i2s=on
#dtparam=spi=on

# Enable audio (loads snd_bcm2835)
dtparam=audio=on

# Additional overlays and parameters are documented
# /boot/firmware/overlays/README

# Automatically load overlays for detected cameras
camera_auto_detect=1

# Automatically load overlays for detected DSI displays
display_auto_detect=1

# Automatically load initramfs files, if found
auto_initramfs=1

# Enable DRM VC4 V3D driver
dtoverlay=vc4-kms-v3d
max_framebuffers=2

# Don't have the firmware create an initial video= setting in cmdline.txt.
# Use the kernel's default instead.
disable_fw_kms_setup=1

# Run in 64-bit mode
arm_64bit=1

# Disable compensation for displays with overscan
disable_overscan=1

# Run as fast as firmware / board allows
arm_boost=1

[cm4]
# Enable host mode on the 2711 built-in XHCI USB controller.
# This line should be removed if the legacy DWC2 controller is required
# (e.g. for USB device mode) or if USB support is not required.
otg_mode=1

[cm5]
dtoverlay=dwc2,dr_mode=host

[pi5]
dtoverlay=nospi10

[all]
Adjusted /boot/firmware/config.txt
# For more options and information see
# http://rptl.io/configtxt
# Some settings may impact device functionality. See link above for details

# Uncomment some or all of these to enable the optional hardware interfaces
#dtparam=i2c_arm=on
#dtparam=i2s=on
#dtparam=spi=on

# Enable audio (loads snd_bcm2835)
dtparam=audio=on

# Additional overlays and parameters are documented
# /boot/firmware/overlays/README

# Automatically load overlays for detected cameras
camera_auto_detect=1

# Automatically load overlays for detected DSI displays
display_auto_detect=1

# Automatically load initramfs files, if found
auto_initramfs=1

# Enable DRM VC4 V3D driver
dtoverlay=vc4-kms-v3d
max_framebuffers=2

# Don't have the firmware create an initial video= setting in cmdline.txt.
# Use the kernel's default instead.
disable_fw_kms_setup=1

# Run in 64-bit mode
arm_64bit=1

# Disable compensation for displays with overscan
disable_overscan=1

# Run as fast as firmware / board allows
arm_boost=1

[cm4]
# Enable host mode on the 2711 built-in XHCI USB controller.
# This line should be removed if the legacy DWC2 controller is required
# (e.g. for USB device mode) or if USB support is not required.
otg_mode=1

[cm5]
dtoverlay=dwc2,dr_mode=host

[pi5]
dtoverlay=nospi10

[all]

hdmi_force_edid_audio=1
max_usb_current=1
hdmi_force_hotplug=1
config_hdmi_boost=7
hdmi_group=2
hdmi_mode=87
hdmi_drive=2
display_rotate=0
hdmi_timings=1024 1 50 18 50 600 1 15 3 15 0 0 0 60 0 40000000 3
As for the options, here is what they mean:
| Parameter | Meaning |
|---|---|
hdmi_force_edid_audio=1 |
Pretends the display supports every HDMI audio format, including DTS/AC3 passthrough, even if its EDID does not advertise them. This is stronger than simply enabling stereo HDMI audio. |
max_usb_current=1 |
Legacy option for older Pi models that raised the USB current limit. It is obsolete/unnecessary on a Pi 4. |
hdmi_force_hotplug=1 |
Pretends an HDMI display is connected even when the hotplug signal is absent. Useful for displays that are slow to power up or do not signal hotplug correctly. |
config_hdmi_boost=7 |
Increases HDMI signal drive strength for marginal or long cables. It is explicitly ignored on Raspberry Pi 4. |
hdmi_group=2 |
Selects the DMT group, normally used for computer monitors. |
hdmi_mode=87 |
Selects a user-defined custom mode supplied by hdmi_timings. |
hdmi_drive=2 |
Selects true HDMI output, including audio. Value 1 selects DVI-style output without audio. |
display_rotate=0 |
No display rotation. The option is deprecated; zero is already the default. |
hdmi_timings=... |
Defines the detailed custom resolution, blanking intervals, synchronization signals, refresh rate and pixel clock. |
As to hdmi_timings:
| Value | Field | Meaning |
|---|---|---|
1024 |
Horizontal active pixels | Visible width |
1 |
Horizontal sync polarity | Positive/inverted HSync polarity |
50 |
Horizontal front porch | 50 blank pixel clocks after visible content |
18 |
Horizontal sync pulse | HSync lasts 18 pixel clocks |
50 |
Horizontal back porch | 50 blank pixel clocks before visible content |
600 |
Vertical active lines | Visible height |
1 |
Vertical sync polarity | Positive/inverted VSync polarity |
15 |
Vertical front porch | 15 blank lines after visible content |
3 |
Vertical sync pulse | VSync lasts 3 lines |
15 |
Vertical back porch | 15 blank lines before visible content |
0 |
Vertical sync offset A | Unused; normally zero |
0 |
Vertical sync offset B | Unused; normally zero |
0 |
Pixel repetition | Disabled |
60 |
Requested frame rate | Nominally 60 Hz |
0 |
Interlaced | Progressive scan |
40000000 |
Pixel clock | 40 MHz |
3 |
Aspect-ratio code | Signals 16:9 |
Once adjusted, reboot the Pi and you should notice the adjusted desktop resolution to fit nicer.
Creating the picture frame
Requirements
Here are the requirements I had in mind for my picture frame:
- The frame should come up automatically whenever powered up
- The screen, being a touch screen, should still be able to operate with Raspberry Pi OS to, for example, reboot it or shut it off, etc.
- The frame should look for a location on my private network for pictures and automatically copy them to itself and start showing them
- The pictures should live on an external USB stick instead of the SD card to avoid wearing it out and not losing all pictures whenever the SD card gets corrupted or needs re-imaging. This allows for:
- Updating / re-imaging the Pi whenever necessary without having to back up the pictures
- Potentially having a lot more storage for pictures when using a larger USB stick than SD card
- Additionally, it should be possible to add pictures / videos to the USB stick directly
Considerations
Linux service
To run the picture frame, I am using mpv, a free, open source, and cross-platform media player for the command line that can display a wide variety of pictures and videos. I will be running it as a Linux service that starts up once the desktop is booted. The desktop is setup for auto-login to make the picture frame come to life whenever it’s powered up automatically, no user interaction required.
Pi 4 VideoCore VI GPU limit
The Pi 4’s VideoCore VI GPU has a maximum 2D texture dimension of 4096 × 4096 pixels. Loading a picture that is larger than, which these days phone pictures are, will cause the GPU to produce an error similar to this:
Playing: /media/gvenzl/Untitled/2026-06-20 12.26.05.jpg
 ● Image  --vid=1  (mjpeg 5712x4284)
VO: [gpu] 5712x4284 yuv420p
[vo/gpu/libplacebo] Validation failed: params->w <= gpu->limits.max_tex_2d_dim (../src/gpu.c:224)
[vo/gpu/libplacebo]   Backtrace:
[vo/gpu/libplacebo]     #0  /lib/aarch64-linux-gnu/libplacebo.so.349(pl_tex_create+0x2f0) [0x7fb4ed0038]
[vo/gpu/libplacebo]     #1  mpv(+0x13abb0) [0x558fababb0]
[vo/gpu/libplacebo]     #2  mpv(+0x124c7c) [0x558faa4c7c]
[vo/gpu/libplacebo]     #3  mpv(+0x12a840) [0x558faaa840]
[vo/gpu/libplacebo]     #4  mpv(+0x131150) [0x558fab1150]
[vo/gpu/libplacebo]     #5  mpv(+0x12e9f0) [0x558faae9f0]
[vo/gpu/libplacebo]     #6  mpv(+0xafee8) [0x558fa2fee8]
[vo/gpu/libplacebo]     #7  mpv(+0x1301c4) [0x558fab01c4]
[vo/gpu/libplacebo]     #8  /lib/aarch64-linux-gnu/libc.so.6(+0x85f38) [0x7fb3805f38]
[vo/gpu/libplacebo]     #9  /lib/aarch64-linux-gnu/libc.so.6(+0xede9c) [0x7fb386de9c]
V: 00:00:00 / 00:00:00 (0%)
The important part is this: Validation failed: params->w <= gpu->limits.max_tex_2d_dim. This means that the picture exceeded the 2d texture dimensions. There are two remedies for this:
Downscale images on the fly via an additional parameter to mpv: --vf="lavfi=[scale='min(1024,iw)':-2]" This will scale any image on the fly down to 1024 pixels (which is the maximum resolution of the touch screen). The -2 keeps aspect ratio and ensures even height and iw stands for input width. Wrapped in the min() it ensures that smaller pictures aren’t scaled up. However, this scaling on the fly still means that mpv still has to decode and upload the full image into GPU memory before scaling it down to fit the screen. That’s unnecessary CPU/GPU work, which means higher power consumption, and slower transitions for zero visual gain.
The second alternative is to automatically resize the images when loaded on the USB stick. That way mpv just loads media files that have already the target resolution and doesn’t need to do any scaling anymore. The magick utility from the imagemagick library can be used for scaling pictures down. This is my preferred approach, so in the end I will be going down that route.
For video, it’s a similar story. You can let mpv downscale the video on the fly using up lots of CPU but with large videos, such as from my iPhone, the downscaling puts significant burden on the CPU so that mpv had to drop some frames to keep up with the playback. This time, the result is not only additional work and power consumption but also a choppy video playback. The ffmpeg utility, usually already installed on a Raspberry Pi OS, can be used to downscale videos.
Vulkan memory error
On Pi OS Trixie, mpv defaults to Vulkan via the V3DV driver (Pi 4’s Vulkan implementation), and V3DV’s memory management under sustained load is apparently a known rough edge — it can mis-report memory pressure or fragment allocations over time. In my case, after the rotation to the next picture I got the following error:
Jul 12 12:26:17 gvenzl-pi-frame mpv[1596]: V: 00:00:00 / 00:00:00 (0%)
Jul 12 12:26:17 gvenzl-pi-frame mpv[1596]: Playing: /media/gvenzl/Untitled/2026-07-08 14.11.39.jpg
Jul 12 12:26:17 gvenzl-pi-frame mpv[1596]:  ● Image  --vid=1  (mjpeg 1024x768)
Jul 12 12:26:17 gvenzl-pi-frame mpv[1596]: V: 00:00:00 / 00:00:00 (0%)
Jul 12 12:26:17 gvenzl-pi-frame mpv[1596]: VO: [gpu] 1024x768 yuv420p
Jul 12 12:26:17 gvenzl-pi-frame mpv[1596]: V: 00:00:00 / 00:00:00 (0%)
Jul 12 12:26:17 gvenzl-pi-frame mpv[1596]: [vo/gpu/libplacebo] vk->CreateSwapchainKHR(...): VK_ERROR_OUT_OF_HOST_MEMORY (../src/vulkan/swapchain.c:622)
Jul 12 12:26:17 gvenzl-pi-frame mpv[1596]: V: 00:00:00 / 00:00:00 (0%)
Jul 12 12:26:17 gvenzl-pi-frame mpv[1596]: [vo/gpu/libplacebo] Failed (re)creating swapchain!
Jul 12 12:26:17 gvenzl-pi-frame mpv[1596]: V: 00:00:00 / 00:00:00 (0%)
Jul 12 12:26:17 gvenzl-pi-frame mpv[1596]: [vo/gpu/libplacebo] vk->CreateSwapchainKHR(...): VK_ERROR_OUT_OF_HOST_MEMORY (../src/vulkan/swapchain.c:622)
Jul 12 12:26:17 gvenzl-pi-frame mpv[1596]: V: 00:00:00 / 00:00:00 (0%)
Jul 12 12:26:17 gvenzl-pi-frame mpv[1596]: [vo/gpu/libplacebo] Failed (re)creating swapchain!
Jul 12 12:26:17 gvenzl-pi-frame mpv[1596]: V: 00:00:00 / 00:00:00 (0%)
Jul 12 12:26:17 gvenzl-pi-frame mpv[1596]: [vo/gpu/libplacebo] vk->CreateSwapchainKHR(...): VK_ERROR_OUT_OF_HOST_MEMORY (../src/vulkan/swapchain.c:622)
Jul 12 12:26:17 gvenzl-pi-frame mpv[1596]: V: 00:00:00 / 00:00:00 (0%)
Jul 12 12:26:17 gvenzl-pi-frame mpv[1596]: [vo/gpu/libplacebo] Failed (re)creating swapchain!
If you look closely, you can see that it is stuck in recreating the swapchain and hence the frame never advances to the next picture. It’s essentially stuck. Luckily Vulkan can be bypassed entirely and OpenGL used instead. OpenGL via EGL is more mature on the Pi 4, avoids libplacebo’s Vulkan path completely, and is perfectly capable for a slideshow. To use it, mpv just requires the --gpu-api=opengl option.
Video hardware decoding
The Raspberry Pi 4 has a built-in H.265 4Kp60 decoder, meaning no decoding via software and additional CPU cycles is required. However, during my tests I found that mpv doesn’t pick it up and defers to its own software-based decoding. The videos played fine using up more CPU and I measured an additional 0.4W consumed during playpack compared to hardware decoding. In the grand scheme, this isn’t a big deal but the decoder is there, so why not use it. To nudge mpv to use the hardware decoder instead, the --vd=h264_v4l2m2m option can be used, instructing mpv to use the video decoder h264_v4l2m2m instead of its own h264 software-based one.
Playlist refresh
To run the picture frame, I need a picture frame service which runs mpv for me. There are a couple of considerations. mpv generates the playlist on startup and only on startup. If new files are added to the folder, mpv will not automatically pick them up. There are two solutions for that: One solution would be to have mpv open a socket and inform it about new pictures/videos via the socket. That will require another service that will look for new files and inform mpv. The second solution would be to simply restart mpv every so often and have it generate a new playlist on startup again. This is not as clean as it will stop and start mpv and hence stop showing pictures once in a while for a short duration. But it is a simple solution.
However, because I need a service to resize pictures/videos anyway, and hence already look for new files, I can easily add socket communication to this one, which makes it a clean solution. To communicate over the socket, I need the socat utility.
SMB / Samba mount
I want the main source location for new images to be a SMB network location on my local NAS. That way, I can just drop files on the network location from my laptop when, e.g., cleaning pictures from a trip. The cifs-utils packages provides the necessary SMB drivers and is usually already preinstalled on Rasberrpy Pi OS.
Installing dependencies
All the dependencies are available out of the box and can be installed via: sudo apt install -y mpv imagemagick ffmpeg socat cifs-utils
Installing dependencies
gvenzl@gvenzl-pi-frame:~ $ sudo apt install -y mpv imagemagick socat cifs-utils
ffmpeg is already the newest version (8:7.1.5-0+deb13u1+rpt1).
cifs-utils is already the newest version (2:7.4-1).
Installing:
  imagemagick  mpv  socat

Suggested packages:
  libcuda1

Summary:
  Upgrading: 0, Installing: 3, Removing: 0, Not Upgrading: 0
  Download size: 1,710 kB
  Space needed: 5,599 kB / 21.3 GB available

Get:1 http://deb.debian.org/debian-security trixie-security/main arm64 imagemagick arm64 8:7.1.1.43+dfsg1-1+deb13u11 [29.4 kB]
Get:2 http://deb.debian.org/debian trixie/main arm64 mpv arm64 0.40.0-3+deb13u1 [1,270 kB]
Get:3 http://deb.debian.org/debian trixie/main arm64 socat arm64 1.8.0.3-1 [411 kB]
Fetched 1,710 kB in 1s (1,816 kB/s)
Selecting previously unselected package imagemagick.
(Reading database ... 123103 files and directories currently installed.)
Preparing to unpack .../imagemagick_8%3a7.1.1.43+dfsg1-1+deb13u11_arm64.deb ...
Unpacking imagemagick (8:7.1.1.43+dfsg1-1+deb13u11) ...
Selecting previously unselected package mpv.
Preparing to unpack .../mpv_0.40.0-3+deb13u1_arm64.deb ...
Unpacking mpv (0.40.0-3+deb13u1) ...
Selecting previously unselected package socat.
Preparing to unpack .../socat_1.8.0.3-1_arm64.deb ...
Unpacking socat (1.8.0.3-1) ...
Setting up socat (1.8.0.3-1) ...
Setting up imagemagick (8:7.1.1.43+dfsg1-1+deb13u11) ...
Setting up mpv (0.40.0-3+deb13u1) ...
Processing triggers for desktop-file-utils (0.28-1) ...
Processing triggers for hicolor-icon-theme (0.18-2) ...
Processing triggers for man-db (2.13.1-1) ...
Processing triggers for mailcap (3.74) ...
Once that is done, I can now take care of the rest, which is a network mount and a couple of Linux services.
Configuring the SMB network mount
To create the network mount, a couple of steps are required.
Create a mount point
sudo mkdir -p /mnt/pictures-ingest
Create credentials file
Creating a credentials file keeps the username/password out of /etc/fstab. Make sure its permissions are locked down to only the root user.
sudo mkdir /etc/samba
echo "username=your_nas_username
password=your_nas_password" | sudo tee -a /etc/samba/credentials >/dev/null
sudo chmod 400 /etc/samba/credentials
Test the mount manually
Manually mount the network location to test whether the setup works. Replace NAS_IP_OR_HOSTNAME and SHARE_NAME with the actual NAS IP address and share. uid=1000,gid=1000 maps the Pi user (check your actual UID/GID with id if not the default pi/first user). vers=3.0 forces SMB3; drop it or try vers=2.0/vers=1.0 if your NAS is older and negotiation fails.
sudo mount -t cifs //NAS_IP_OR_HOSTNAME/SHARE_NAME /mnt/pictures-ingest -o credentials=/etc/samba/credentials,uid=1000,gid=1000,vers=3.0
If that mounts cleanly and ls /mnt/pictures-ingest works, it’s time to make it permanent by adding it to /etc/fstab. If not, double check your credentials, IP address and share name.
Make mount persistent
Add the following line to /etc/fstab, replacing the place holders:
echo "//NAS_IP_OR_HOSTNAME/SHARE_NAME /mnt/pictures-ingest cifs credentials=/etc/samba/credentials,uid=1000,gid=1000,vers=3.0,_netdev,x-systemd.automount 0 0" | sudo tee -a /etc/fstab >/dev/null
_netdevtells the system this is a network filesystem, so it waits for networking before mounting (important on boot).x-systemd.automountmounts on first access instead of blocking boot if the NAS happens to be unreachable — useful for an appliance-style Pi so it doesn’t hang waiting on the network share every boot.
Test the fstab entry without rebooting
To test the fstab entry without rebooting, simply unmount the share and mount -a again:
sudo umount /mnt/pictures-ingest
sudo systemctl daemon-reload
sudo mount -a
If ls /mnt/pictures-ingest returns an empty folder again, the SMB mount is working fine.
The picture frame service
The picture frame service essentially just runs mpv with a bunch of parameters:
mpv \
  --gpu-api=opengl \
  --vd=h264_v4l2m2m \
  --fs \
  --idle=yes \
  --loop-playlist=inf \
  --image-display-duration=3600 \
  --shuffle \
  --input-ipc-server=/tmp/pi-frame.socket \
  /media/gvenzl/Pi-Frame
--gpu-api=opengl: Instructsmpvto use OpenGL due to above explained Vulkan memory error--vd=h264_v4l2m2m: Instructsmpvto use the H.264 hardware video decoder--fs: Runsmpvin full screen--idle=yes: Makesmpvwait idly instead of quitting when there is no file to play--loop-playlist: Loops playback infinitely--image-display-duration=3600: If the current file is an image, show the image for the given number of seconds (1 hour)--shuffle: Play files in random order--input-ipc-server=/tmp/pi-frame.socket: Enable the IPC support and create the listening socket for the other service to tellmpvof new files/media/gvenzl/Pi-Frame: The location of the files that should be displayed
The service is installed as a user service installed at ~/.config/systemd/user/pi-frame.service, hence doesn’t require sudo privileges, and looks as follows:
pi-frame.service
#
# Runs an mpv fullscreen image slideshow on the directly-attached
# HDMI touchscreen display. Points only at the local display folder,
# which is populated and maintained by pi-frame-ingest.service.
#
# --idle=yes keeps mpv open and waiting even if the display folder
# is empty on first boot. Files appended via IPC by the ingest
# service will appear immediately without restarting mpv.
#
# Quitting mpv via touch (clean exit, code 0) will NOT auto-restart
# it. Use 'systemctl --user start pi-frame' to bring it back.
# Crashes restart automatically.
#
# Install:
#   mkdir -p ~/.config/systemd/user
#   cp pi-frame.service ~/.config/systemd/user/
#   systemctl --user daemon-reload
#   systemctl --user enable --now pi-frame.service
#
# Useful commands:
#   systemctl --user status pi-frame
#   systemctl --user stop pi-frame
#   systemctl --user start pi-frame
#   systemctl --user disable pi-frame    # stop starting on login

[Unit]
Description=Pi-Frame - display
After=default.target
# Start the ingest service alongside mpv. Ingest has no display
# dependency so it doesn't belong under graphical-session.target
# directly - owning it here avoids an ordering cycle.
Wants=pi-frame-ingest.service

[Service]
Type=simple

# Small buffer to let the Wayland compositor settle
# and USB/network drives mount before mpv
# tries to open a fullscreen window
ExecStartPre=/bin/sleep 8

# Remove any stale socket left over from a previous run. mpv will
# not overwrite an existing socket file, so without this a crash
# leaves a dead socket that silently disables IPC on restart.
# The leading - means systemd ignores failure (i.e. file not found).
ExecStartPre=-/bin/rm -f /tmp/pi-frame.socket

# Adjust display folder path to match your setup.
# This should be a locally mounted folder - never point mpv at the raw input
# device (USB/network). The ingest service populates this folder.
ExecStart=mpv   --gpu-api=opengl   --vd=h264_v4l2m2m   --fs   --idle=yes   --loop-playlist=inf   --image-display-duration=3600   --shuffle   --input-ipc-server=/tmp/pi-frame.socket   /media/gvenzl/Pi-Frame

# Restart on crash only. Clean quit (e.g. via touch) stays stopped.
Restart=on-failure
RestartSec=5

[Install]
WantedBy=default.target
The service starts up when the default.target is reached and waits for 8 seconds for USB/network devices and the desktop to come up. Unfortunately, the Wayland / labwc configuration doesn’t automatically activate graphical-session.target on boot, so I had to revert to a simple “start and wait” method with the ExecStartPre=/bin/sleep 8 instruction. The alternative would be to put a *.desktop file under ~/.config/autostart that labwc processes on startup and have that file invoke systemctl --user start pi-frame but that’s another file to take care of for no real benefit. Unfortunately, the 8 second sleep means that subsequent systemctl --user start pi-frame commands will also take 8 seconds. But given that this frame is (power) plug’n’play, there won’t ever be a manual systemctl call. Note that the service also wants the pi-frame-ingest service, which is the picture loading and resizing service.
The picture/video ingest service
The ingest service is a bigger piece but still manageable. Because it involves more than just one command, the service itself is wrapped around a shell script. The service file itself is simple and looks like this:
pi-frame-ingest.service
#
# Polls an input location on a fixed interval for new image files.
# Resizes each one to fit the display, moves it to the local display
# folder, and notifies mpv via IPC so the new image appears in the
# running slideshow immediately.
#
# Polling is used rather than inotify because inotify does not receive
# change events reliably over NFS.
#
# Also does a sweep of the input folder on startup so any files
# that arrived while the Pi was off are processed right away.
#
# If mpv isn't running when a file arrives, the file still lands
# in the display folder and will appear on next mpv start.
#
# Requires: socat imagemagick
#   sudo apt install -y socat imagemagick
#
# Install:
#   cp pi-frame-ingest.service ~/.config/systemd/user/
#   systemctl --user daemon-reload
#   systemctl --user enable --now pi-frame-ingest.service
#
# Useful commands:
#   systemctl --user status pi-frame-ingest

[Unit]
Description=Pi-Frame - image ingest and resize
# Start after pi-frame so the IPC socket is available for
# live-appending. Wants= rather than Requires= so this service
# keeps running even if mpv is intentionally stopped.
After=pi-frame.service
Wants=pi-frame.service

[Service]
Type=simple

# Arguments: <input_dir> <display_dir> <socket> <max_dimension> <poll_interval_seconds>
# Adjust all five to match your setup.
ExecStart=/home/gvenzl/.local/bin/pi-frame-ingest   /mnt/pictures-ingest,/media/gvenzl/Pi-Frame/load   /media/gvenzl/Pi-Frame   /tmp/pi-frame.socket   1024   600   3600

# Always restart - if the poll loop exits for any reason bring it
# back automatically
Restart=always
RestartSec=5
The service starts after pi-frame so that the socket location is already created by mpv and invokes a pi-frame-ingest shell script that takes one or more input locations (the SMB share and the USB stick itself), an output location (the USB stick), the socket location, max display width and height resolution and a poll interval. The script then itself looks for new media files in the input location(s), resizes and put them in the new location and informs mpv of the new file. The script has a couple of smarts built in, like not to resize the file over the network drive but locally and putting it back if anything fails, etc.
Installing and starting the services
All that is left is installing the pieces and starting the services:
mkdir -p ~/.config/systemd/user
mkdir -p ~/.local/bin
cp pi-frame-ingest.sh ~/.local/bin/pi-frame-ingest
chmod +x ~/.local/bin/pi-frame-ingest
cp pi-frame.service ~/.config/systemd/user/
cp pi-frame-ingest.service ~/.config/systemd/user/
systemctl --user daemon-reload
systemctl --user enable --now pi-frame.service
The frame in action
And this is what the result looks like:
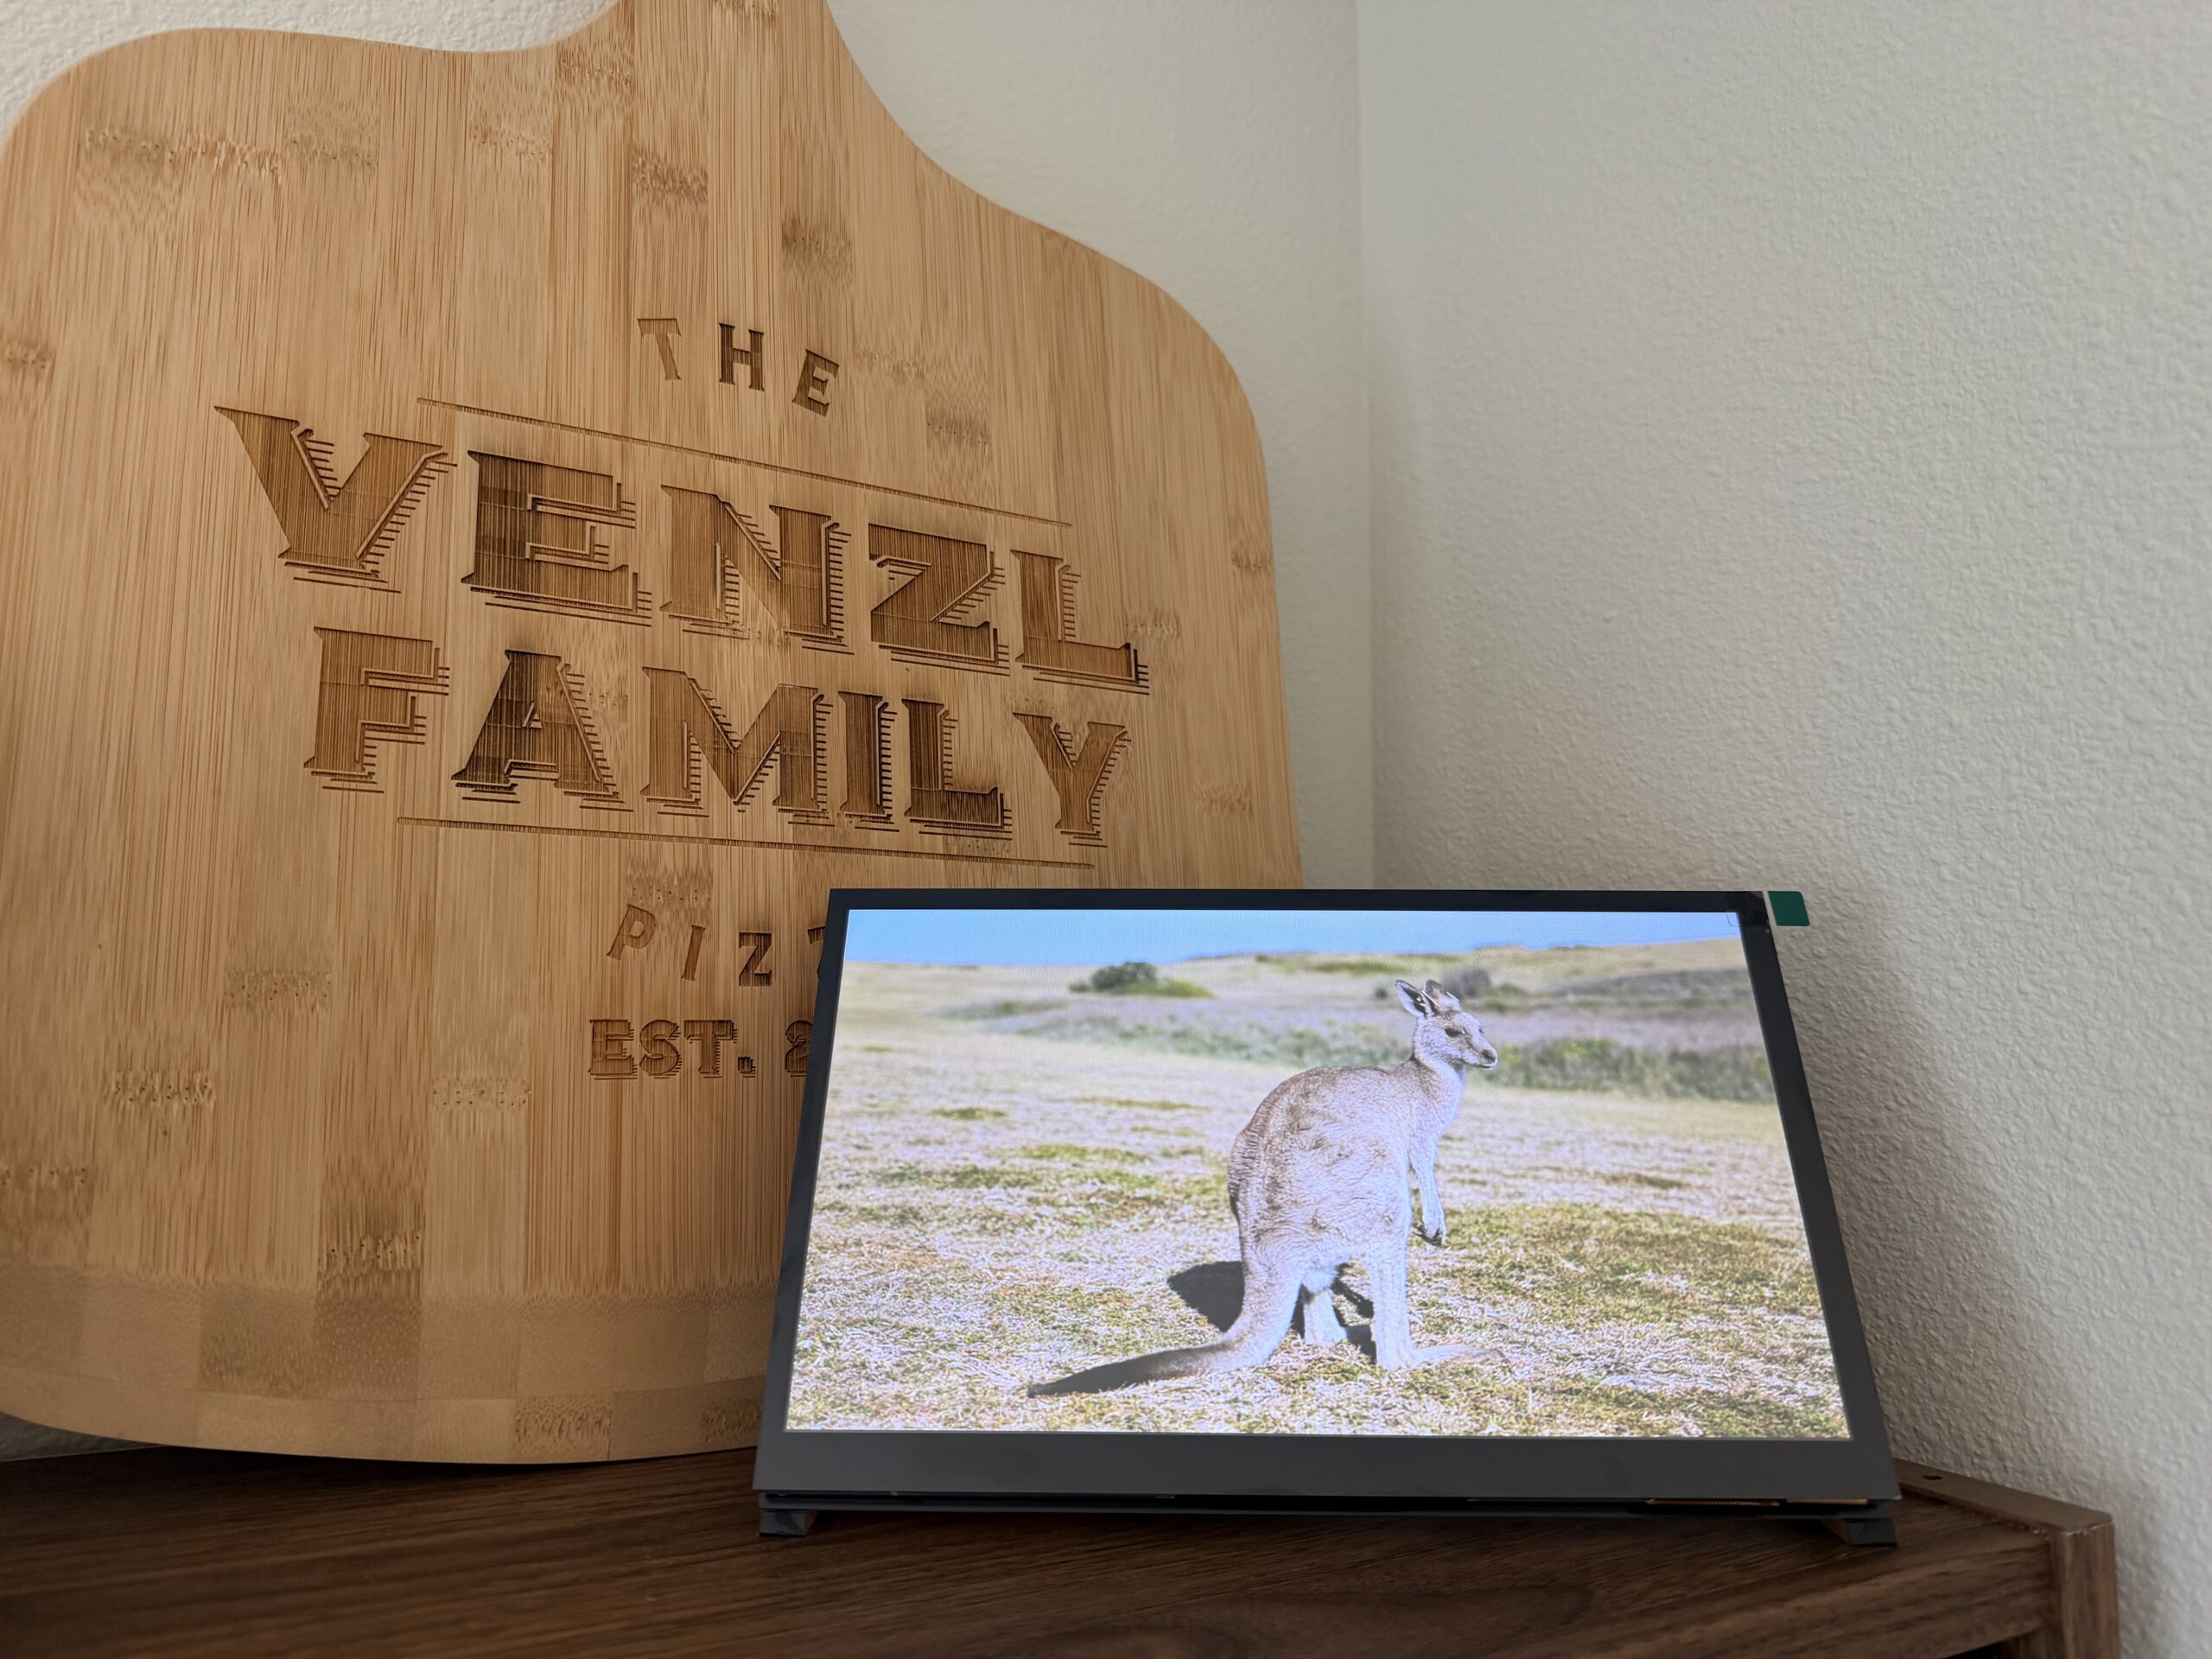
Of course, I didn’t just fiddle around with a couple of commands and left it at that. I have put them all in a short install script up on GitHub: https://github.com/gvenzl/pi-frame/