With a lot of the Oracle Database Free and 23ai efforts behind me – for the time being, the time has come for me to put some focus back on the cloud-native world again. Today, I’ll give you a quick demonstration of how you can create an OCI (Oracle Cloud Infrastructure) Container Registry and upload container images to it.
Creating an OCI Container Registry
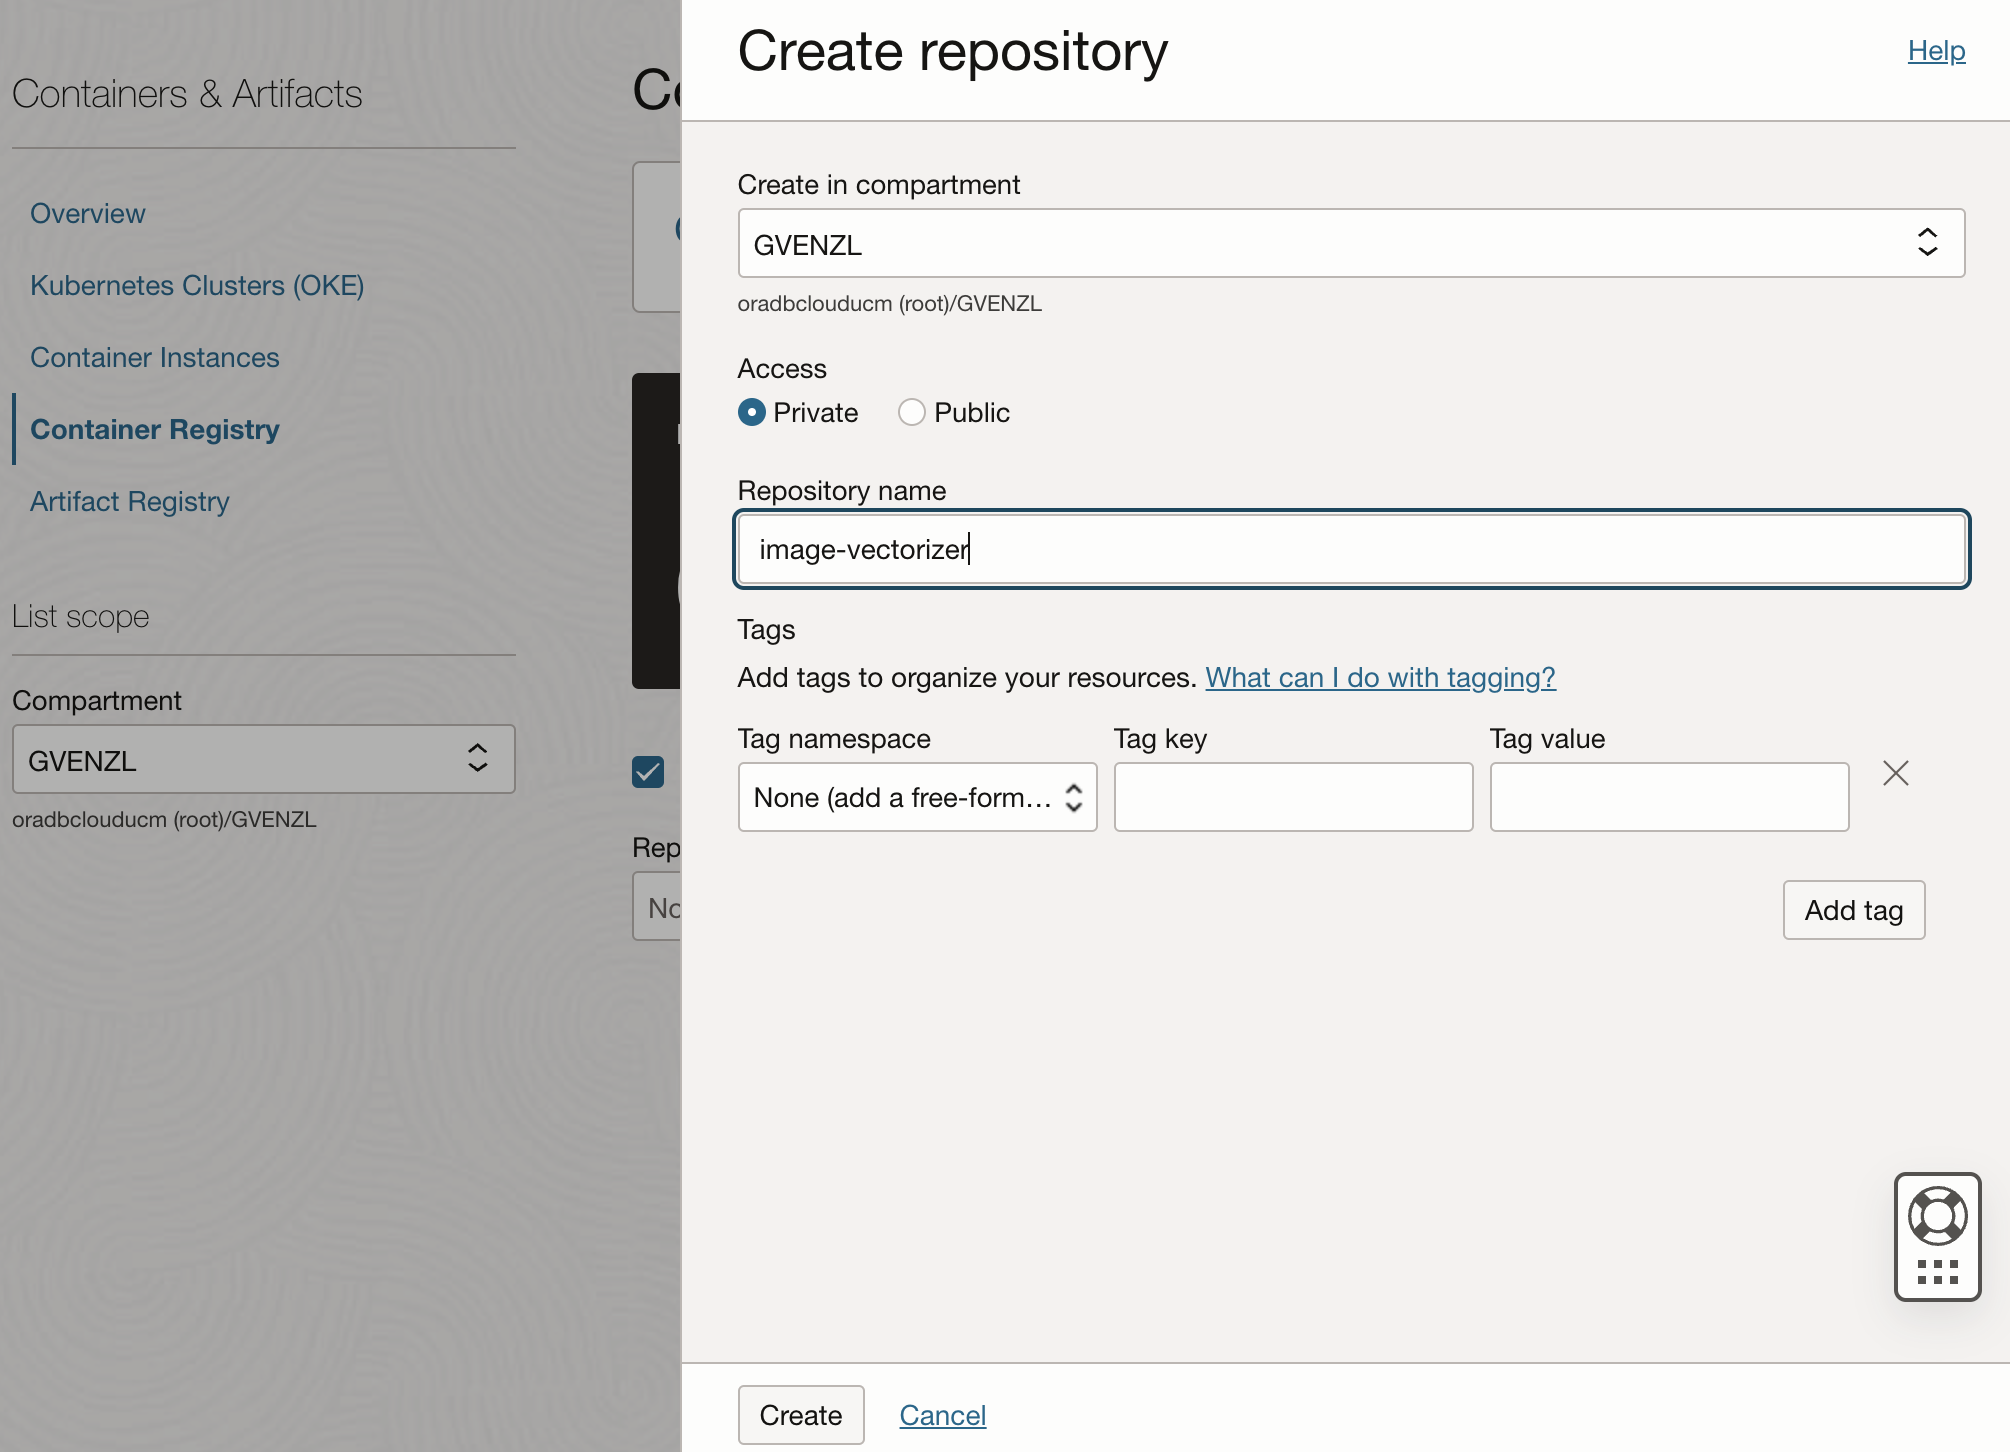
In your OCI console, head over to Developer Services --> Containers & Artifacts --> Container Registry. There, hit Create repository where you choose the Access and Repository name and then click the Create button:

A word on Access: Private | Public.
OCI Documentation
- Access: Whether the repository is a public repository or a private repository. You can only make the repository public if you belong to the tenancy’s Administrators group or have been granted the REPOSITORY_MANAGE permission. Note these points:
- If you make the repository public, any user with internet access and knowledge of the appropriate URL can pull images from the repository.
- If you make the repository private, you (along with users belonging to the tenancy’s Administrators group) can perform any operation on the repository.
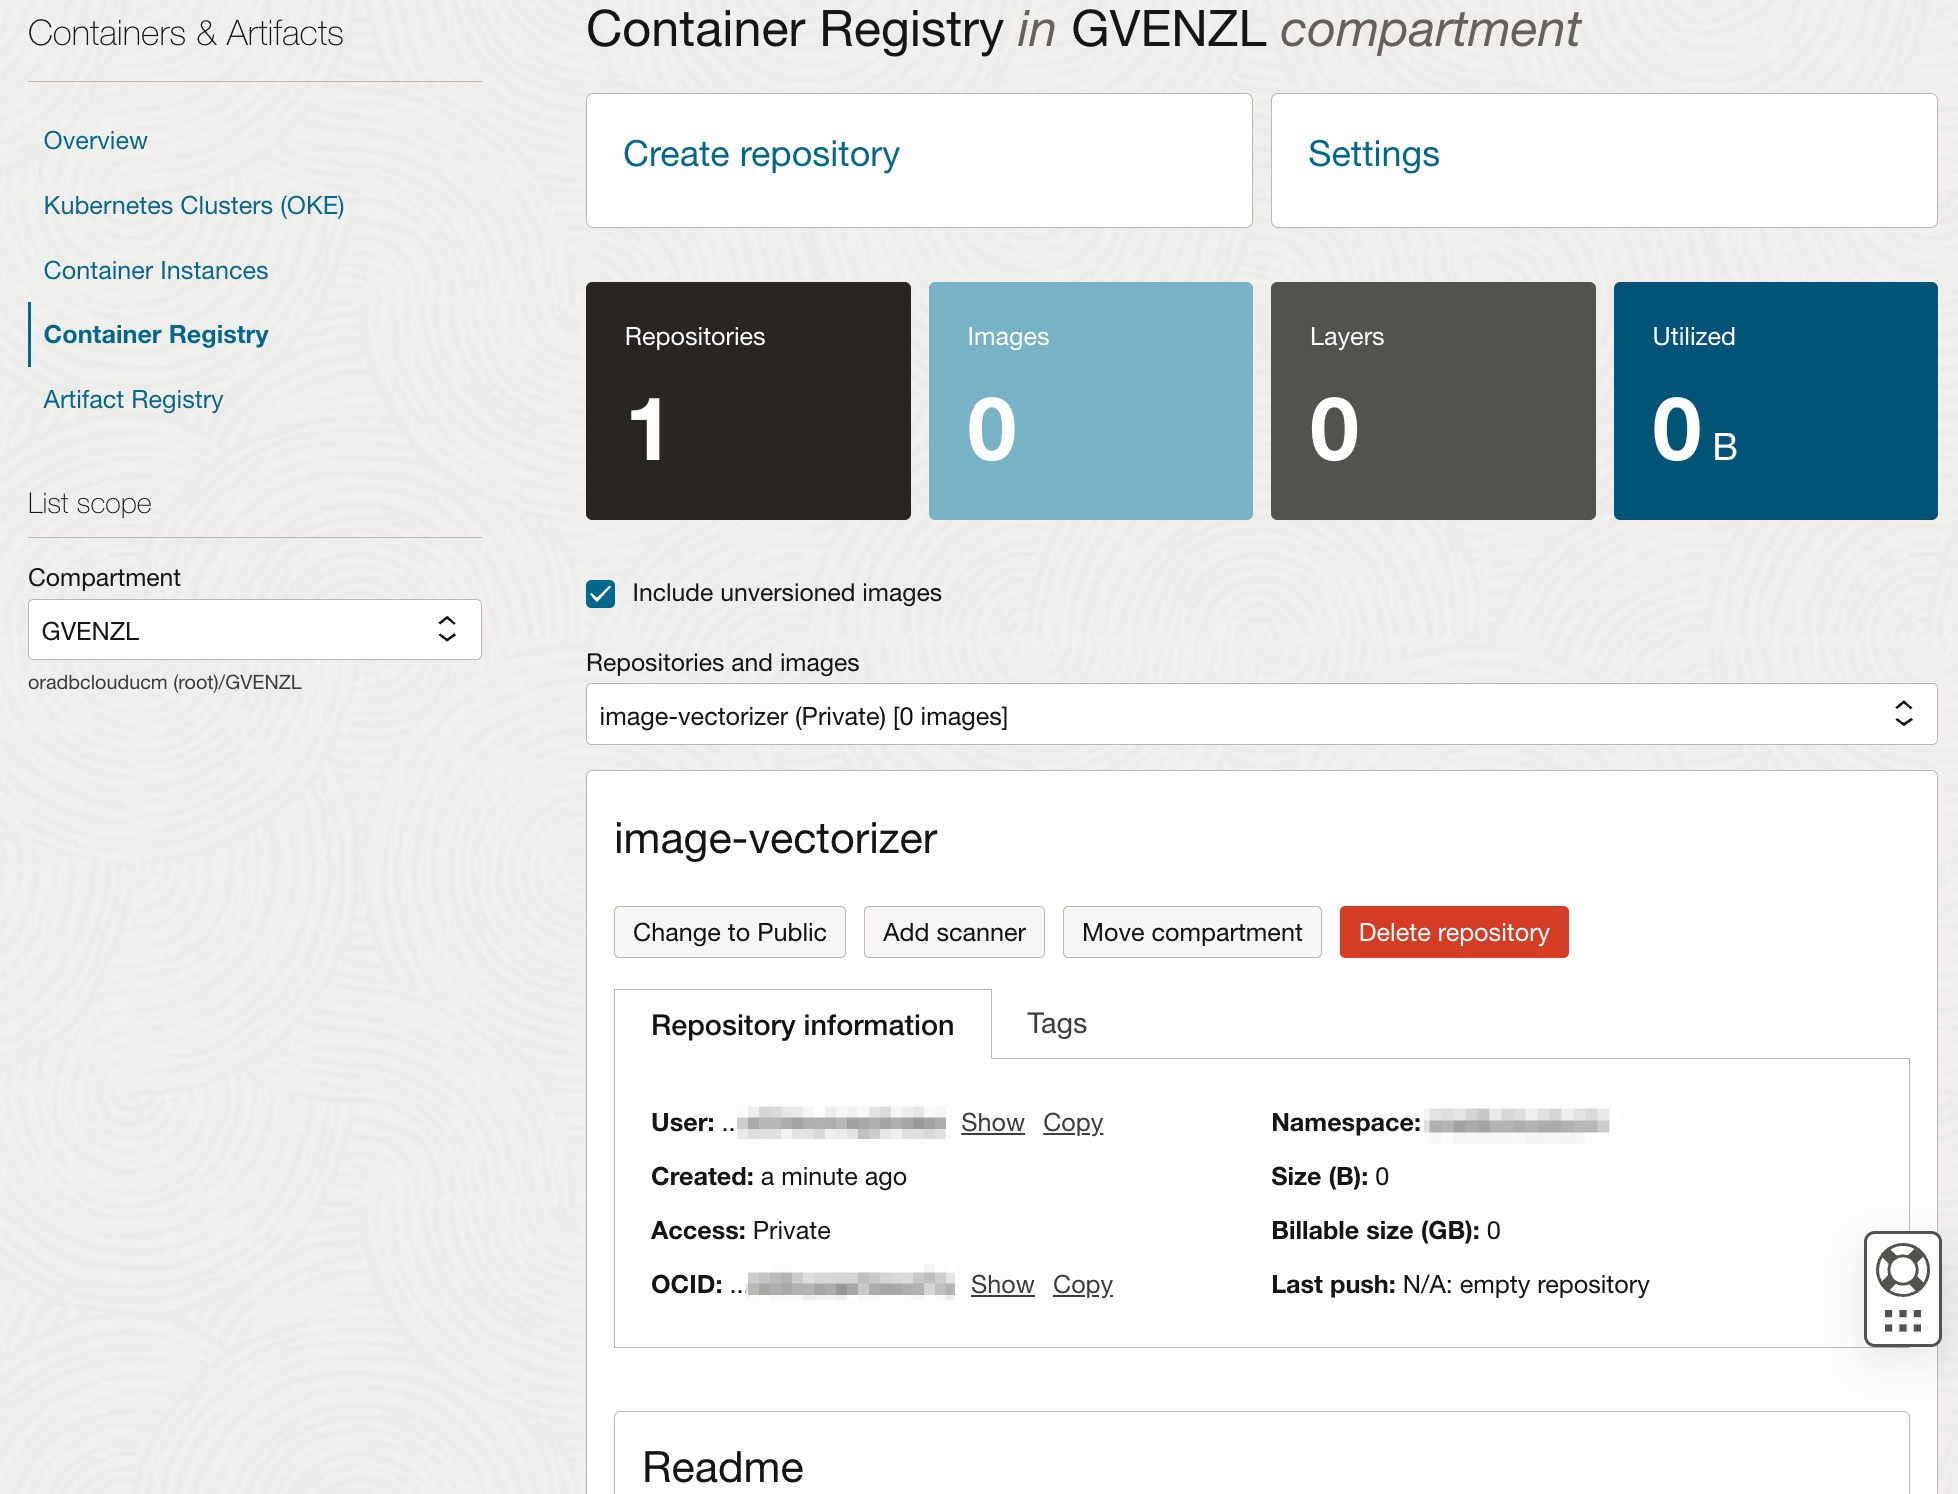
In just a second or less later, your repository will have been created:
Uploading container images to your container registry
To upload images to the container registry, you will have to log in (docker | podman login <registry>) into the registry with your OCI credentials. But this is not just done via username and password. As of the time of writing this blog post, logging into OCI requires a tenancy name, username, FIDO key, and an authenticator app, for me anyway. How will you be able to do the same via your docker | podman CLI?
Generating an Auth Token
If you have dealt with other container registries before, such as GitHub Container Registry, you already know that they leverage an authentication token that stands in for the user’s password or other authentication methods. The same is true for OCI. So, before you can push images to the registry, you must generate an auth token.
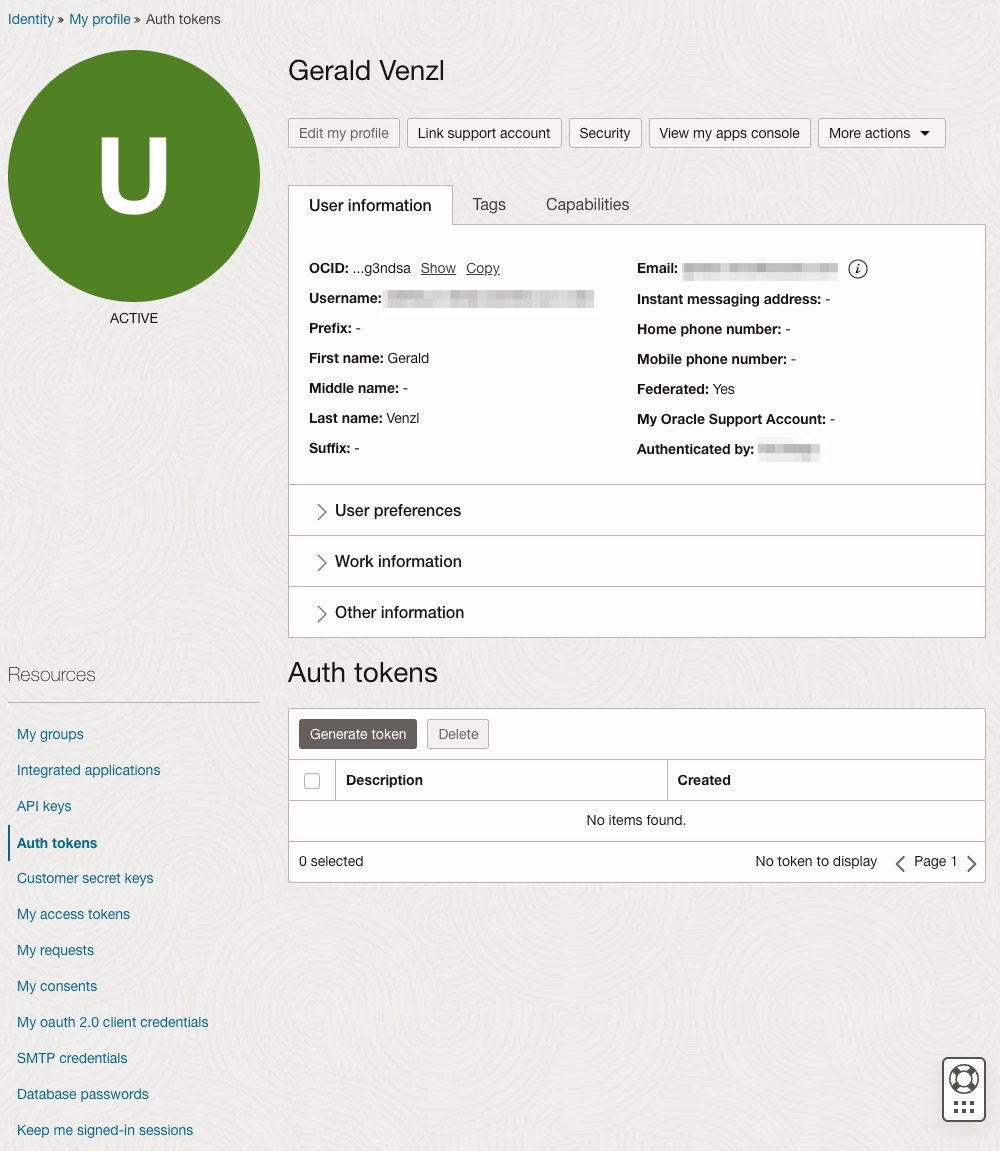
In the OCI console, open the Profile menu by clicking on the person icon in the top right corner –> My profile). Under Resources at the bottom left, click on Auth tokens:
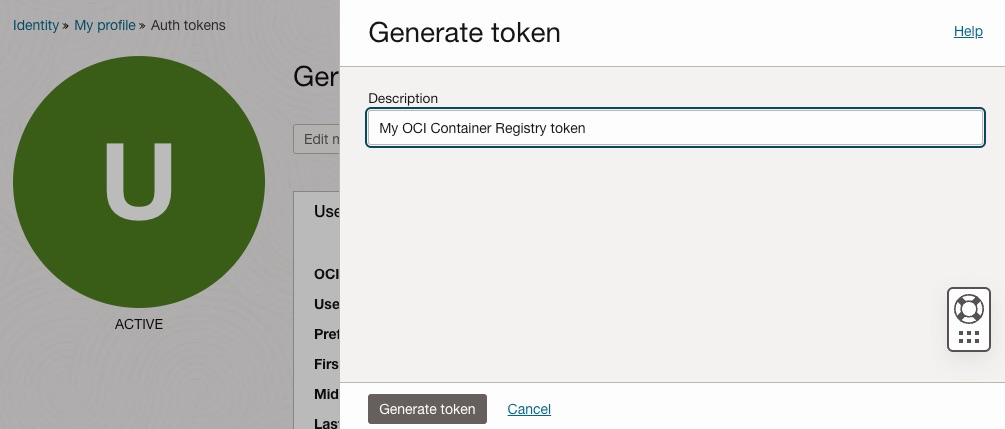
In the Auth tokens section, click on Generate token, enter a friendly description for the auth token without accidentally adding any confidential information and click Generate token again:
A new token will be generated:
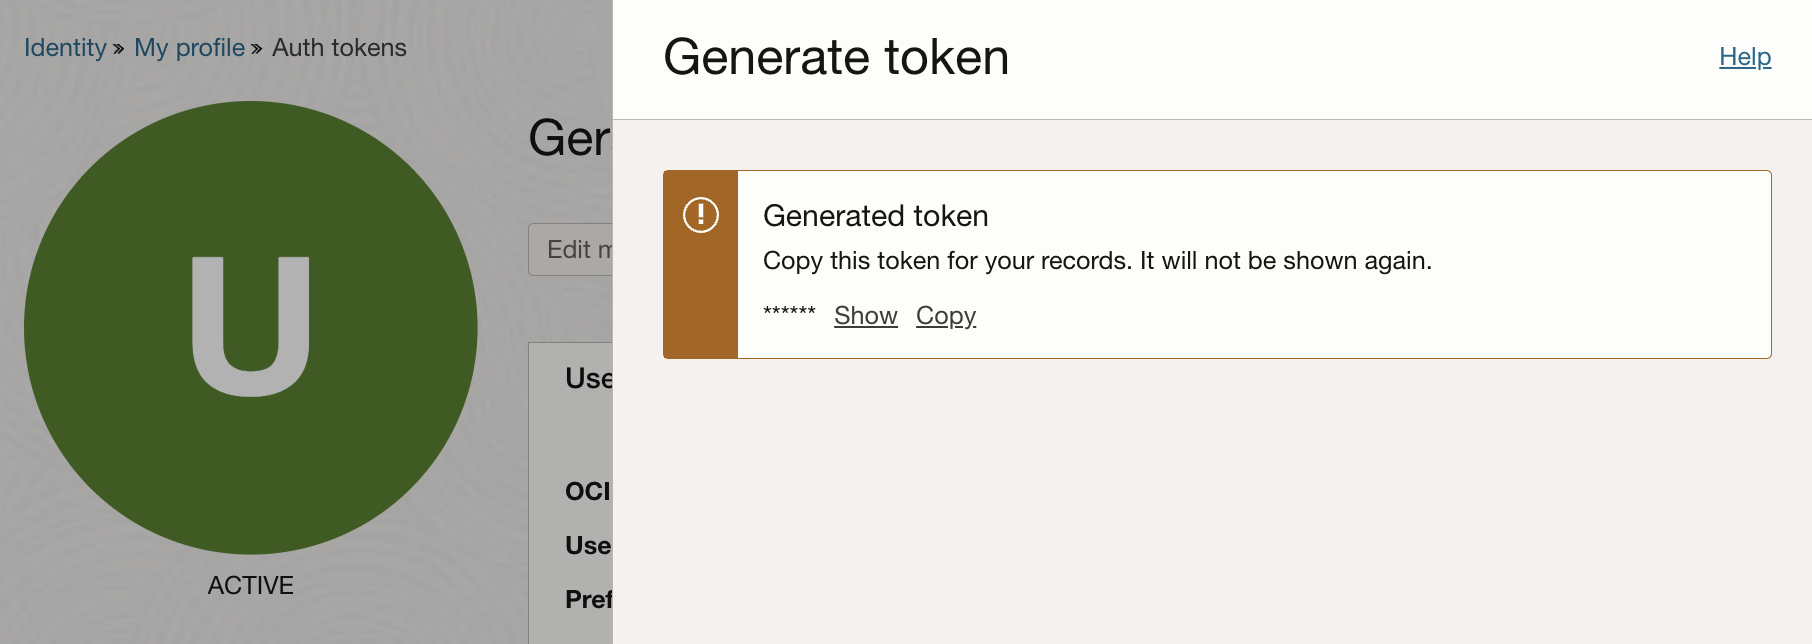
Copy the auth token immediately to a secure location from where you can retrieve it. You will not be able to see the token ever again!
Note: If you lose the token, you can always generate and use a new token and discard the old one.
Logging in to the container registry with your auth token
There are two URL variants under which OCI Container Registries are available:
| Scheme | example for US West (phoenix) region |
|---|---|
ocir.<region-id>.oci.oraclecloud.com | ocir.us-phoenix-1.oci.oraclecloud.com |
<region-id>.ocir.io | us-phoenix-1.ocir.io |
<region-code>.ocir.io | phx.ocir.io |
You can use one of these URLs to pull and push images from and to the registry. For other regions, see Container Registry Availability by Regions in the OCI documentation.
To log into the Container Registry, you need a username and the auth token. Your username is in the format <tenancy-namespace>/<username>. To find the tenancy namespace, go to the Tenancy Details page under Tenancy information in the Cloud Console. The tenancy namespace is the auto-generated Object storage namespace string (not to confuse with the actual tenancy name) of your tenancy, for example, ansh81vru1zp/jdoe@acme.com. If your tenancy is federated, use the format <tenancy-. For example, for Oracle Identity Cloud Service, use namespace>/<federation-service>/<username><tenancy-.namespace>/oracleidentitycloudservice/<username>
So, to log into your container registry, you need:
$ podman login <ocir url>
Username: <tenancy-namespace>/[<federation-service/]<username>
Password: <your auth token>
If done correctly, you should see a Login Succeeded! from the container runtime client.
As an example, assume I have a container registry in the Phoenix region, my tenancy namespace is “geraldscloud“, federated by the Oracle Identity Cloud Service and my user name is “gerald@acme.com“. My podman login would look the following:
$ podman login phx.ocir.io
Username: geraldscloud/oracleidentitycloudservice/gerald@acme.com
Password: [auth token, characters will not be printed]
Login Succeeded!
Pushing images to OCI Container Registry
Once logged in, I can push images to my OCI container registry. The target registry name uses the following scheme: <registry-domain>/<tenancy-namespace>/<repo-name>.
As I created my registry with the name “image-vectorizer” under my tenancy “geraldscloud” in the Phoenix region, the URL for my registry is: phx.ocir.io/geraldscloud/image-vectorizer.
Note: There is no <federation-service> in the URL, this is only required for the authentication.
Note: Although I created my Container Registry image-vectorizer in the GVENZL compartment, the compartment is not part of the registry URL!
To push a local image, e.g. gvenzl/image-vectorizer, I have to tag that image with the registry name phx.ocir.io/geraldscloud/image-vectorizer and push it:
$ podman tag gvenzl/image-vectorizer phx.ocir.io/geraldscloud/image-vectorizer
$ podman push phx.ocir.io/geraldscloud/image-vectorizer
Getting image source signatures
Copying blob sha256:92abfa8b5ad398a5fa29565f6e62e3f27e4f24f7d39679d83721dadd1666880c
Copying blob sha256:737dd689dac07a6b70838381bac54fd6cb5338551245914f38035417b6a17c47
Copying blob sha256:cf7b6a6d0cefa835f40a7fa558985341fa6cd9d482815b370ec1ed8746e87d62
Copying blob sha256:a5b09d494d856d9bf3a54872eaf2e0cd489bbc63d851556d1b410f3bbde90748
Copying config sha256:41ba4bf3ac490ed1b665f4580892850bba87e6046074b280fff4652b6c96bfa9
Writing manifest to image destination
$
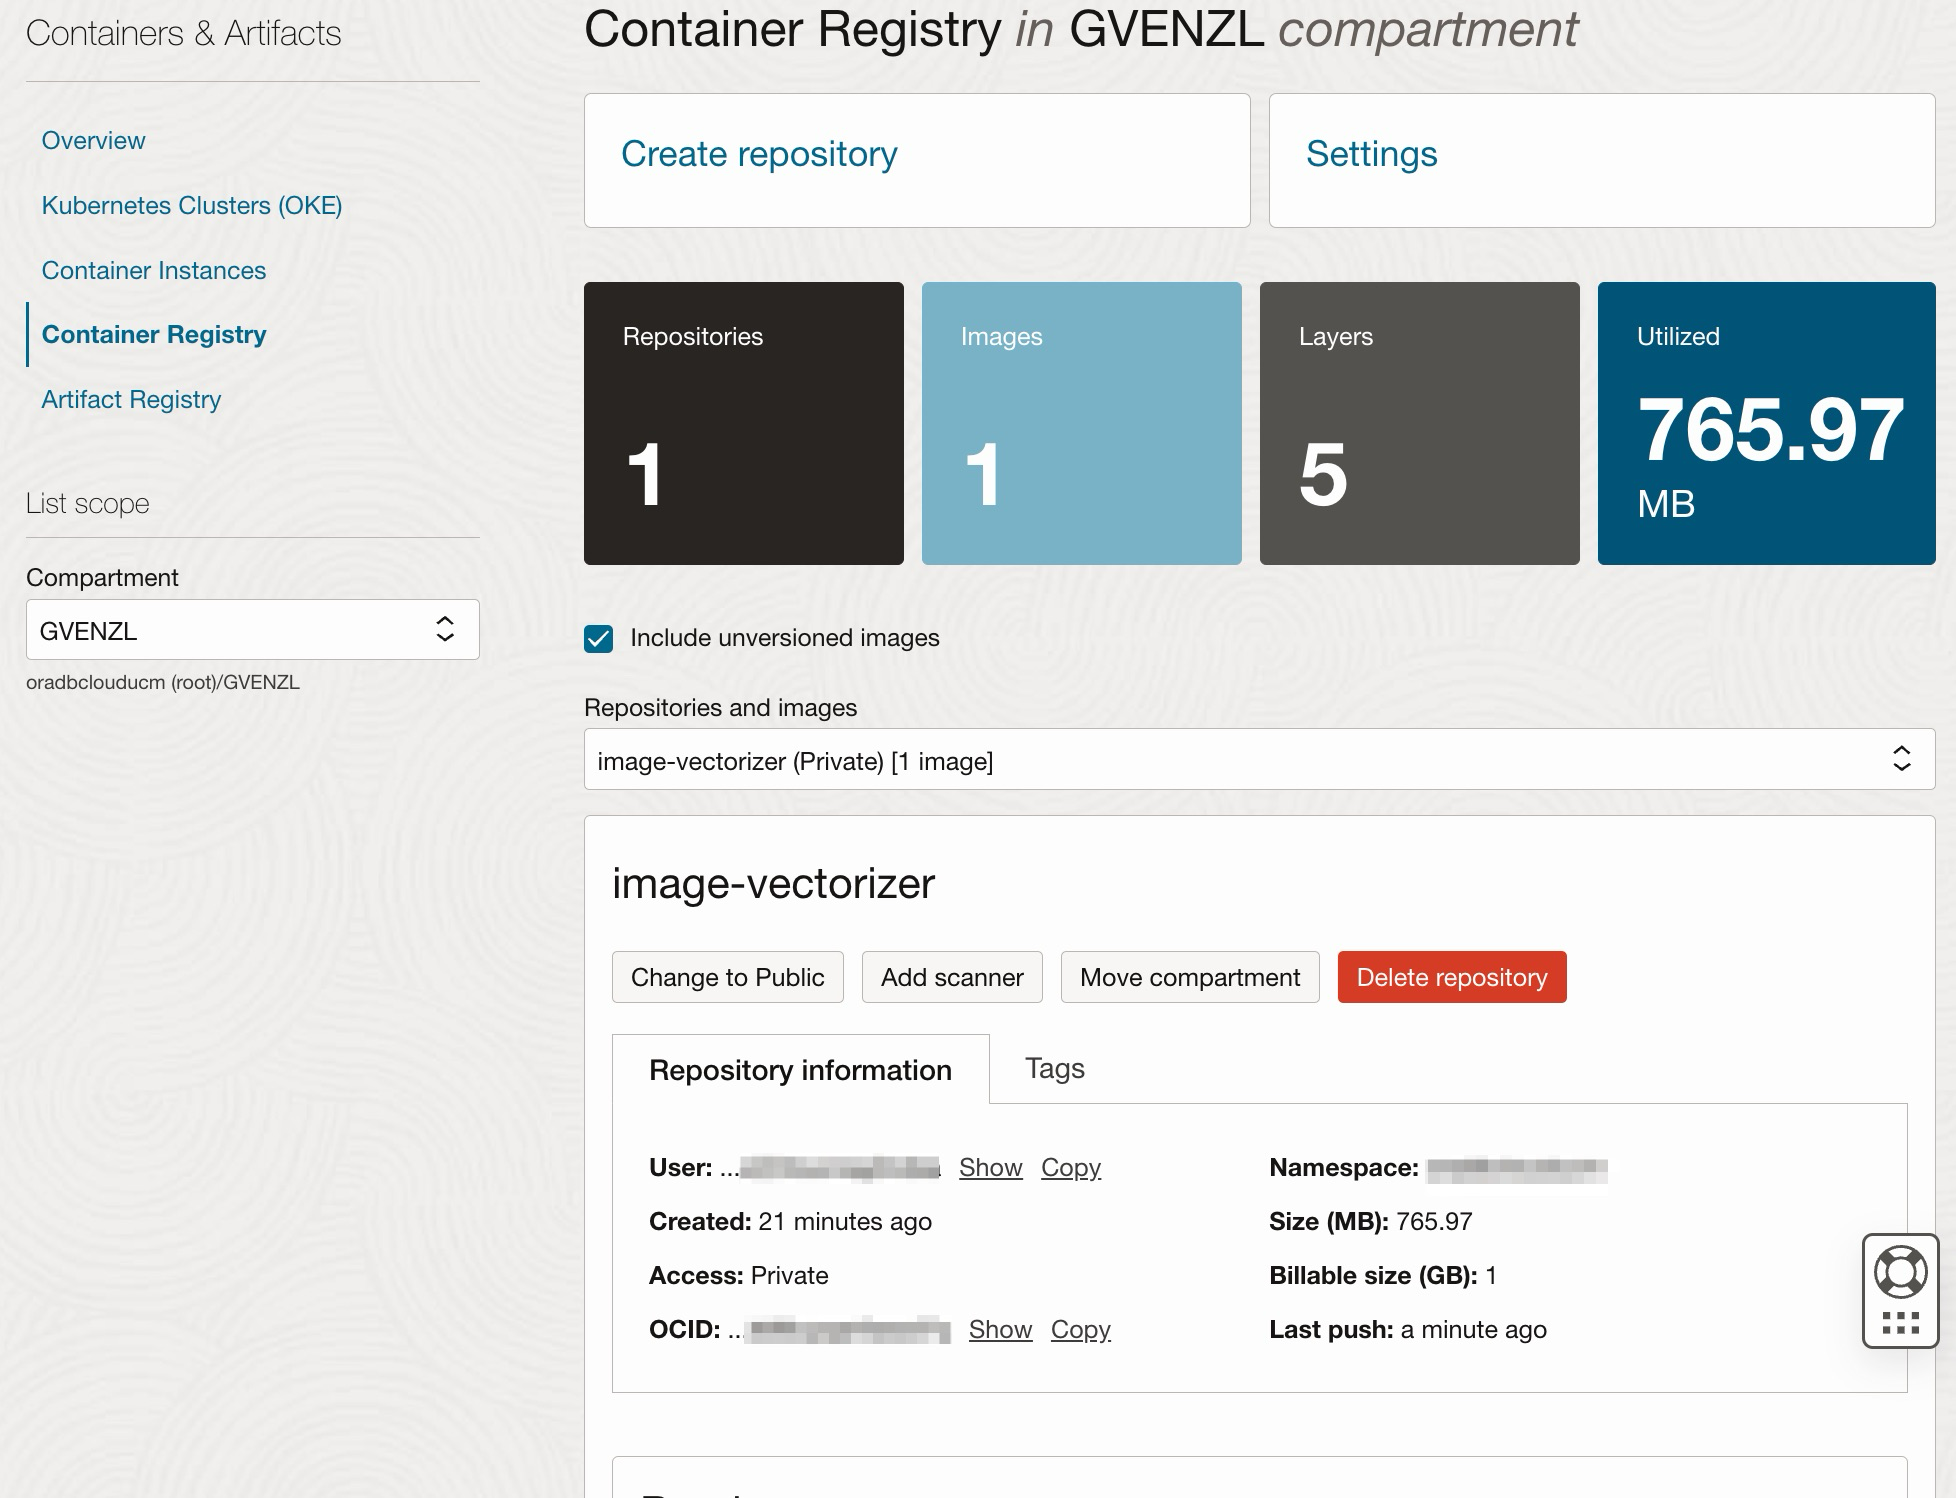
Once the image is pushed, you can see it back on the Container Registry page. Make sure you choose the proper registry under Repositories and images:
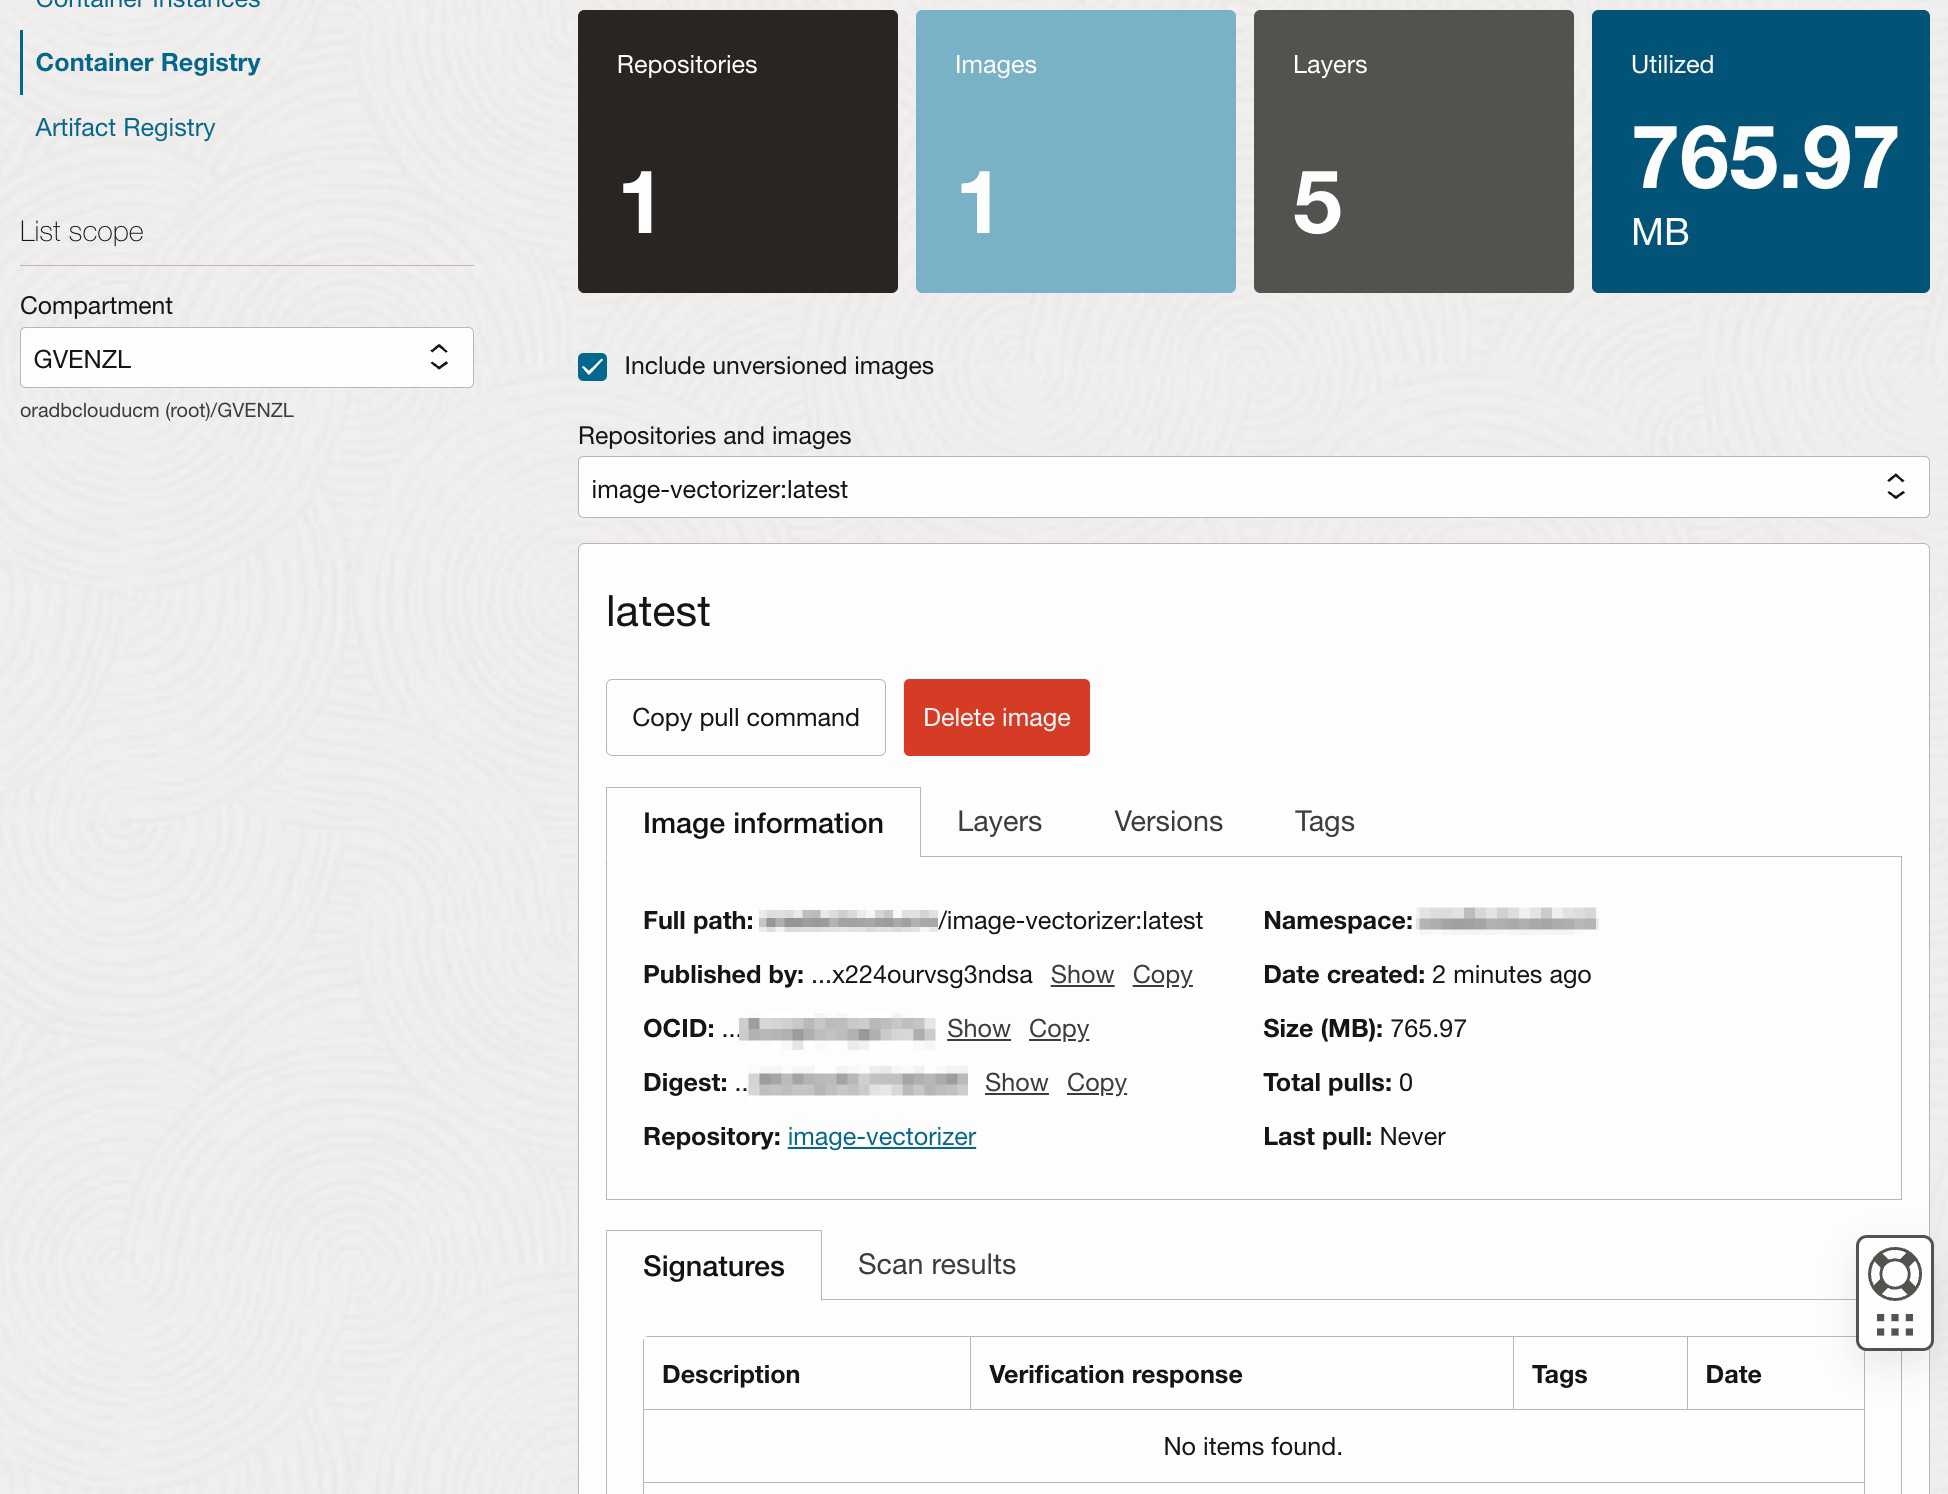
You can also drill down into specific images by selecting the image in the same drop-down menu:
From there on, you can start pulling the images (after logging into the registry) from anywhere else, including your Oracle Kubernetes Engine (OKE) cluster.