
Oracle Cloud Infrastructure provides a command line interface, usually referred to as OCI CLI. Using the CLI one can interact with Oracle Cloud Infrastructure resources via the shell. If you don’t have it already pre-installed on your Oracle Linux 8 Compute Node, below you can follow the steps on how to set it up.
Note, OCI CLI is available for the following Operating Systems:
- CentOS 7
- CentOS 8
- Oracle Autonomous Linux 7.9
- Oracle Linux 7.8
- Oracle Linux 7.9
- Oracle Linux 8
- Oracle Linux 9
- Ubuntu 18.0.4
- Ubuntu 20.0.4
- Windows Desktop 10 & 11
- Windows Server (2012/2016/2019)
- Windows Server 2022
Installation of the OCI CLI
To install it, see the documentation here, just execute the following commands:
sudo dnf -y install oraclelinux-developer-release-el8
sudo dnf install python36-oci-cli
Once installed, you can invoke it via oci:
$ oci -version
3.45.1
Configuring the OCI CLI
For the CLI to talk to your cloud environment, you first need to configure it. You will need your user OCID and your tenancy OCID. Retrieve them first, then run oci setup config. This will ask you for a couple of things:
- The location for your config file (default
$HOME/.oci/config) - Your user OCID (to be found in your OCI user profile)
- Your tenancy OCID (to be found under
Administration --> Tenancy details) - The tenancy default region represented as an index (does not have to be your home region)
- Whether you want to generate a new API Signing RSA key pair (if you don’t have a key already, that’s a Yes)
- The directory where the key should be stored (default
$HOME/.oci) - Name for your key
- Passphrase for your private key (type “N/A” if you do not want to type in a password for the key every time you want to use the OCI CLI)
- Repeat the passphrase
- The directory where the key should be stored (default
When you run through the setup, it will look like this:
$ oci setup config
    This command provides a walkthrough of creating a valid CLI config file.

    The following links explain where to find the information required by this
    script:

    User API Signing Key, OCID and Tenancy OCID:

        https://docs.cloud.oracle.com/Content/API/Concepts/apisigningkey.htm#Other

    Region:

        https://docs.cloud.oracle.com/Content/General/Concepts/regions.htm

    General config documentation:

        https://docs.cloud.oracle.com/Content/API/Concepts/sdkconfig.htm


Enter a location for your config [/home/opc/.oci/config]:
Enter a user OCID: ocid1.user.oc1..aaaa....
Enter a tenancy OCID: ocid1.tenancy.oc1..aaaa...
Enter a region by index or name(e.g.
1: af-johannesburg-1, 2: ap-chiyoda-1, 3: ap-chuncheon-1, 4: ap-dcc-canberra-1, 5: ap-dcc-gazipur-1,
6: ap-hyderabad-1, 7: ap-ibaraki-1, 8: ap-melbourne-1, 9: ap-mumbai-1, 10: ap-osaka-1,
11: ap-seoul-1, 12: ap-singapore-1, 13: ap-singapore-2, 14: ap-sydney-1, 15: ap-tokyo-1,
16: ca-montreal-1, 17: ca-toronto-1, 18: eu-amsterdam-1, 19: eu-dcc-dublin-1, 20: eu-dcc-dublin-2,
21: eu-dcc-milan-1, 22: eu-dcc-milan-2, 23: eu-dcc-rating-1, 24: eu-dcc-rating-2, 25: eu-dcc-zurich-1,
26: eu-frankfurt-1, 27: eu-frankfurt-2, 28: eu-jovanovac-1, 29: eu-madrid-1, 30: eu-madrid-2,
31: eu-marseille-1, 32: eu-milan-1, 33: eu-paris-1, 34: eu-stockholm-1, 35: eu-zurich-1,
36: il-jerusalem-1, 37: me-abudhabi-1, 38: me-abudhabi-2, 39: me-abudhabi-3, 40: me-dcc-doha-1,
41: me-dcc-muscat-1, 42: me-dubai-1, 43: me-jeddah-1, 44: me-riyadh-1, 45: mx-monterrey-1,
46: mx-queretaro-1, 47: sa-bogota-1, 48: sa-santiago-1, 49: sa-saopaulo-1, 50: sa-valparaiso-1,
51: sa-vinhedo-1, 52: uk-cardiff-1, 53: uk-gov-cardiff-1, 54: uk-gov-london-1, 55: uk-london-1,
56: us-ashburn-1, 57: us-chicago-1, 58: us-gov-ashburn-1, 59: us-gov-chicago-1, 60: us-gov-phoenix-1,
61: us-langley-1, 62: us-luke-1, 63: us-phoenix-1, 64: us-saltlake-2, 65: us-sanjose-1): 63
Do you want to generate a new API Signing RSA key pair? (If you decline you will be asked to supply the path to an existing key.) [Y/n]:
Enter a directory for your keys to be created [/home/opc/.oci]:
Enter a name for your key [oci_api_key]:
Public key written to: /home/opc/.oci/oci_api_key_public.pem
Enter a passphrase for your private key ("N/A" for no passphrase):
Repeat for confirmation:
Private key written to: /home/opc/.oci/oci_api_key.pem
Fingerprint: ***************************
Config written to /home/opc/.oci/config


    If you haven't already uploaded your API Signing public key through the
    console, follow the instructions on the page linked below in the section
    'How to upload the public key':

        https://docs.cloud.oracle.com/Content/API/Concepts/apisigningkey.htm#How2

$
Upload the Public Key to the Console
For the OCI CLI to act on your behalf, you have to add the public key to your OCI user profile in the Console. The public key has been generated in the same location as the private key, which is the location you chose for where the keys should be created (the default is $HOME/.oci).
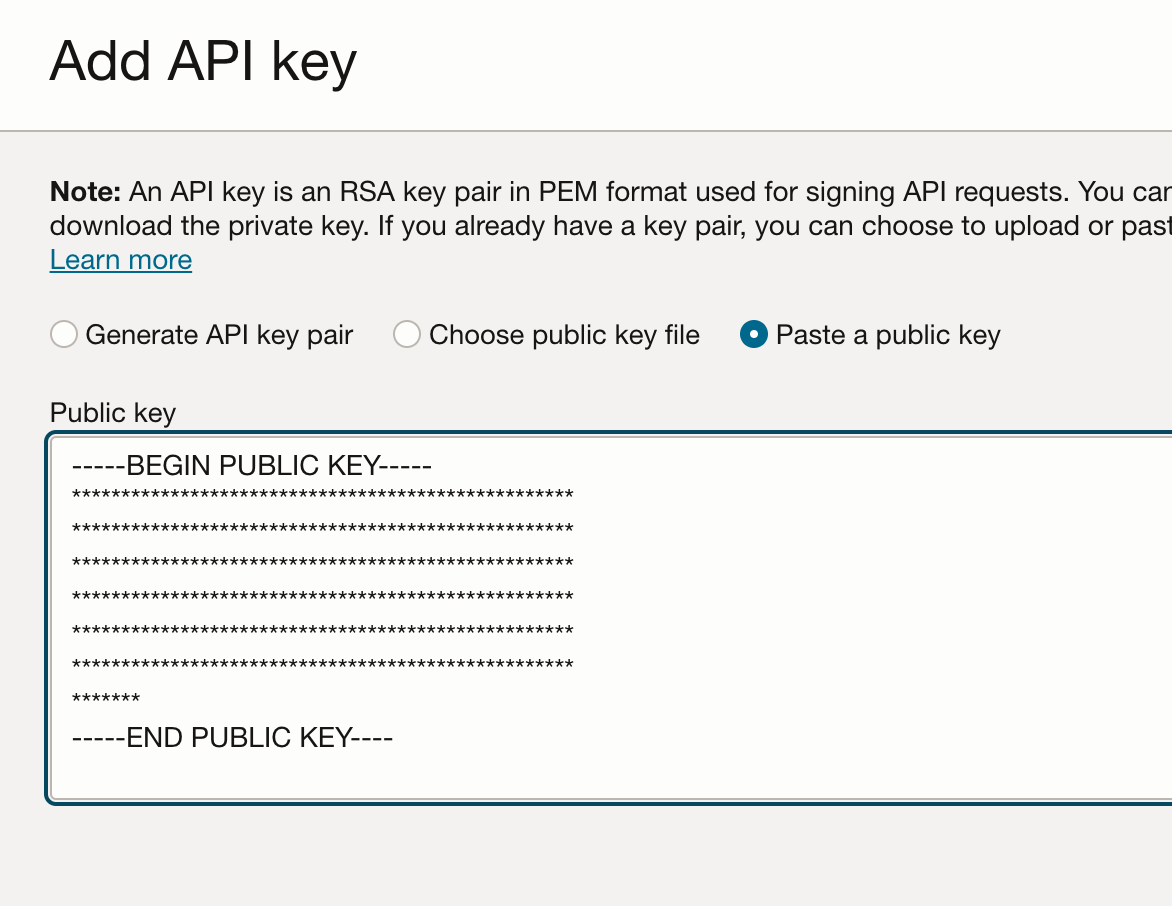
You have two ways to add the public key, either upload it or copy/paste the contents of the key. If you are using a compute VM, copy/pasting the contents saves you the hassle of downloading the public key to your laptop to upload it to the Console. Instead, just do a cat <location of your public key> and copy the contents into your clipboard, for example:
$ cat .oci/oci_api_key_public.pem
-----BEGIN PUBLIC KEY-----
***************************************************
***************************************************
***************************************************
***************************************************
***************************************************
***************************************************
*******
-----END PUBLIC KEY----
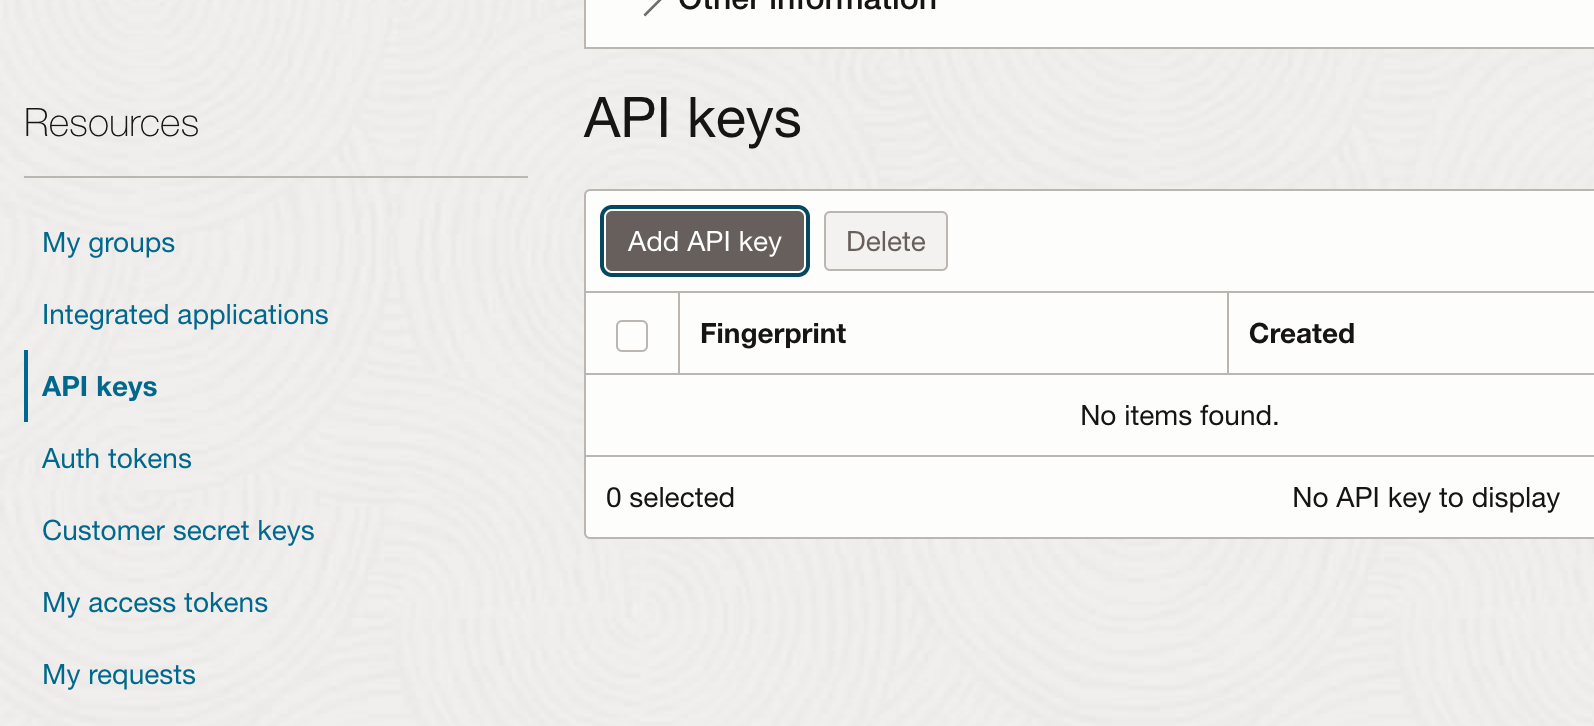
Next, login to your console and head to Profile –> My Profile –> Resources (on the bottom left) –> API keys –> Add API key:
Choose Paste a public key and put your public key into the contents field:
Then click Add at the bottom of the page. The console will give you a configuration file preview and if you started out with adding an API key in the Console, you can use this configuration file preview instead to setup the OCI CLI. The only TODO that’s left there is to point to the private key within the configuration file.
Using the OCI CLI
You are all set now and can start using the CLI on your machine. For example, you can create an object store bucket, upload a file to it and list the contents of the object store bucket:
$ oci os bucket create --name mybucket --compartment-id ocid1.compartment.oc1..aaaa*****
  "data": {
    "approximate-count": null,
    "approximate-size": null,
    "auto-tiering": null,
    "compartment-id": "ocid1.compartment.oc1..aaaa****",
    "created-by": "ocid1.user.oc1..aaaa*****",
    "defined-tags": {
      "Administration": {
        "Creator": "oracleidentitycloudservice/gerald"
      }
    },
    "etag": "78af246-6fca-4eb2-a8b2-cd5a7c7634ba",
    "freeform-tags": {},
    "id": "ocid1.bucket.oc1.phx.aaaaa****",
    "is-read-only": false,
    "kms-key-id": null,
    "metadata": {},
    "name": "mybucket",
    "namespace": "******",
    "object-events-enabled": false,
    "object-lifecycle-policy-etag": null,
    "public-access-type": "NoPublicAccess",
    "replication-enabled": false,
    "storage-tier": "Standard",
    "time-created": "2024-08-14T18:34:00.893000+00:00",
    "versioning": "Disabled"
  },
  "etag": "49078acd-3afb-4eb2-b9be-cd1ace7634ba"
}

$ oci os object put -bn mybucket --name testfile.txt --file testfile.txt
Uploading object  [####################################]  100%
{
  "etag": "21b7dcba-3bfa-84ca-bf3a-894c0910f584",
  "last-modified": "Wed, 14 Aug 2024 18:37:37 GMT",
  "opc-content-md5": "6pxQqU2wHZZQ8NAU5cec9w=="
}

$ oci os object list -bn mybucket
{
  "data": [
    {
      "archival-state": null,
      "etag": "21b7dcba-3bfa-84ca-bf3a-894c0910f584",
      "md5": "6pxQqU2wHZZQ8NAU5cec9w==",
      "name": "testfile.txt",
      "size": 15,
      "storage-tier": "Standard",
      "time-created": "2024-08-14T18:37:37.310000+00:00",
      "time-modified": "2024-08-14T18:37:37.310000+00:00"
    }
  ],
  "prefixes": []
}
To get a comprehensive and easy to read list of commands available, check out this “readthedocs” style OCI CLI documentation: https://docs.oracle.com/en-us/iaas/tools/oci-cli/3.45.1/oci_cli_docs/index.html
Pingback: How to Automate the Restore of /u01 on OCI Using Shell Script and oci-cli | Vinicius DBA
Pingback: OCIFS – How to Mount an Object Storage Bucket in your Compute VM as a File System? | Vinicius DBA